January 3, 2026
Why Your Roof Needs Moss Removal (And How to Actually Fix It)
Author
Most homeowners don’t think about moss removal until their roof starts looking like a forest floor. By then, the problem is already bigger than aesthetics. Moss has likely been quietly breaking down your shingles for months, maybe even years, trapping moisture and causing damage that a simple scrub brush won’t undo.
Here's what nobody tells you: moss doesn't just show up randomly. It needs specific conditions. Consistent moisture, minimal direct sunlight, and a slightly acidic surface to establish colonies. Your roof creates these conditions in predictable zones based on its orientation, surrounding vegetation, and how water moves across its surface. Which means you can actually prevent it if you know what you're doing.
Pennington tested this stuff and found that moss controls work best when moss is actively growing during cool, wet, rainy seasons of spring and fall, with mosses being largely dormant during warm summer weather. This seasonal growth pattern is exactly why timing your intervention matters as much as the method you choose. If you’re noticing dark streaks or organic growth along with moss, it may also be worth learning more about roof algae and how it affects shingles.
Table of Contents
- Why Your Roof Grew Moss (And Why That Matters)
- What Moss Actually Does to Your Shingles
- The Pressure Washer Mistake Everyone Makes
- What Actually Works
- When to Call Someone Who Knows What They're Doing
- Your Roof After Moss: What to Expect
TL;DR
- Moss grows because of conditions you can actually control
- Pressure washing destroys your roof. Seriously, don't.
- Prevention is about sun and drainage, not products
Why Your Roof Grew Moss (And Why That Matters)
The Microclimate Your Roof Creates Without You Knowing
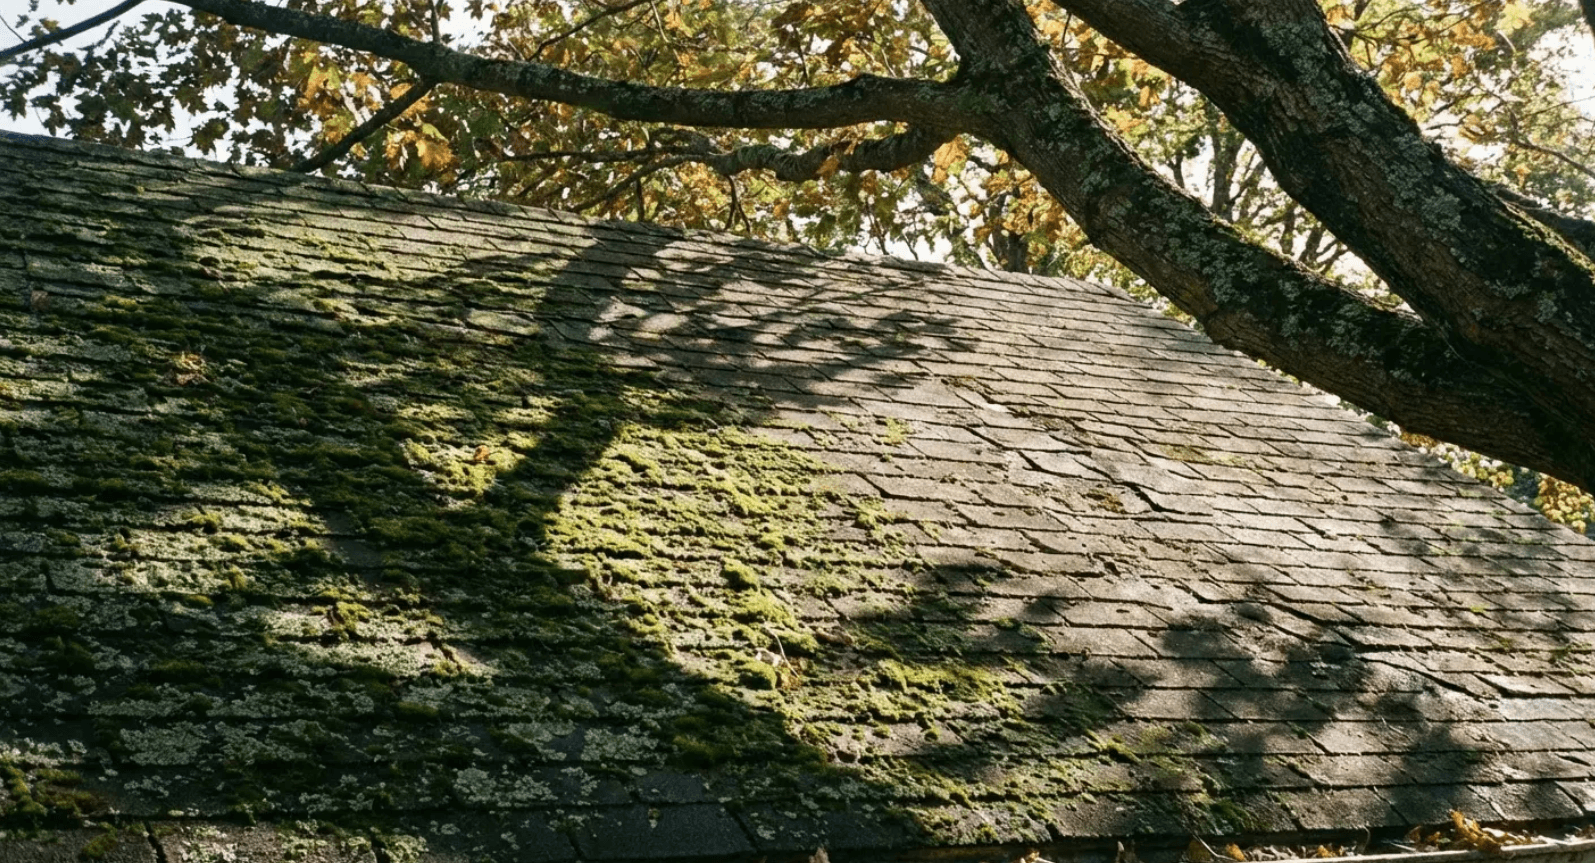
Walk around your house and look at your roof. See that north-facing slope that never seems to dry out? That's where moss lives. It gets maybe 2-3 hours of sun on a good day, and after it rains, it stays damp for hours while the rest of your roof dries off.
Overhanging branches don't just drop debris (though that matters too). They create shade pockets where morning dew lingers hours longer than on exposed sections. I've seen homeowners scrubbing the same patches every few years without addressing why those same spots keep returning.
The moss isn't stubborn. It's responding to environmental cues you haven't changed.
Understanding these microclimates means you can target prevention efforts where they'll actually work instead of treating your entire roof as a uniform problem. Your roof creates distinct zones with varying levels of vulnerability.
| Roof Zone | Sun Exposure | Moss Risk | What to Do About It |
|---|---|---|---|
| North-facing slope | 2-3 hours daily | Very High | Tree trimming, zinc strips |
| South-facing slope | 6-8 hours daily | Low | Debris clearing only |
| Valleys & corners | Variable (usually shaded) | Very High | Frequent debris removal |
The Debris Layer That Acts as Moss Fertilizer
Pine needles, leaves, and organic matter don't just sit on your roof looking messy. They break down slowly, creating a thin layer of decomposed material that holds moisture against your shingles and provides nutrients moss needs to anchor and spread.
You might clean your gutters twice a year and think you're staying ahead of the problem. But the real issue is the material that settles between shingle tabs and in the valleys where water naturally channels. This decomposing layer changes your roof's pH and creates a sponge effect that keeps the surface damp even during dry weeks.
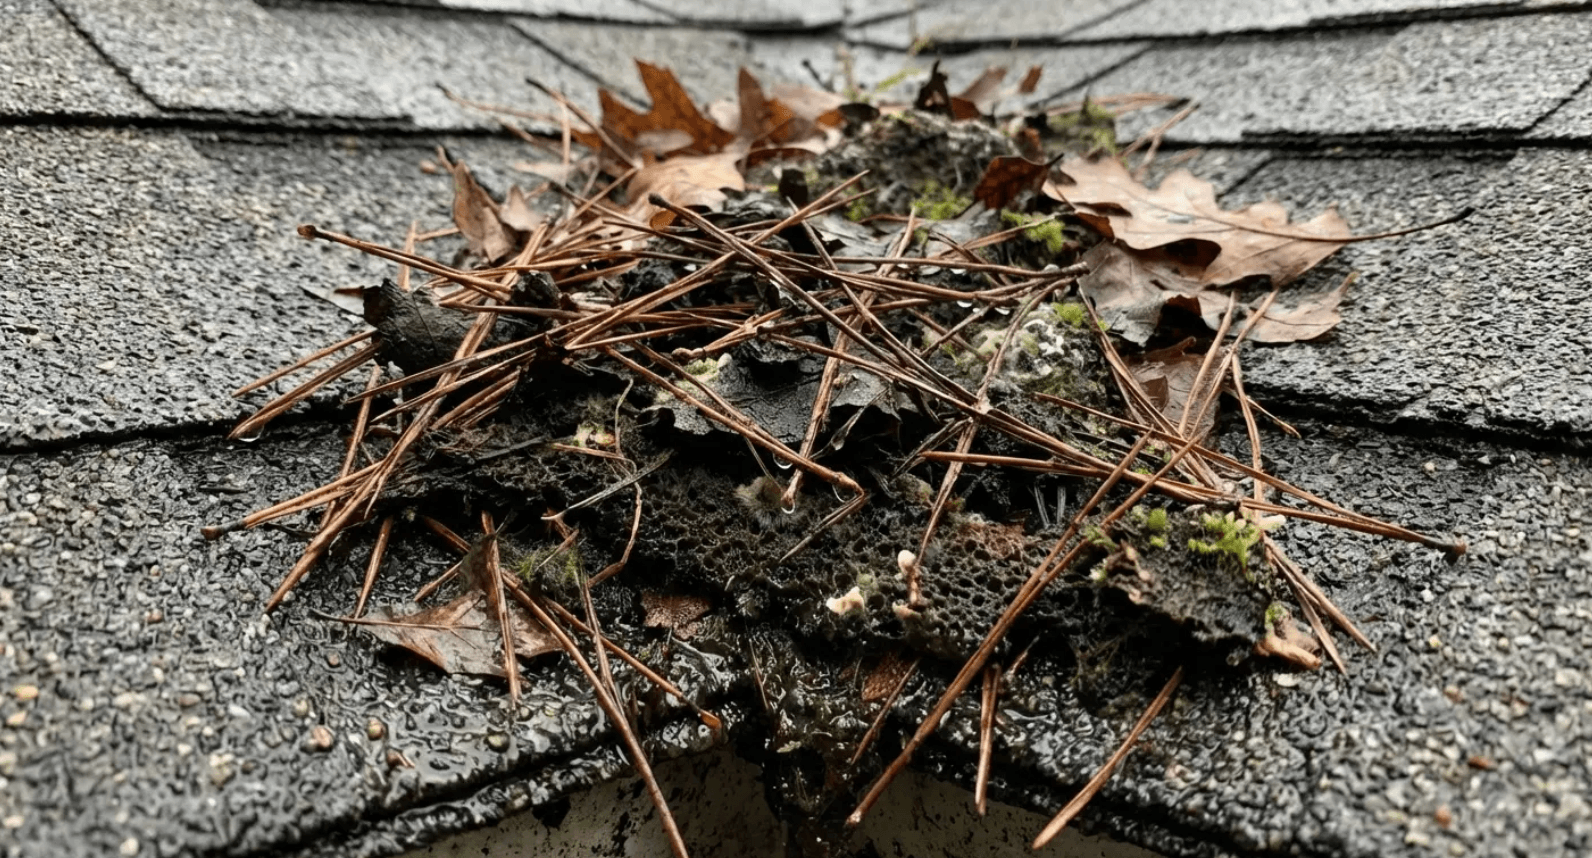
I've tested moisture levels on roofs that look clean from the ground, and the readings tell a different story. That barely visible film of organic matter can hold three times its weight in water. Removing existing moss without clearing this layer means you're addressing symptoms while ignoring the cause.
This guy in SE Portland, I think it was last March, called me out because his gutters were overflowing. He was kind of annoyed, actually, because he cleans them twice a year religiously. Takes pride in it. So I get up there and yeah, the gutters are clean. But his roof valleys? Jesus. Looked like a compost pile. When we pulled up the moss, there was this half-inch layer of rotted pine needles that had basically turned into soil. The shingles underneath were holding water like sponges. He went real quiet when I showed him. That "oh shit, I've been doing this wrong for years" look.
After clearing both the moss and the debris layer, then implementing quarterly valley cleaning, the roof stayed clear for over four years.
How Modern Shingle Composition Changed the Moss Game
Asphalt shingles manufactured before the mid-2000s contained more natural oils that made them less hospitable to organic growth. Newer shingles, while more durable in other ways, have surface textures and compositions that moss finds easier to colonize.
The granules designed to protect against UV damage create tiny crevices where moss spores settle and find shelter from wind that would otherwise dislodge them. This isn't about quality. It's about trade-offs in manufacturing priorities. Energy efficiency and impact resistance got better, but biological resistance got worse.
You'll notice moss establishing faster on newer roofs in the same neighborhood where older roofs stayed relatively clear for decades. The solution isn't to avoid modern shingles (you don't have much choice). It's to acknowledge that prevention strategies need to adapt to how current materials behave.
Waiting until you see visible moss growth means colonies have already penetrated deeper than you can see from ground level.
What Moss Actually Does to Your Shingles
Root Systems That Work Like Slow-Motion Crowbars
Moss doesn't just sit on your roof's surface. It sends rhizoids (root-like structures) into the spaces between granules and eventually beneath shingle edges. These structures are searching for moisture and stability, and they're surprisingly strong for their size.
Over months and years, they create lifting pressure that separates shingles from the roof deck in microscopic increments. You won't see dramatic curling right away, but water that should run off your roof now has pathways to travel horizontally under shingles instead of down and off.
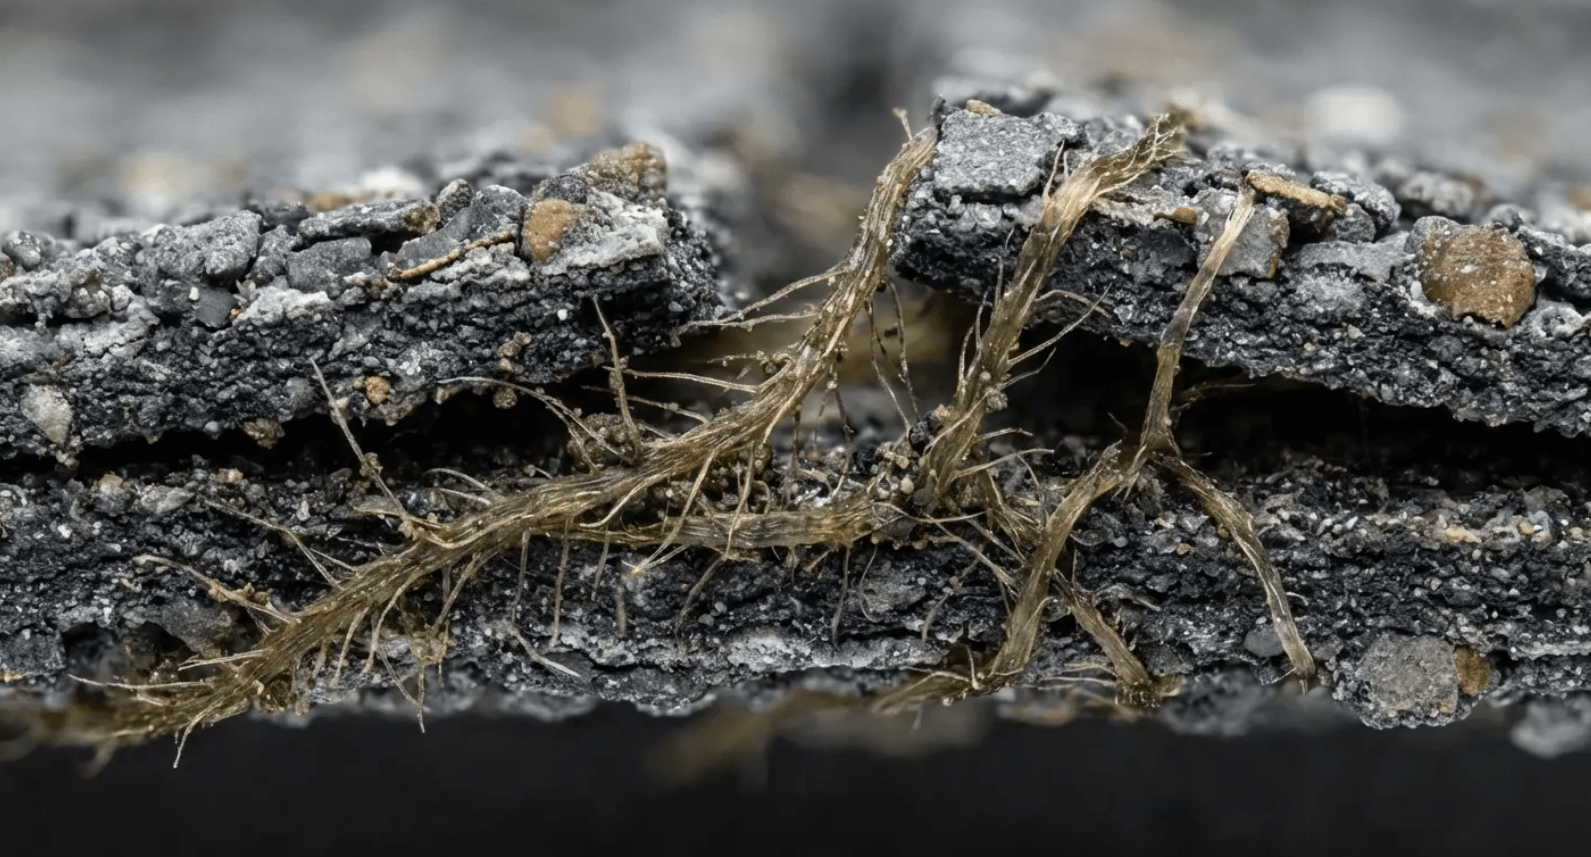
I've pulled up moss-covered shingles during inspections and found the underside compromised in ways that weren't visible from above. The adhesive strips that seal shingles to each other get weakened. The mat layer inside the shingle starts delaminating.
By the time you decide the moss looks bad enough to address, the structural damage has progressed beyond what moss removal alone can fix.
The Moisture Trap That Accelerates Freeze-Thaw Damage
Moss colonies act like sponges that keep your shingles damp for extended periods. In climates with freeze-thaw cycles, this moisture retention becomes actively destructive. Water absorbed into the shingle mat expands when it freezes, creating internal fractures that compromise the shingle's integrity.
The moss holds this moisture against the shingle surface even when surrounding areas have dried, meaning the same spots experience repeated freeze-thaw cycles while the rest of your roof remains stable. You might think your roof failed prematurely because of manufacturing defects, but the real culprit was the extended moisture exposure moss created.
This process doesn't require heavy moss coverage. Even thin patches that look more like discoloration than growth can hold enough water to cause problems.
Had a customer put off moss removal for three winters because "it's not that bad yet." By the time I got there, the moisture damage had spread three feet beyond the visible moss. Turned a $400 cleaning into a $3,200 partial replacement. She was not happy with me, like I somehow caused it by pointing it out.
pH Changes That Break Down Protective Layers
Moss and the organic debris that supports it create slightly acidic conditions on your roof's surface. Asphalt shingles rely on their granule coating to protect the underlying mat from UV degradation and weathering.
Prolonged exposure to acidic conditions breaks down the bond between granules and the asphalt layer, accelerating granule loss beyond normal wear patterns. You'll see this as bare patches that appear darker than surrounding areas, in irregular shapes that match where moss was growing.
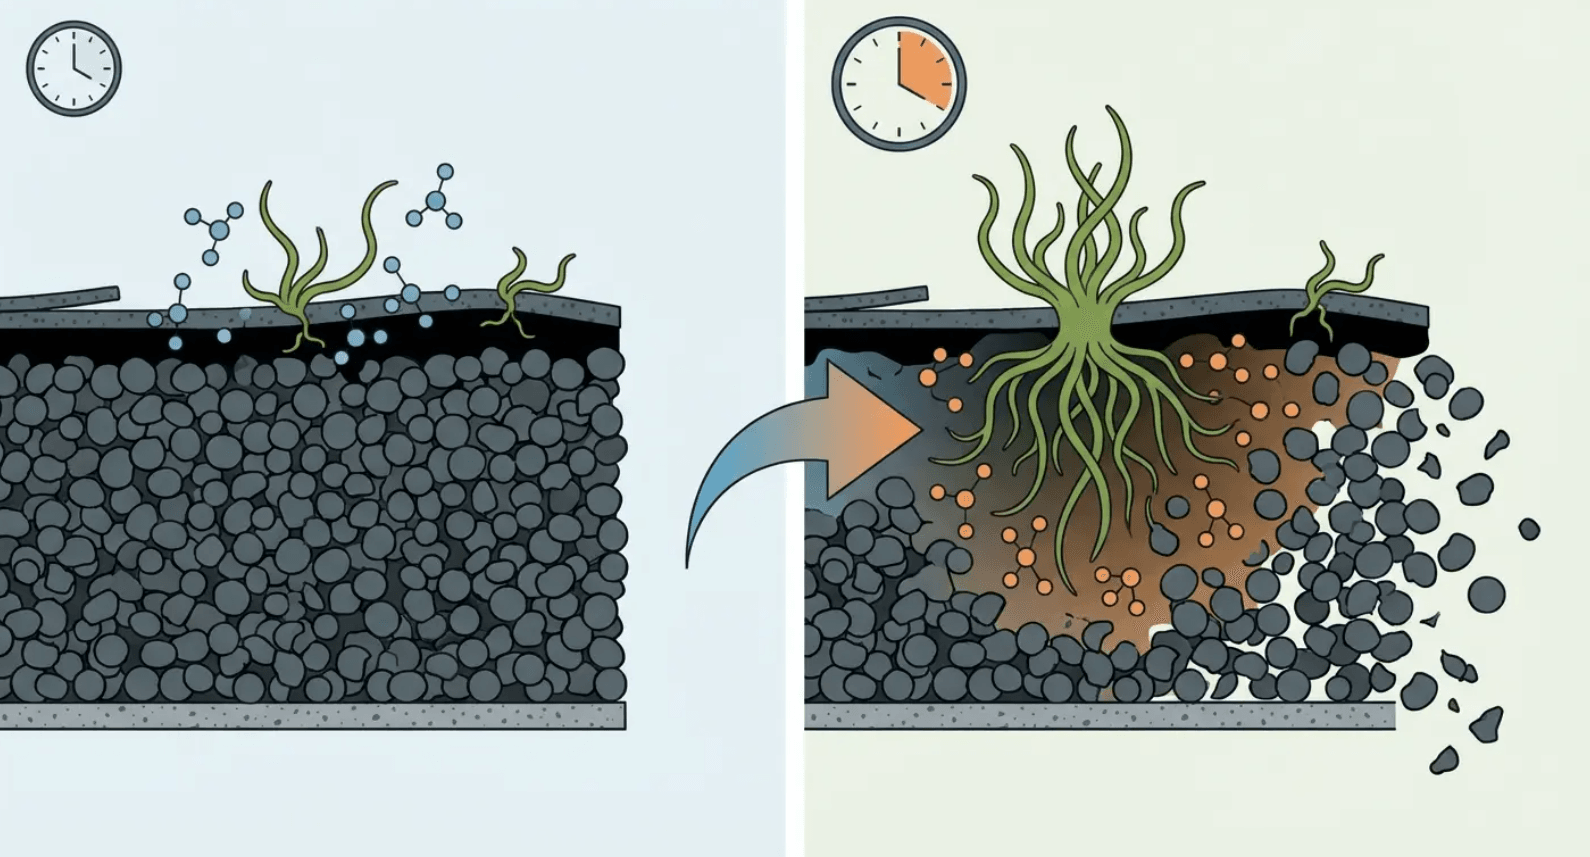
Once granules are gone, the asphalt layer deteriorates rapidly. What started as a biological problem becomes a chemical one that continues even after you've removed the visible moss. I've seen homeowners successfully clear moss from their roof only to find bare spots appearing within months because the underlying damage was already done.
Early intervention matters. "Waiting until it gets worse" is rarely the economical choice it seems to be.
Timing Matters More Than Method
The Growth Cycle Window You're Probably Missing
Moss grows most actively during cool, wet seasons (fall and early spring in most climates). Removing it during these periods means you're fighting active growth, and fragments you dislodge can easily re-establish in the moisture-rich environment.
Late spring and summer, when moss enters a dormant phase and dries out, is when removal becomes most effective. The dried moss releases its grip on shingles more easily, and fragments are less likely to take root elsewhere on your roof. You're also less likely to damage shingles during removal when they're warm and pliable rather than cold and brittle.
Most homeowners do this backward. They notice moss looking particularly lush and green during wet seasons and decide that's when it needs to go. I get the logic, but it's exactly wrong.
Plan your removal for when the moss is weakest, not when it's most visible.
When to Remove Moss:
March-April: Figure out how bad it is, plan for summer removal
May-June: Good time to actually do this
July-August: Best time. Moss is dried out and weak.
September-October: Last chance before rainy season
November-February: Don't even think about it. Too cold, moss is growing.
Weather Conditions That Make or Break Your Results
You need several consecutive dry days after moss removal to let your roof fully dry and to allow any treatment products to set properly. Removing moss right before a rainy period means moisture gets trapped under loosened shingles before you've had a chance to reseal or treat the surface.
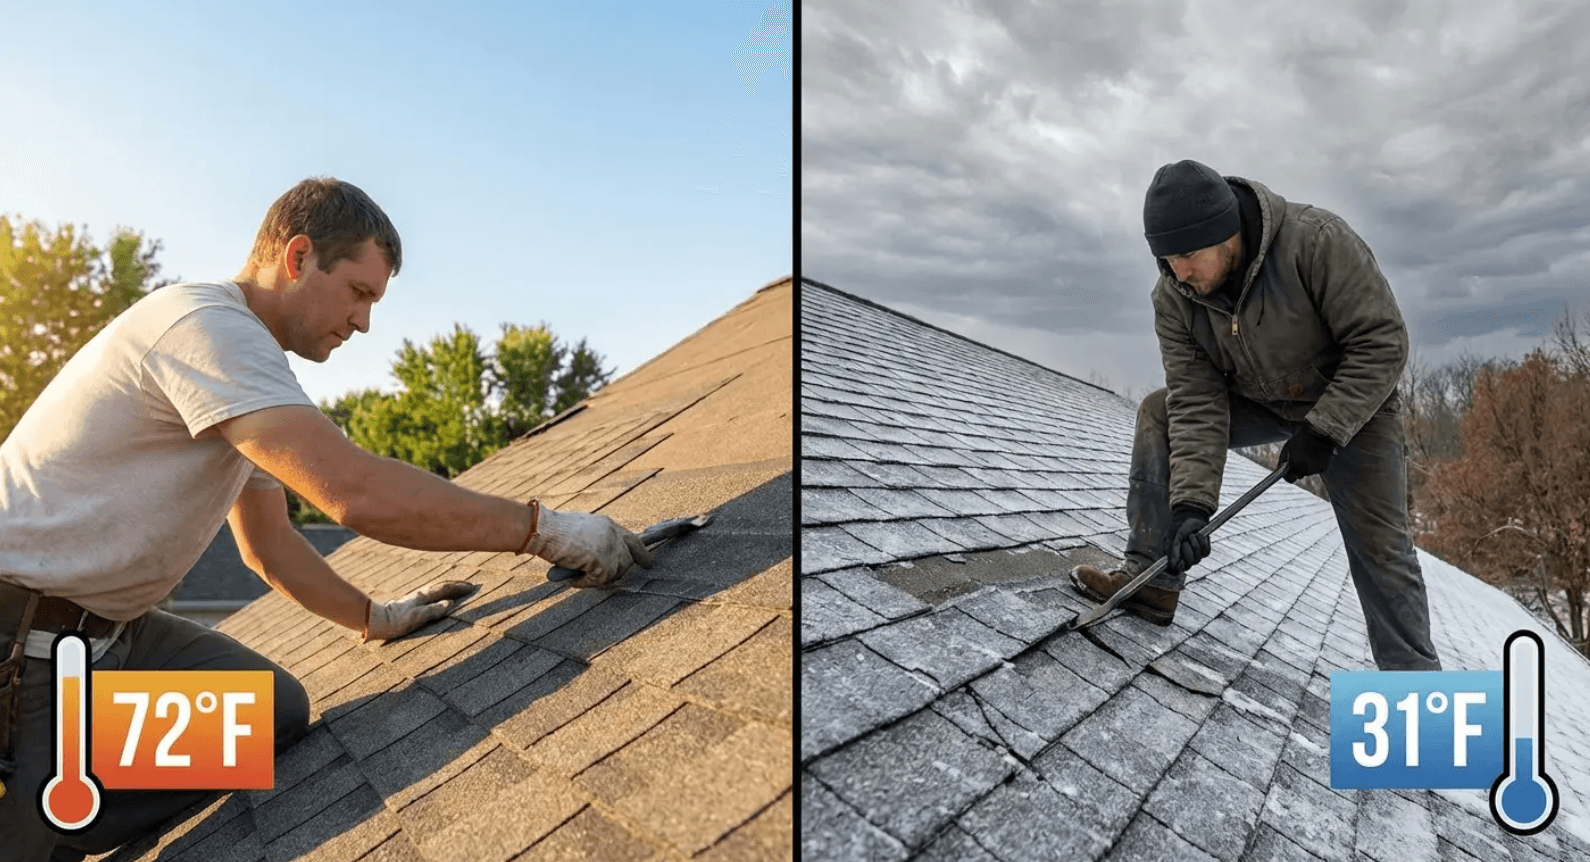
Temperature matters too. Working on a roof when shingles are cold (below 50°F) increases the risk of cracking or breaking them during moss removal. Too hot (above 85°F), and you'll damage softened shingles just by walking on them.
The ideal window is narrower than you might think. Professional services book out weeks in advance during optimal conditions. If you're planning DIY removal, checking the extended forecast isn't optional. You need to know what the weather will do for at least five days after you finish, not just whether it'll rain tomorrow.
Weather matters more than you think. Too cold (under 50°F) and shingles get brittle. You'll crack them just walking around. Too hot (over 85°F) and they get soft. You'll leave footprints. You need it dry for at least five days after you finish, not just the day you're working. And if it's windy, don't even bother. You'll spend more time chasing debris than actually cleaning.
The Pressure Washer Mistake Everyone Makes
Why High-Pressure Water Destroys More Than It Cleans
Let's talk about pressure washers. I know they're tempting. Point, spray, watch the moss disappear. Super satisfying.
Also super destructive.
High-pressure water (anything above 1,500 PSI) strips granules from shingles, forces water under shingle edges, and can break the seal between layers. You might remove the moss, but you've also shortened your roof's lifespan by years in a single afternoon.
I've inspected roofs where homeowners did exactly this, and the damage was immediately visible. Bare streaks where granules used to be. Lifted shingle edges. Water stains in the attic from moisture that got driven through compromised areas.
Even "soft washing" with reduced pressure can cause problems if the technique isn't right. The water stream angle matters. The distance from the nozzle to the shingle surface matters. How long you dwell on any one spot matters.
There's a reason professional roof cleaners carry insurance and use specific equipment. The margin for error is smaller than most people realize until they've already made an expensive mistake.
Manual Removal Techniques That Actually Preserve Your Roof
A stiff brush (not wire, which scratches shingles) used with downward strokes in the direction water flows is slower but far safer than pressure washing. You're working with the shingle structure instead of against it.
Combine this with a moss killing solution applied several days before removal, and the moss lifts away with minimal force. The key is patience. You're not scrubbing hard, you're coaxing loosened moss off the surface.
Start at the roof's peak and work downward so debris falls away from areas you've already cleaned. Use a roof rake from the ground for lower sections if you can reach them safely. This approach takes longer (count on a full day for an average-sized roof versus a few hours with a pressure washer), but your shingles remain intact.
You'll also notice the difference in how your roof looks afterward. Pressure-washed roofs have an uneven appearance where granule loss varied. Manually cleaned roofs maintain their uniform texture.
How to Actually Remove Moss:
Day 1: Apply moss kill solution to affected areas. Saturate thoroughly. Protect landscaping below with tarps.
Days 2-10: Wait. Let the moss die completely. It should turn brown or black. Don't skip this.
Day 11: Start at roof peak, work downward. Use a stiff plastic brush with downward strokes only. Remove debris from gutters as you go.
Days 12-14: Inspect for remaining patches. Spot-treat any missed areas.
30 days later: Check treated areas for new growth. Document with photos.
Chemical Treatments That Work (And the Ones That Don't)
Zinc sulfate and copper sulfate solutions kill moss without damaging shingles when applied correctly. They work by disrupting the moss's ability to photosynthesize, causing it to die and release its grip on the roof surface.
Bleach-based solutions kill moss too, but they're harsher on shingles and surrounding vegetation. You'll see recommendations for everything from dish soap to vinegar online, and while some of these have mild effects, they don't penetrate moss colonies deeply enough to kill the root structures.
I've tested various formulations, and concentration matters more than most DIY guides acknowledge. Too weak, and you're just wetting the moss. Too strong, and you risk damaging shingles or killing landscaping below.
Application method matters too. Spraying from the ground with a garden sprayer gives inconsistent coverage. Walking the roof with a pump sprayer lets you target heavy growth areas and ensure saturation.
The best results come from applying treatment, waiting 7-10 days for the moss to die completely, then removing the dead material. Trying to do both steps on the same day means you're working harder than necessary and getting inferior results.
Oregon State University research shows that zinc sulfate moss killers applied in powder form have been known to provide moss control for up to two years under some circumstances, making them one of the longest-lasting treatment options available.
Quick sidebar: if someone tries to sell you those ultrasonic moss repellent devices, save your money. I've never seen one work. Ever. And I've seen people spend $200+ on them. Anyway, back to actual solutions.
Prevention Is About Sun and Drainage, Not Products
Sunlight Access as Your Primary Defense
Trimming tree branches to increase direct sunlight on your roof does more to prevent moss than any chemical treatment. Moss can't establish in areas that get 4+ hours of direct sun daily and dry out completely between rain events.
You don't need to remove trees entirely (though that would work). Just create enough clearance that morning sun reaches previously shaded sections. This is especially important for north-facing slopes that naturally get less light.
The change doesn't have to be dramatic. Raising the canopy by removing lower branches or thinning dense growth can shift the sunlight pattern enough to make your roof inhospitable to moss. I've seen dramatic differences on properties where homeowners committed to annual tree maintenance versus those who let vegetation grow unchecked.
The roofs with managed tree coverage stayed clear for years. The others needed moss removal every 18-24 months despite using preventive treatments.
Two houses on the same block in Seattle, both with big Douglas firs shading their roofs. One owner paid an arborist $450 to raise the canopy and thin things out. The other didn't. Five years later, the first roof is still clean. The second one has needed treatment three times. I know because I did two of them. Math isn't hard on this one.
Your roof's exposure to sunlight is the foundation of any prevention strategy. Get this right, and everything else becomes easier.
Drainage Patterns You Can Control
Water that pools or flows slowly across your roof creates the sustained moisture moss needs. Keeping gutters clean is the obvious step, but you also need to look at how water moves across the roof surface itself.
Valleys that collect debris need more frequent clearing than other areas. Sections where two roof planes meet trap water longer than they should. Sometimes the solution is as simple as adjusting a downspout or adding a diverter that changes where water exits your gutter system.
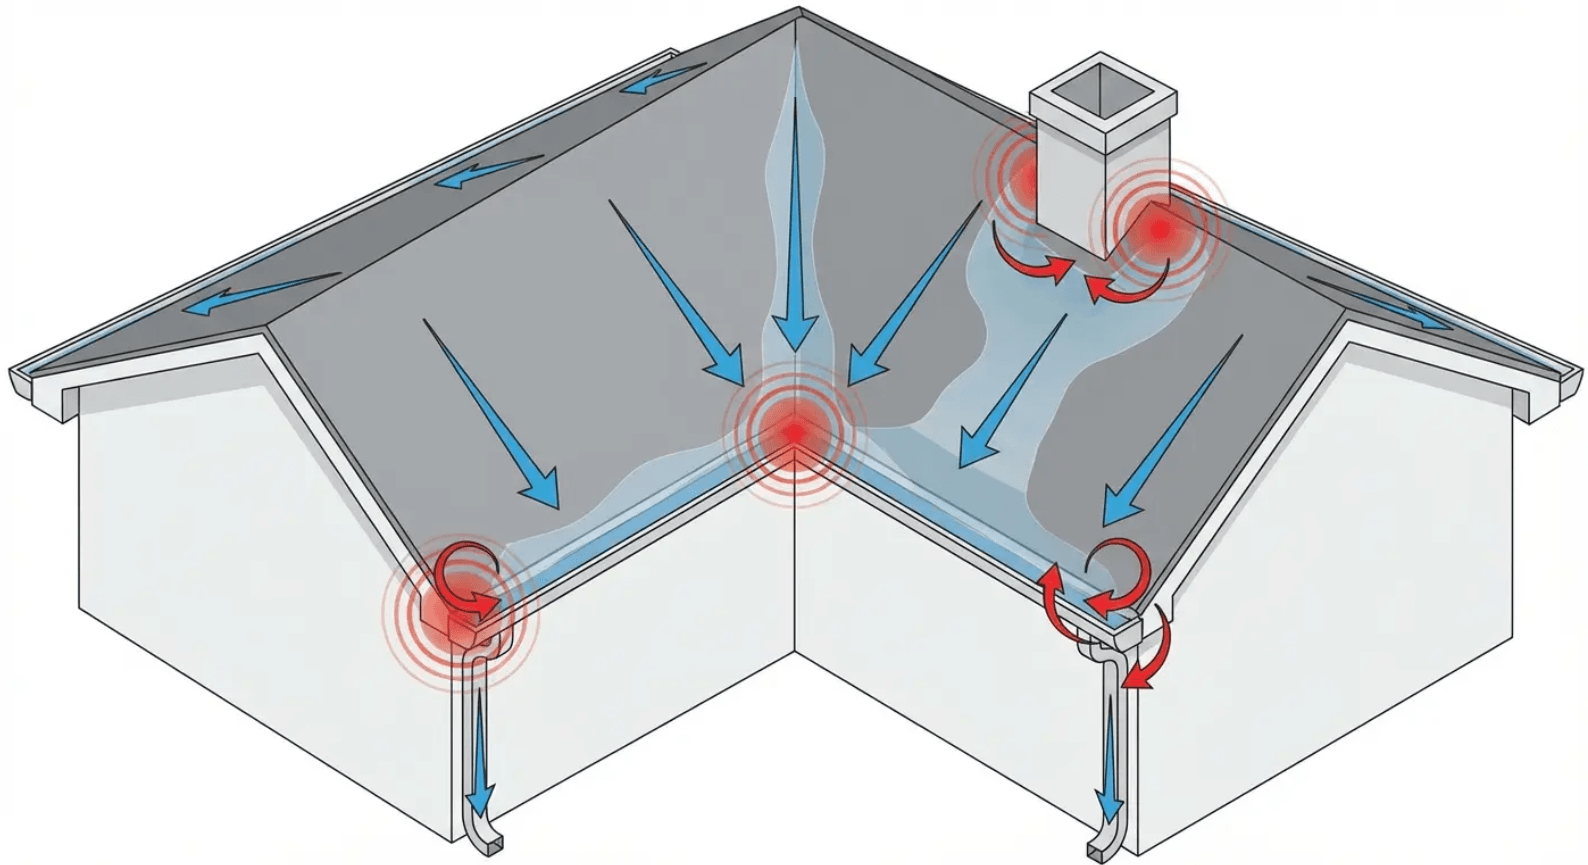
Other times, you need to address underlying issues like inadequate roof pitch in certain areas or damaged flashing that lets water travel where it shouldn't. I've mapped water flow on hundreds of roofs, and there's always a pattern to where moss establishes first.
It's not random.
Find where water lingers on your roof, and you've found where you need to focus prevention efforts. Fixing drainage issues might require some investment upfront, but it's the only way to stop treating the same problem repeatedly.
Zinc and Copper Strips: What They Actually Accomplish
Metal strips installed near the roof peak release ions when it rains that inhibit moss growth on the sections below. They work, but with limitations you should understand before installing them.
The range is roughly 15-20 feet downslope from the strip, meaning a single strip won't protect a large roof. They need to be installed correctly (partially exposed, not completely covered by shingles) to release ions. They don't kill existing moss, only prevent new growth. You'll still need to remove current colonies before the strips provide any benefit.
The protection also degrades over time as the metal oxidizes and releases fewer ions. Expect to replace or supplement them every 10-15 years.
Despite these limitations, they're one of the few "install and forget" prevention methods that delivers results. I recommend them as part of a comprehensive approach, not as a standalone solution. Combine metal strips with improved sunlight access and proper drainage, and you've built a system that keeps moss from re-establishing after removal.
Skip the other elements and rely only on strips, and you'll be disappointed with how quickly moss returns in shaded, moisture-prone areas.
Pennington research confirms that moss controls based on zinc sulfate monohydrate kill moss over a three to five-week period depending on moss thickness and conditions, demonstrating why metal strips that continuously release zinc ions provide ongoing preventive value.
When to Call Someone Who Knows What They're Doing
The Equipment and Safety Costs You Didn't Budget For
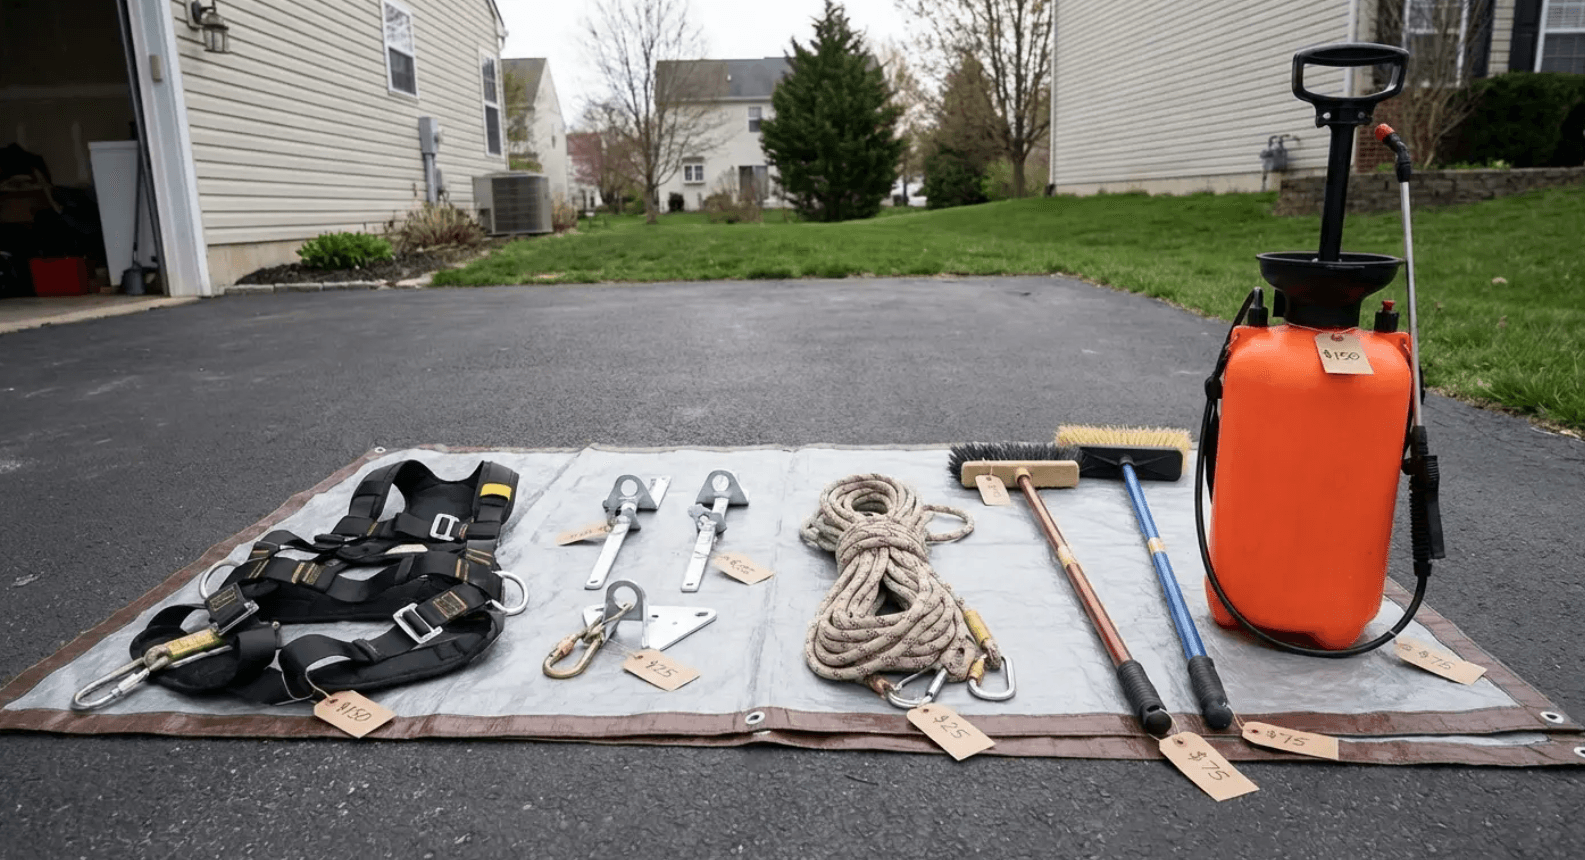
Look, I'm not going to tell you moss removal is impossible to DIY. It's not. But here's what people don't factor in: proper fall protection runs $300-500. The right chemicals and application equipment add another $100. Your time, figure 8-12 hours for a typical roof. And if you screw it up, you void your warranty and possibly damage your roof worse than the moss did.
Professional service runs $400-800 and takes 3-4 hours. We carry insurance. We know which methods preserve your warranty. And we'll spot problems you'd never notice from the ground.
I'm obviously biased here. This is literally my job. But I've also fixed enough DIY disasters to know the math doesn't work out the way homeowners think it will.
Your homeowner's insurance probably doesn't cover damage you cause to your own roof during maintenance. When you add up equipment, materials, time, and risk, the gap between DIY and professional service is smaller than it appears.
How Moss Removal Affects Your Roof Warranty
Most shingle warranties include language about proper maintenance and approved cleaning methods. Using a pressure washer or harsh chemicals can void your warranty, leaving you with no recourse if your roof fails prematurely.
Professional roof cleaning companies know which methods preserve warranty coverage and can provide documentation that the work was done correctly. This matters more than you might think. Shingle manufacturers have gotten strict about warranty claims, and they will look for reasons to deny coverage.
Evidence of improper cleaning or maintenance gives them exactly what they need.
If your roof is less than 10 years old and still under warranty, paying for professional removal protects an asset worth thousands of dollars. You're not just buying moss removal, you're buying documentation that maintains your warranty rights.
I've seen homeowners lose warranty coverage over DIY cleaning attempts, then face full replacement costs when their roof failed years earlier than expected. The $400-800 they saved on professional cleaning cost them $15,000+ in lost warranty protection.
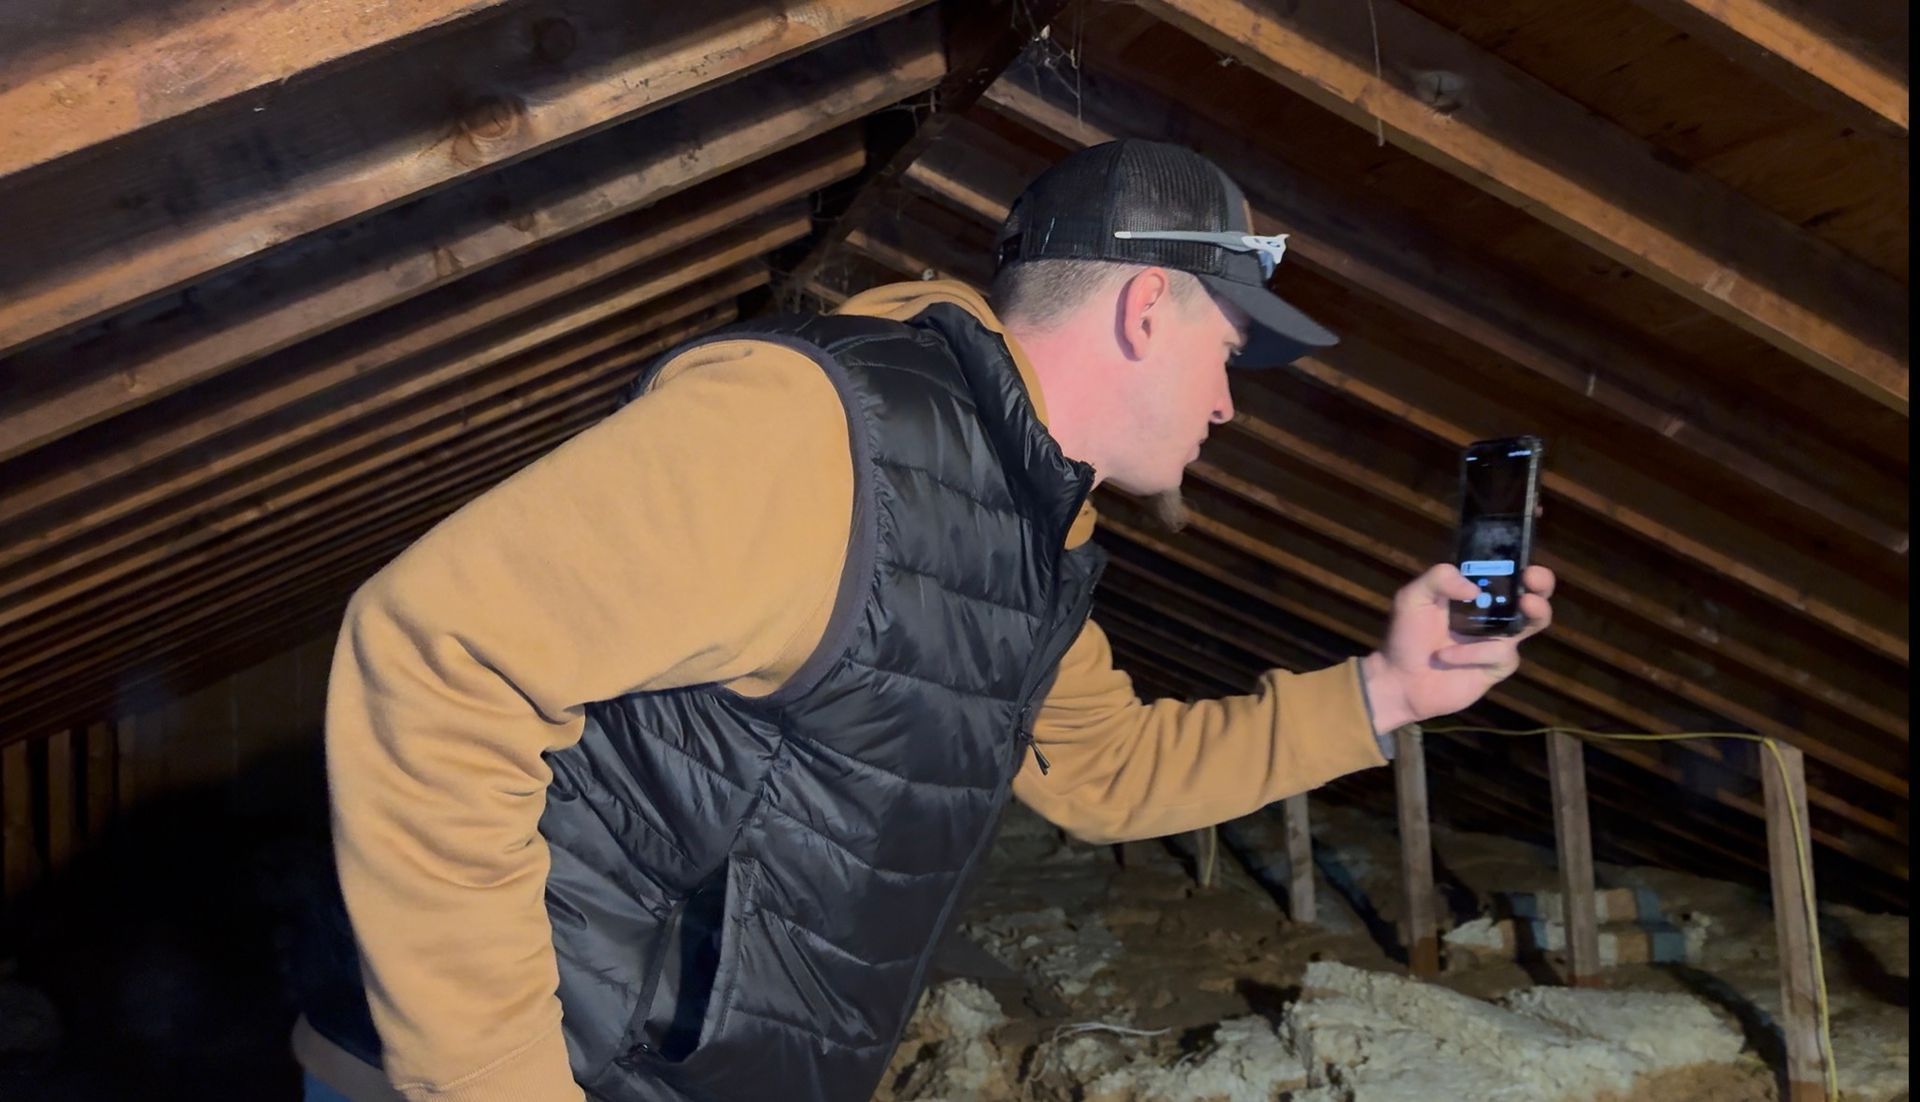
The Hidden Damage Assessment You're Missing
Professionals inspect your roof while removing moss, identifying problems you wouldn't notice from the ground or without training. Damaged flashing, compromised sealant, lifted shingles, and early signs of failure all become visible when someone's on the roof doing detailed work.
You might hire them for moss removal and discover you have a small leak that would've become a major problem within six months. That early detection saves you from water damage to your attic, insulation, and interior ceilings.
DIY moss removal means you're focused on the task at hand, not evaluating overall roof condition. You don't know what to look for, and you're not incentivized to find problems (because they mean more work for you).
This is where professional service delivers value beyond the obvious. The moss removal itself might be something you could technically do, but the roof assessment that happens simultaneously is worth the service cost by itself.
Your Roof After Moss: What to Expect
Recovery Potential for Lightly vs. Heavily Infested Roofs
Roofs with early-stage moss growth (thin coverage, minimal root penetration) can recover fully after proper removal and prevention measures. The shingles haven't sustained permanent damage, and their protective granule layer remains largely intact. You're looking at normal lifespan expectations if you address the problem quickly.
Heavily infested roofs where moss has been present for multiple years show measurable reduction in remaining lifespan even after successful removal. Studies tracking roof performance after moss remediation found that roofs with severe infestations lasted an average of 40-60% of their remaining rated life compared to roofs that never had moss issues.
That's significant. A roof that should have lasted another 15 years might only give you 6-9 more years after heavy moss damage.
This isn't meant to discourage you from removing moss (you should absolutely still do it), but to set realistic expectations. You're stopping further damage and maximizing whatever lifespan remains, but you're not reversing damage that's already occurred at the structural level.
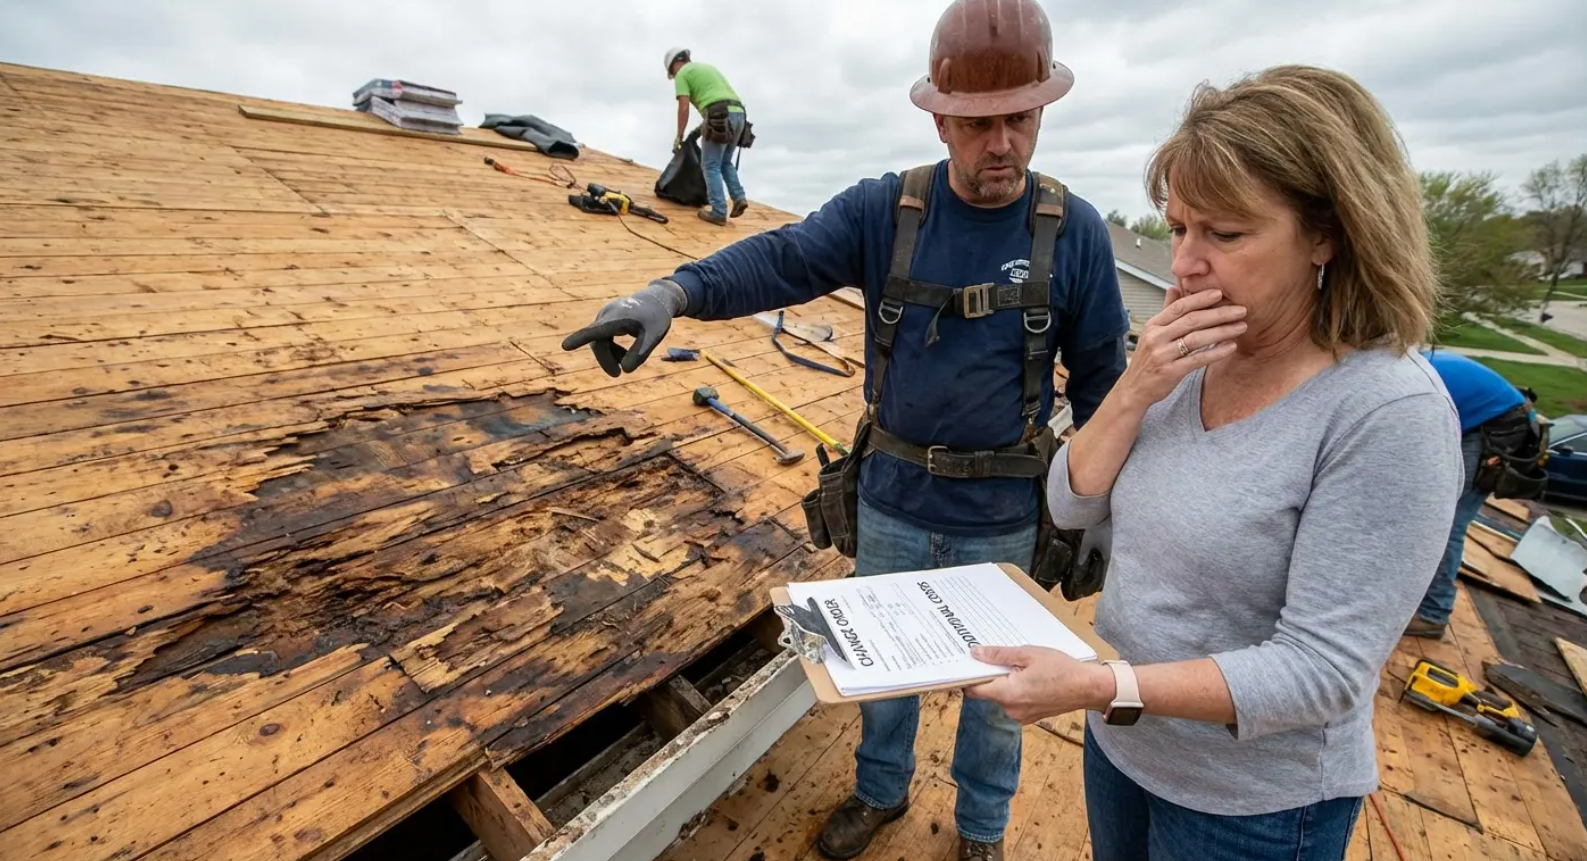
Replacement Indicators That Mean Removal Isn't Enough
Curling shingle edges, extensive granule loss, visible cracks, and soft spots when you walk on the roof all indicate damage beyond what moss removal can address. You're looking at replacement, not remediation.
Moss might have caused or accelerated these problems, but removing it won't fix them. I've had homeowners ask me to clean roofs that were already past their functional life, hoping to squeeze out a few more years. Sometimes that works for a season or two, but it's rarely cost-effective.
The money spent on cleaning would be better applied toward replacement. You need an honest assessment of your roof's condition before deciding whether moss removal makes sense. A roof with 5-7 years of life remaining is worth cleaning and protecting. A roof that's showing multiple failure indicators probably isn't.
You can do a basic evaluation yourself before calling for service. Look for shingles with exposed black asphalt (granules completely gone), edges that curl upward or downward more than a quarter inch, and any areas where shingles feel spongy underfoot.
Check your attic for water stains on the underside of roof decking or on insulation. Examine flashing around chimneys, vents, and roof valleys for rust or separation. Count how many shingles have visible cracks or tears.
If you find more than 10-15 damaged shingles on a typical residential roof, or if water stains appear in multiple attic locations, you're likely past the point where moss removal alone solves your problem. These indicators don't mean you should ignore the moss, but they do mean you need a more comprehensive plan that might include partial or full roof replacement.
Post-Removal Monitoring That Prevents Recurrence
You need to inspect your roof quarterly after moss removal, looking specifically at the areas where moss was heaviest. Early detection of new growth lets you treat small spots before they become established colonies.
This doesn't require getting on the roof. Binoculars from the ground work fine for most residential roofs. You're looking for green or dark patches that appear fuzzy rather than smooth. You're checking that gutters remain clear and that tree trimming you did hasn't grown back enough to create shade problems again.
Set calendar reminders for these inspections (most people forget without them), and keep a simple log of what you see. Changes over time tell you whether your prevention system is working or needs adjustment.
I've found that homeowners who commit to this monitoring schedule keep their roofs moss-free for 5+ years after professional removal. Those who treat it as a one-time fix and forget about it see moss return within 18-24 months.
The removal itself is just the reset point. What you do afterward determines whether you've solved the problem or just delayed it.
Here's What Actually Matters
The thing is, and this surprises most people, moss isn't even the main problem. It's a symptom. Your roof is creating conditions that moss loves, and until you change those conditions, you're just buying yourself temporary relief.
You can hire the best cleaning service in town, but if you don't fix why the moss grew there (shade, poor drainage, debris buildup), you'll be doing this again in two years. The removal is just hitting reset. What you do after determines whether you actually solved the problem.
Most people stop at removal. They see a clean roof and consider the job done. Six months later, they're frustrated that it's coming back and wondering why their efforts didn't last.
The roofs that stay clear? Those belong to people who treated the removal as step one, not the finish line. They trimmed trees. They fixed their gutters. They check their roof every few months instead of waiting until it looks like a forest.
That's the difference between solving a problem and just postponing it.
So yeah, remove the moss. But don't stop there. You'll be wasting your time and money if you do.