January 3, 2026
Asphalt Shingle Roof Replacement: Why Your Attic Tells You More Than Your Roofer Does
Author
Availability and pricing inverse relationship: when contractors are busy (summer), prices peak. When they have capacity (spring/fall), you negotiate better rates.
Shingle Weight Matters More Than Color
Shingle Weight and What It Actually Tells You
Shingles get sold by weight per square (100 square feet). This number matters more than the warranty. Way more.
Heavier shingles contain more asphalt, more fiberglass mat, and more granules. Which means they last longer and handle weather better. Pretty straightforward.
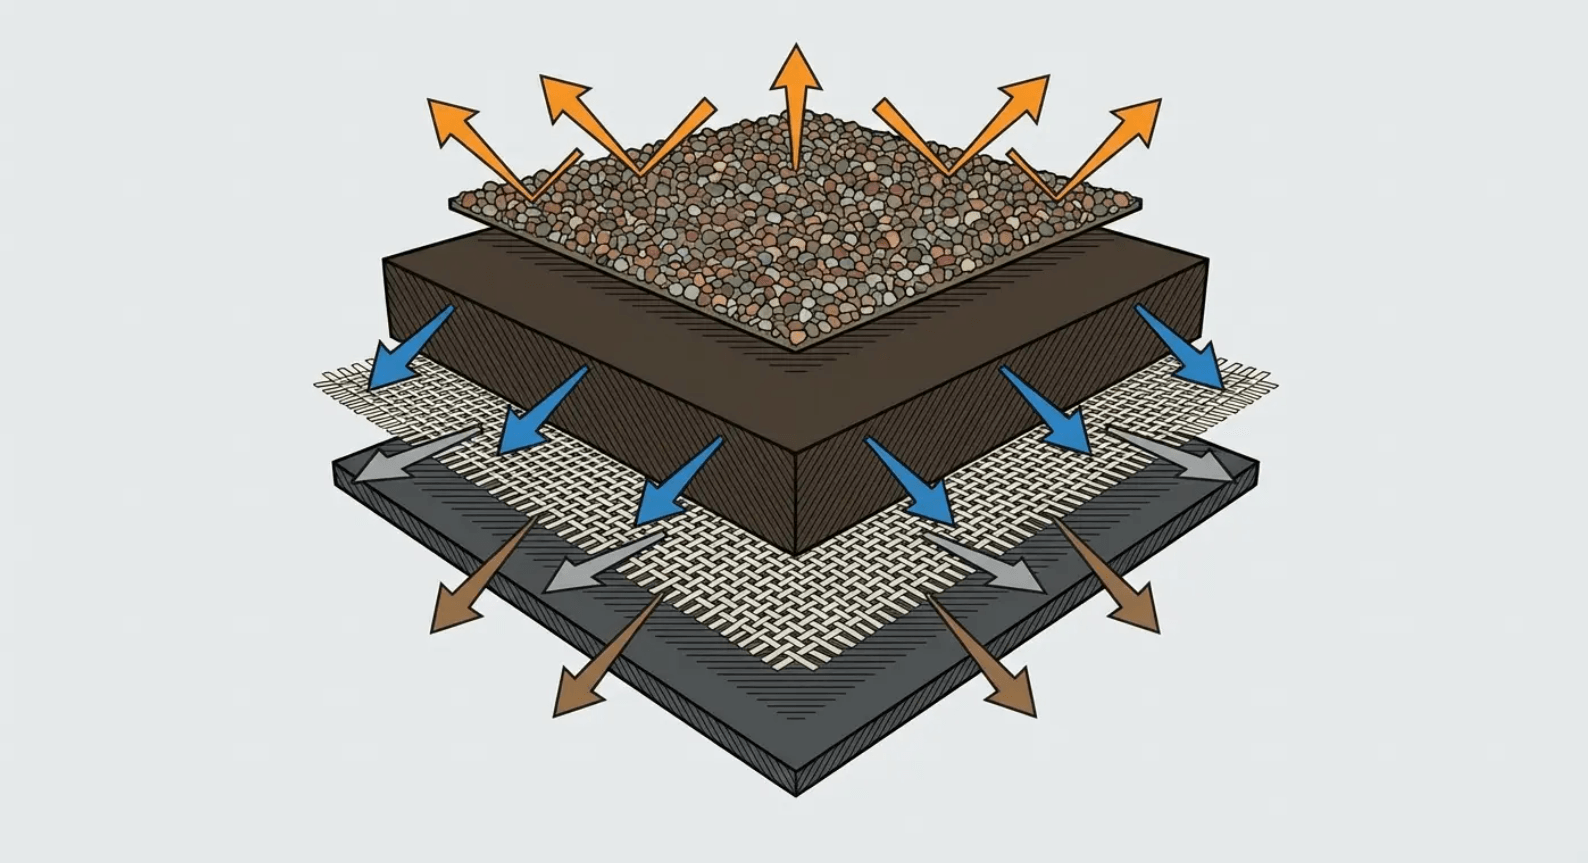
Standard three-tab shingles weigh around 200-230 pounds per square. Architectural (dimensional) shingles range from 240-400+ pounds per square. That weight difference isn't just thickness for aesthetics. It's material that protects your home.
The heavier shingle has more asphalt to weather away before it fails, more mat to maintain structural integrity, and more granules to shed before UV exposure degrades the asphalt underneath.
Your roof structure needs to support the weight, but this is rarely an issue for modern construction. The difference between a 250-pound shingle and a 350-pound shingle is about 1 pound per square foot, well within structural tolerances for any roof built to code in the last 50 years.
Understanding the cost of asphalt shingle roof replacement means looking beyond the sticker price to the value proposition. A heavier, higher-quality shingle might cost 20% more upfront but deliver 40% longer lifespan. I've seen homeowners choose the cheapest option only to replace again 8 years earlier than necessary, spending more in the long run. When evaluating new roof cost, factor in the material weight and quality rather than focusing solely on initial expenses.
Granule Adhesion Technology You're Not Being Told About
Granules do more than make your roof look good. They're ceramic-coated rock particles that shield the asphalt from UV radiation and physical impact. Lose your granules, and your shingles age exponentially faster. Yet most homeowners never ask about granule adhesion when selecting shingles.
Manufacturers have developed improved adhesion systems over the past decade, but they don't advertise them prominently because the technology isn't visual. You can't see better adhesion in a showroom. You only see the results 10-15 years later when one roof still has its granules and another is shedding them into the gutters.
Look for shingles with dual-layer granule embedment or adhesive-enhanced granule systems. These technologies bond granules into the asphalt more securely, reducing the loss that occurs from thermal cycling, hail impact, and normal weathering. Your roofer might not mention this unless you ask, but it's worth the conversation.
Algae Resistance and Whether You Actually Need It
Those black streaks on roofs aren't dirt. They're algae (Gloeocapsa magma) that feeds on the limestone filler in asphalt shingles. It doesn't damage the shingles structurally, but it looks terrible and reduces resale value in neighborhoods where appearance matters.
Algae-resistant shingles incorporate copper-coated granules that release copper ions when it rains. These ions inhibit algae growth. The technology works, but it's not permanent. The copper coating gradually depletes, giving you 10-15 years of protection before you're back where you started.
You need this upgrade if you live in humid climates (especially the Southeast and Pacific Northwest) or if your roof has limited sun exposure due to tree coverage. Skip it if you're in arid regions or if your roof gets full sun most of the day. Algae needs moisture and shade to thrive.
The cost premium is usually minimal (around $5-10 per square), making it worthwhile for most homeowners even if you're not sure you need it. Roof cleaning to remove algae costs more than the upgrade and has to be repeated every few years.
The Hidden Costs Nobody Mentions
Permit Modifications and Inspection Failures
Your initial estimate includes a permit line item, probably $200-500 depending on your jurisdiction. What it doesn't tell you is that this covers a standard replacement only. Any structural modifications, ventilation system changes, or code compliance upgrades discovered during the project trigger additional permit amendments and re-inspection fees.
Inspectors fail roofing projects for reasons you'd never anticipate: improper flashing around that skylight you forgot to mention, deck boards spaced too far apart for the shingle weight you selected, or ventilation ratios that don't meet current code (even though they met code when originally installed). Each failure means another inspection fee and potentially another day of labor to correct the issue.
Older homes face the biggest risk because they're grandfathered under old codes until you do major work. Your replacement project might trigger requirements to upgrade attic ventilation, add ice and water shield in areas that didn't require it originally, or install drip edge where none existed before. These aren't contractor upsells. They're code compliance requirements that add real costs.
Waste Disposal Weight Overages
Your estimate probably includes disposal for one layer of shingles. Sounds reasonable until you realize that your house might have two or even three layers under that top one (common in homes built before regulations limited layering). Each additional layer multiplies your disposal weight and cost.
Wet shingles weigh way more than dry ones. If your roof has been leaking or if rain hits during tear-off, your disposal weight skyrockets. A square of dry shingles weighs around 250 pounds. That same square when saturated can hit 400+ pounds. Disposal companies charge by weight, and that difference comes out of your pocket if the estimate assumed dry removal.
Deck repairs add disposal weight too. Those rotten boards have to go somewhere, and they're heavier than shingles. Contractors estimate conservatively on deck repairs because they can't see the full extent until tear-off happens. When they find more damage than expected, both the repair costs and disposal costs increase.
Get your estimate itemized with specific assumptions about layers, moisture conditions, and anticipated deck repairs. Ask what happens if those assumptions are wrong. A good contractor will give you a per-pound overage rate or build in contingency so you're not surprised.
Substrate Repairs That Multiply During Tearoff
You can't see your roof deck until the shingles come off. This reality creates the most contentious cost conversations in our industry. Contractors who lowball estimates to win bids often underestimate substrate repairs, then hit you with change orders once the roof is open and you're committed.
Substrate damage clusters around predictable areas: valleys where water concentrates, eaves where ice dams form, penetrations where flashing has failed, and anywhere you've had visible interior leaks. A thorough attic inspection before you start (remember that section?) gives you advance warning about where problems likely exist.
Had a 1985 Cape Cod in New England. Got an estimate for standard asphalt shingle roof replacement at $12,500 based on the assumption of minimal substrate damage. The homeowner had noticed a small water stain in the upstairs bedroom ceiling two years prior but it hadn't grown, so they assumed it was a minor issue that had resolved itself. During tear-off, we discovered that a failed valley flashing had been channeling water into the wall cavity for years. What appeared as a small ceiling stain represented extensive damage: 12 sheets of plywood decking needed replacement, the top plates of two wall sections had rotted and required sistering, and the insulation in that wall cavity was saturated and moldy. The substrate repairs alone added $4,800 to the project, a 38% cost increase. Had the homeowner conducted a thorough attic inspection beforehand, they would have seen the moisture tracking down the rafters and could have budgeted appropriately or addressed the issue before it spread.
Deck board replacement costs vary wildly based on access and material. Replacing a few boards on a simple gable roof might run $3-5 per square foot. Replacing large sections on a complex roof with multiple levels and limited access can hit $8-12 per square foot. Plywood or OSB sheathing replacement falls somewhere in between, usually $40-60 per sheet installed.
Set aside 10-15% of your total project cost as substrate repair contingency. If you don't need it, great. If you do, you're prepared instead of scrambling for financing or making compromises that affect the quality of your new roof.
How We Do It Differently
I've spent this entire article walking you through the gaps in typical roofing consultations because I've seen too many homeowners get blindsided by costs and complications they should have known about upfront. At Joyland Roofing, we start every replacement conversation in your attic, not on your roof. That interior inspection I spent three paragraphs on? That's not a nice-to-have. That's step one.
This approach means you know about substrate issues before we write an estimate, not after we've torn off your shingles and you're committed. We itemize every component: permits with specific assumptions about code compliance requirements, disposal with layer counts and moisture contingencies, substrate repairs based on what we've seen in your attic. You might not love the total number, but you'll understand exactly what you're paying for and why.
Look, I can't predict every single thing we'll find under your shingles. Nobody can. But we can identify 80-90% of potential problems before we start, give you accurate pricing for those issues, and build reasonable contingencies for the unknowns. You deserve to make your replacement decision with complete information, not partial estimates that balloon once work begins.
Ready to get an honest assessment of your roof's condition and what replacement will actually cost? We'll start in your attic and work our way out, giving you the full picture before you commit to anything.
What Happens When Your Roof Comes Off
Weather Exposure Windows and Mitigation
Your roof protects everything you own. Removing it, even temporarily, creates real risk that most homeowners don't think about until they're watching clouds roll in with half their sheathing exposed. Understanding this vulnerability helps you prepare and know what questions to ask your contractor about weather protocols.
Complete tear-off and replacement usually takes 2-4 days depending on roof size and complexity. During that window, your home is exposed. Quality contractors use tarps and synthetic underlayment to protect open sections, but these are temporary measures. A severe storm during replacement can still cause interior damage even with protection in place.
Timing matters enormously here. This is why I emphasized earlier that proactive replacement during calm weather windows beats emergency replacement during storm season. You have control over exposure risk when you choose your timing. You have none when a leak forces immediate action in the middle of hurricane season.
Ask your contractor about their weather monitoring process. Do they check forecasts before starting each day? At what wind speed or rain probability do they stop work and secure the site? How quickly can they cover exposed areas if weather changes unexpectedly? If your contractor doesn't have a weather protocol, find a different contractor. I'm serious.
Interior Disruption You Should Prepare For
Roof replacement is loud. Not "annoying background noise" loud, but "you can't take a phone call" loud. Tear-off involves pry bars ripping up shingles and hammers removing nails. Installation involves nail guns firing thousands of fasteners. The noise and vibration travel through your entire structure.
Work from home that week? Plan to relocate. Have pets sensitive to noise? Arrange alternative care. Own valuable items hanging on walls? Take them down before work starts. The vibration can and will knock things off walls and shelves.
Pre-Replacement Home Preparation Checklist
Complete these tasks 2-3 days before your roof replacement begins:
Upper Floors & Attic Access:
- Remove all wall-mounted pictures, mirrors, and decorations
- Take down ceiling fans or secure blades with tape
- Cover furniture with drop cloths or plastic sheeting
- Relocate fragile items (lamps, vases, electronics) to lower floors
- Seal attic access points with plastic sheeting and painter's tape
- Remove items stored directly against attic access hatches
Exterior Preparation:
- Move vehicles to street or neighbor's driveway (minimum 15 feet from house)
- Relocate patio furniture, grills, and planters away from house perimeter
- Trim back tree branches within 10 feet of roof line
- Mark sprinkler heads and landscape lighting with flags
- Remove or secure loose items in yard (toys, decorations, hoses)
Family & Pets:
- Arrange alternative workspace if working from home
- Schedule pet boarding or arrange quiet space away from home
- Notify neighbors about project timeline and potential disruption
- Plan meals that don't require extensive kitchen time (vibration affects upper cabinets)
- Identify alternative entry/exit if driveway will be blocked
Documentation:
- Photograph existing landscaping and exterior features
- Document pre-existing interior ceiling conditions
- Clear path for contractor walkthroughs and material access
Dust infiltrates your home despite your best efforts. It works through light fixtures, ceiling fans, and any penetrations in your ceiling. Cover furniture in upper-floor rooms, seal off attic access points with plastic sheeting, and expect to do thorough cleaning after the project completes.
Your driveway and yard become a work zone. Delivery trucks will block access. Dumpsters will occupy parking space for days. Debris will inevitably end up in landscaping despite cleanup efforts. Magnetic sweepers catch most nails, but walking your property after completion to pick up stray fasteners is wise, especially if you have kids or pets.
None of this should deter you from necessary replacement, but knowing what to expect prevents frustration and helps you prepare appropriately.
The Final Walkthrough That Actually Matters
Don't hand over final payment until you've walked the property with your contractor and verified completion to your satisfaction. This isn't about being difficult. It's about making sure you got what you paid for before the crew leaves and your leverage disappears.
Check these items during your walkthrough:
- All vents, flashing, and penetrations properly sealed and secured
- Ridge caps installed straight with consistent exposure
- Valleys running clean with no shingle debris or misaligned courses
- Drip edge visible and properly installed along all eaves and rakes
- No exposed nail heads or unsealed fasteners visible anywhere
- Gutters cleaned and reattached if they were removed
- Complete yard cleanup with no visible debris or nails
- Dumpster removed and driveway/landscaping restored
Look at your roof from multiple angles and distances. Step back across the street and scan for wavy lines or inconsistent patterns that indicate poor installation. Get on a ladder (if you're comfortable) and look closely at the starter course and ridge details where shortcuts often hide.
Most issues are easy to fix if you catch them before the crew demobilizes. That same repair becomes a callback hassle requiring scheduling and return visits if you notice it after everyone's gone. Take your time with this walkthrough. You're inspecting a 20-30 year investment.
Final Thoughts
Don't replace your roof because your neighbor did. Don't do it because some contractor's "already in the area." And definitely don't wait until you're panicking over a leak.
Do it when you actually understand what's wrong with your roof, what it'll really cost, and when the timing makes sense for you. Not your neighbor. You.
Your roof replacement decision shouldn't be driven by your neighbors' choices, a contractor's convenient timing, or panic over a small leak. It should be driven by accurate information about your specific roof's condition, honest understanding of what replacement costs, and realistic assessment of when that replacement makes strategic sense for your situation.
I've covered the overlooked angle throughout this piece: that your attic tells you more about replacement timing than your shingles do, that warranties protect manufacturers more than homeowners, that "too early" beats "just in time" both financially and practically. These insights shift the conversation from reactive crisis management to proactive decision-making.
You now know to look inside before looking up, to read warranties for coverage rather than marketing numbers, to time your replacement strategically rather than waiting for failure. You understand that material selection goes deeper than color charts, that cost estimates hide predictable overages, and that the replacement process itself creates risks worth preparing for.
Take this knowledge into your contractor conversations. Ask the questions I've outlined. Demand the transparency you deserve. Your asphalt shingle roof replacement is probably the largest exterior investment you'll make in your home. Approach it with complete information, and you'll make better decisions at every step.
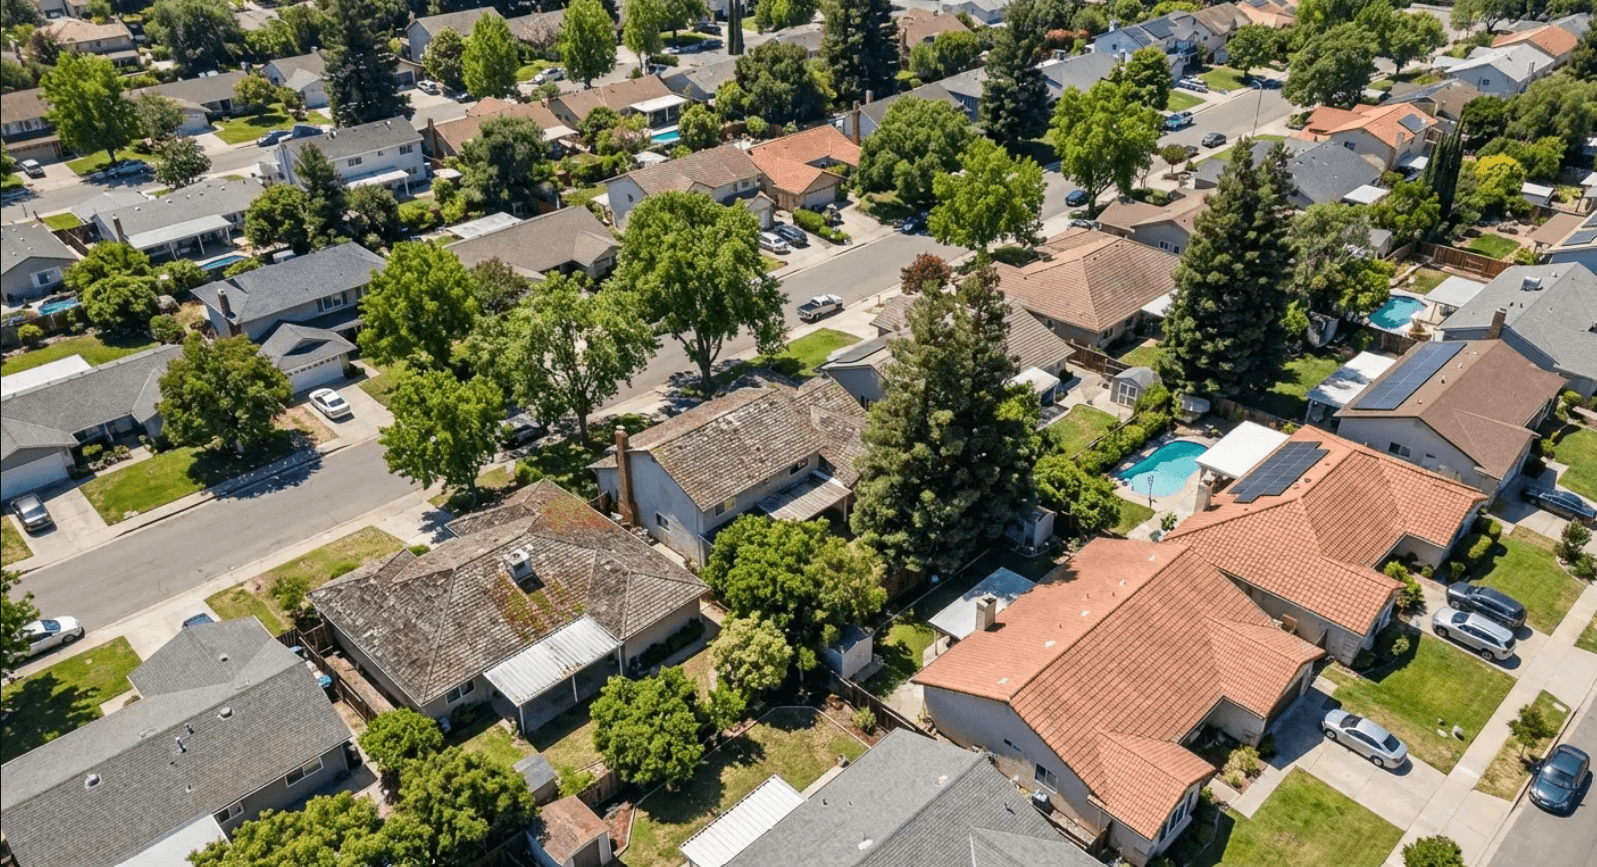
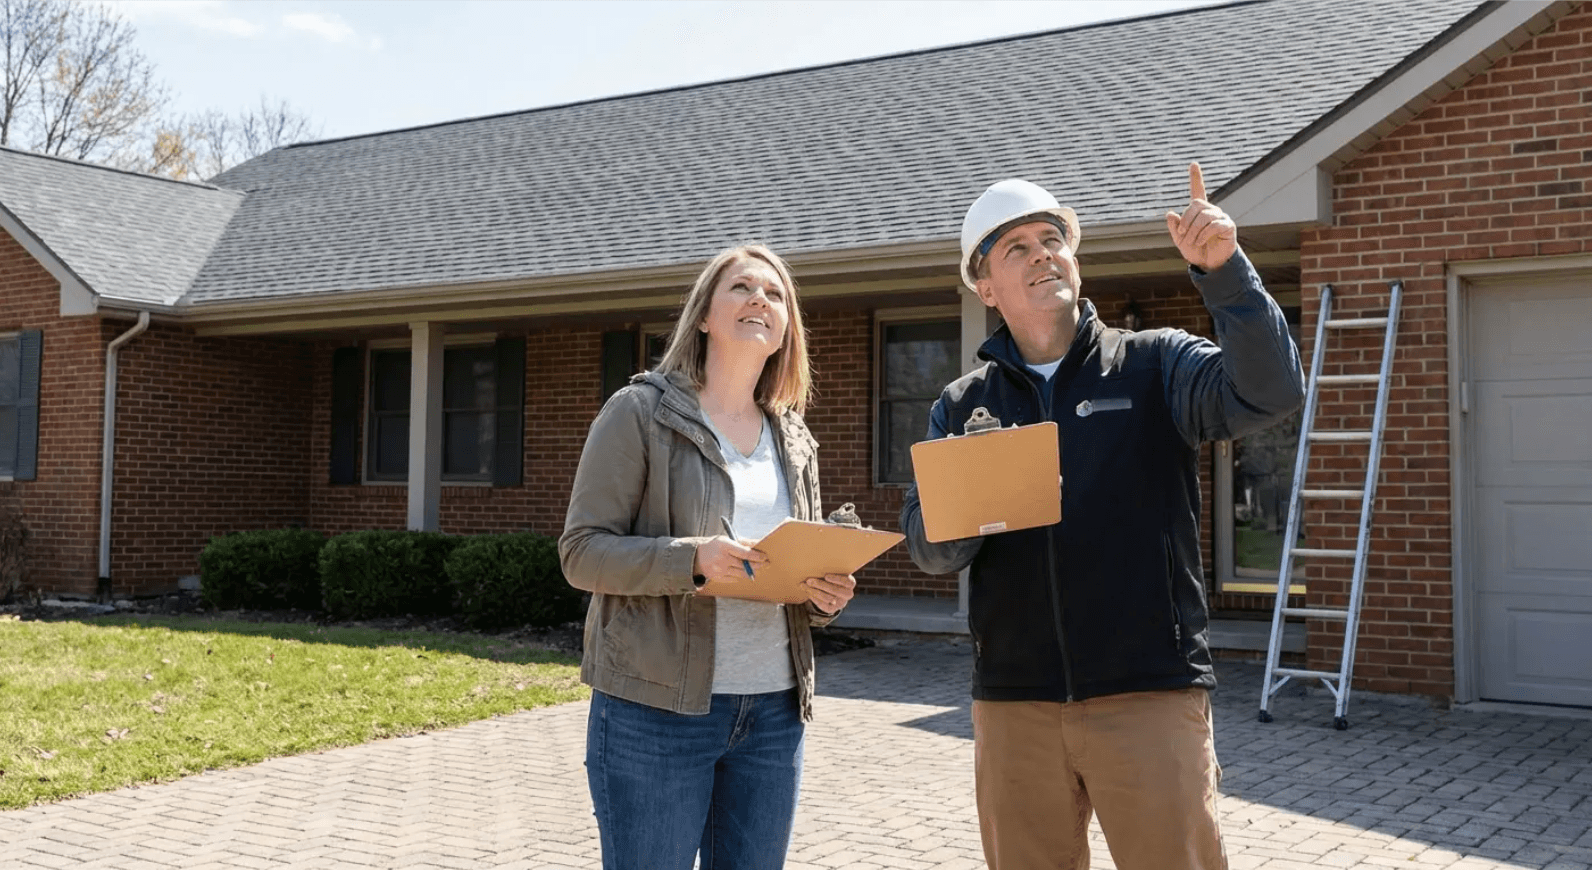
You’re standing in the driveway again, staring up at the roof. Looking for curled shingles, missing tabs, anything that says it’s time for an asphalt shingle roof replacement.
That’s what most people do. Look up, judge what they can see, and hope the roof still has a few good years left.
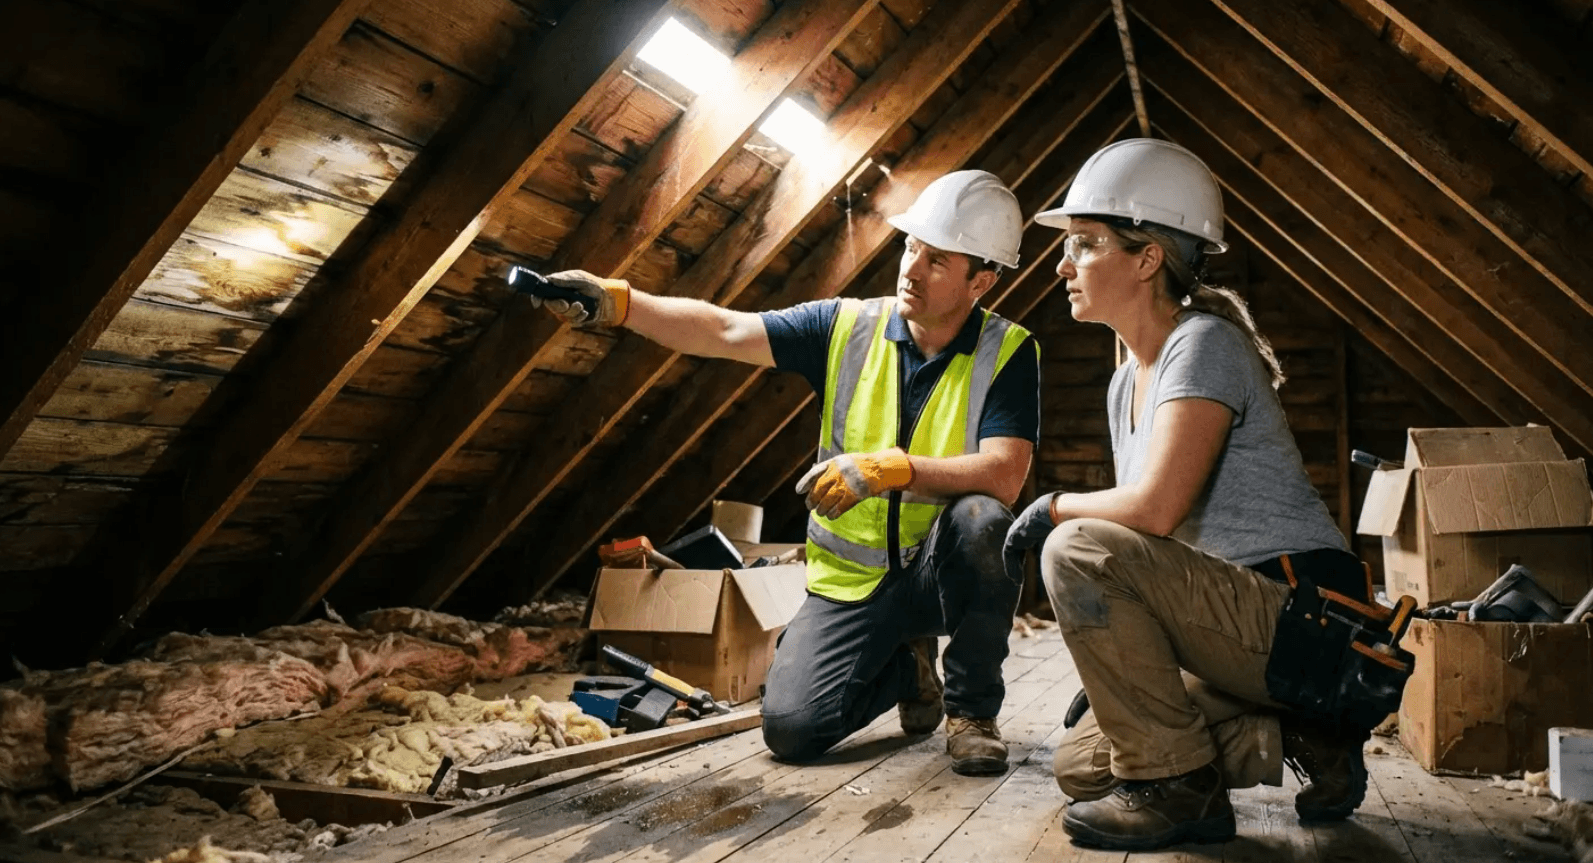
But by the time damage is visible from the ground, the real problems have usually been developing for months - sometimes years. The early warning signs don’t appear on the shingles first. They show up in your attic.
Your attic reveals heat buildup, moisture patterns, and ventilation failures long before shingles start curling or leaking. If you want to understand how these hidden issues connect to the overall system, it helps to look at the parts of a roof and how each component affects what’s happening above and below your shingles.
If you want to know whether an asphalt shingle roof replacement is actually coming soon, that’s the place that tells the truth.
Table of Contents
- TL;DR
- Why You're Looking at the Wrong Thing
- The Attic Inspection Nobody Does
- Your Warranty Is Probably Worthless
- Stop Caring What Your Neighbors Do
- Replace Early or Pay More Later
- Shingle Weight Matters More Than Color
- The Hidden Costs Nobody Mentions
- How We Do It Differently
- What Happens When Your Roof Comes Off
TL;DR
- Your attic shows problems 6-18 months before you can see them outside
- Warranties? They protect manufacturers, not you. Coverage tiers matter more than the year count.
- Don't wait for your neighbors. Their roof has nothing to do with yours.
- Replacing 2-3 years before failure saves you from emergency pricing and limited contractor availability
- Shingle weight, backing material, and granule adhesion outweigh color selection for longevity
- True project costs include hidden fees for permit modifications, waste removal weight overages, and substrate repairs
- Roof removal exposes your home to weather risks that require specific mitigation strategies
Why You're Looking at the Wrong Thing
You're in your driveway again, squinting up at the roof. Looking for those curled shingles everyone talks about. Third time this month you've done this walk-around, and your neck's killing you.
After doing this thousands of times, here's what I know: by the time you can see the problem from ground level, you've already missed the window where you had control over timing and cost.
Everyone's trained you to look up. Wrong direction. Your attic's talking right now, telling you exactly what's happening with your roof, and you're not listening. Not about obvious leaks or water stains (though those matter). The subtle signs show up way earlier: slight discoloration on sheathing, minor temperature inconsistencies, barely perceptible moisture patterns that appear and disappear with weather changes.
Asphalt shingle demand is dropping, down 1.1% yearly through 2028 per Freedonia Group's industry analysis. Not because roofs need less work. Because people are finally planning ahead instead of waiting for disasters. This decline reflects a market increasingly dominated by planned replacements over emergency responses.
Nobody tells you this stuff. Attic inspections don't photograph well for marketing materials. They're not sexy. A dramatic before-and-after shot of shingles gets clicks. A photo of your roof decking with early moisture intrusion? Not so much. But that unglamorous space between your ceiling and your shingles holds the truth about whether you need a replacement this year or three years from now.
The Attic Inspection Nobody Does
What to Look for Beyond the Obvious Water Stains
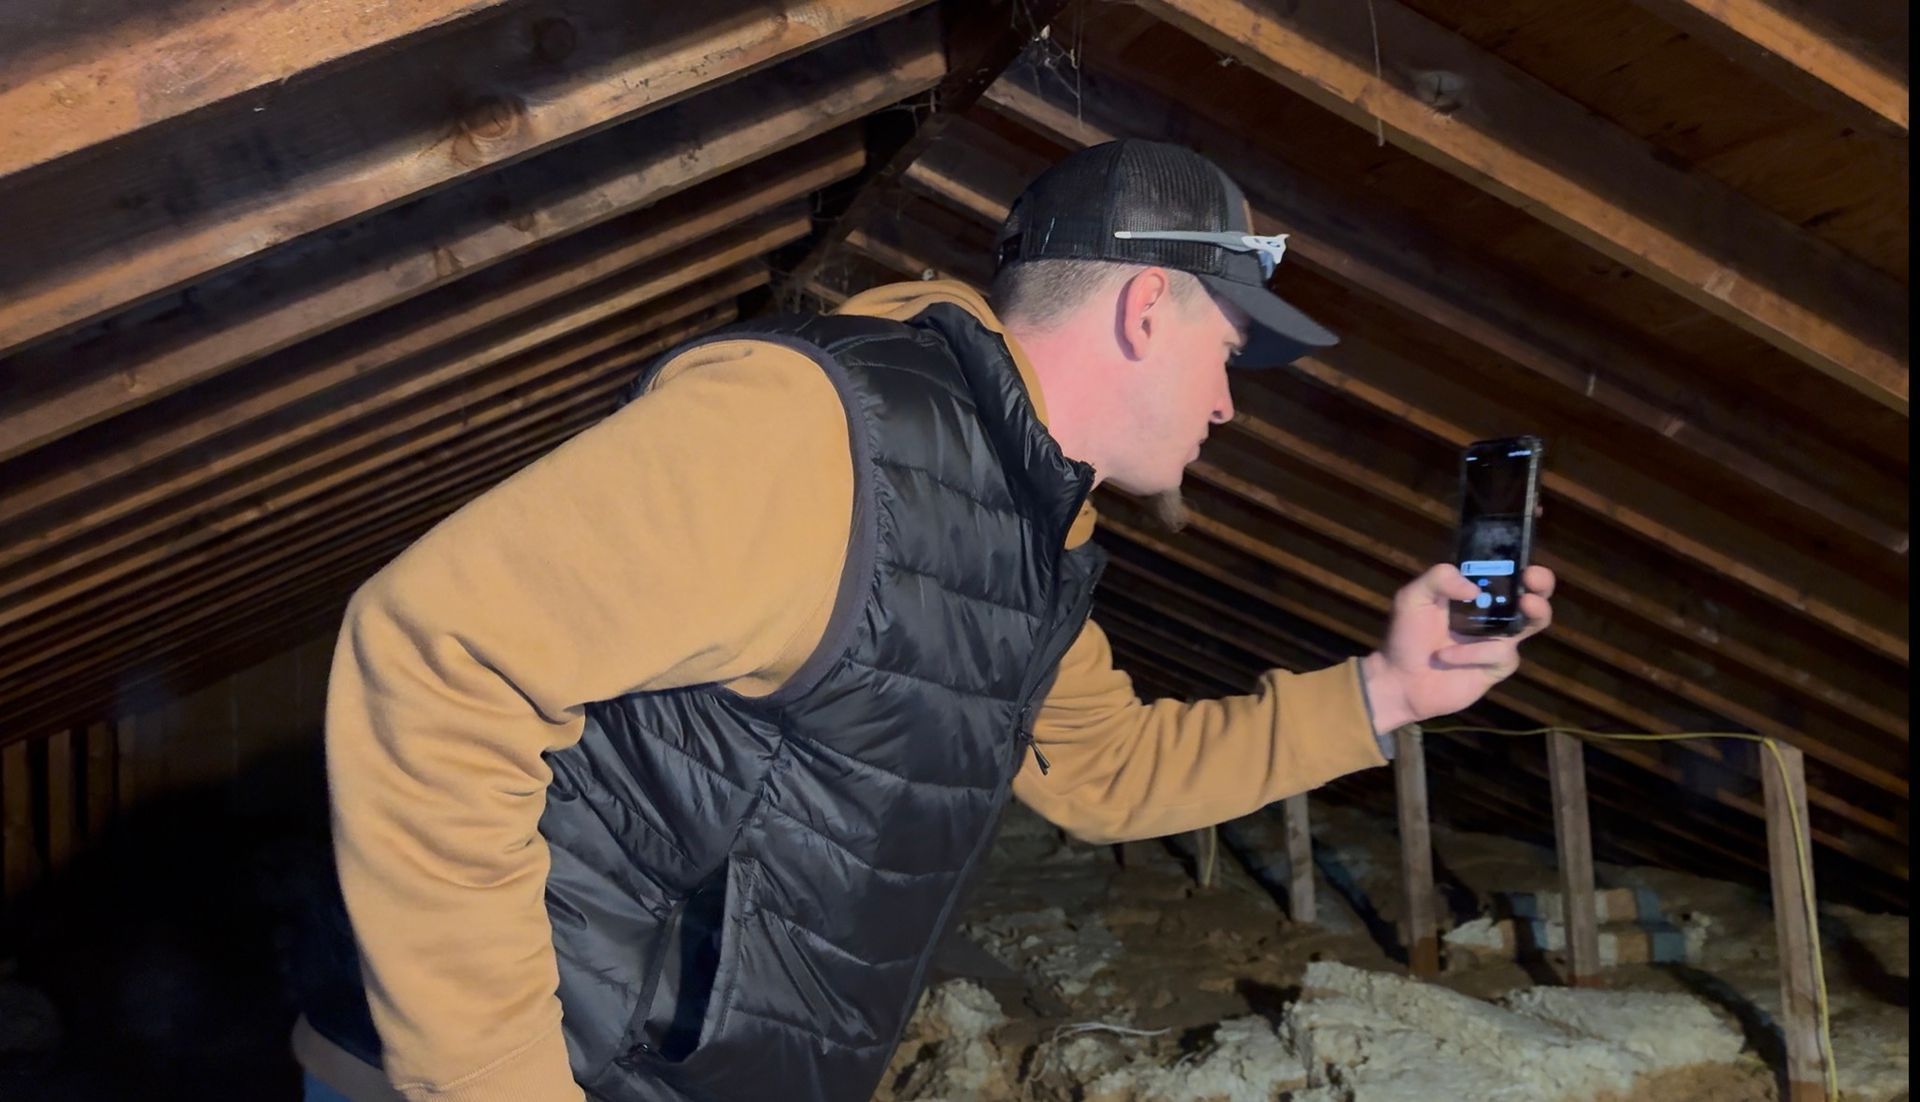
Grab a flashlight. Go up on a sunny day. You're hunting for pinpricks of light coming through the roof deck (sheathing). Even tiny light penetration means your shingles have separated enough to compromise the seal. This happens years before those shingles curl visibly from the outside.
Run your hand along the underside of the roof sheathing. Should feel dry and slightly cool. Never damp or warm to the touch. Temperature tells you about ventilation failure, which kills shingles faster than age does. Moisture tells you about current intrusion, even if you haven't seen interior damage yet.
Attic Inspection Checklist: What to Document
Before you head into your attic, prepare to document these critical indicators:
- Light penetration, any pinpricks of daylight (photo these, you'll forget where they were)
- Sheathing moisture levels (note damp vs. dry areas)
- Insulation compression patterns (mark affected zones)
- Nail shanks. Rust circles around them? You've got moisture problems.
- Temperature differentials (compare attic temp to outdoor temp)
- Ventilation airflow (check for blockages at soffits and ridge)
- Wood discoloration (even subtle color changes matter)
- Musty odors, strongest near specific areas
- Frost or condensation patterns (visible in winter months)
- Structural sagging (indicates prolonged moisture damage)
Take photos with timestamps. This documentation becomes invaluable when consulting contractors or tracking deterioration over time.

Check your insulation patterns. Has it compressed in specific areas? Compression indicates repeated moisture events that have dried (so you missed them) but left evidence. Your insulation is basically a moisture diary if you know how to read it.
The nails penetrating through your sheathing from above should look clean. Rust halos around nail shanks mean moisture has been present long enough to oxidize metal. You won't see this from your driveway.
Ventilation Failures That Destroy Shingles From Below
Your shingles have two enemies: the sun beating down from above and trapped heat rising from below. Most homeowners only think about the first one.
Bad ventilation kills shingles 40% faster. You'd never know from the outside. Everything looks fine. Meanwhile your attic's hitting 150°F in summer, baking those shingles from underneath. That heat makes the asphalt brittle and causes granules to release prematurely. You'll replace your roof and blame the shingle quality when the real culprit was airflow you never addressed.
Had a colonial outside Baltimore, 2005 build, about 2,400 square feet. Builder put in soffit vents (good) but skipped the ridge vent entirely. Just two gable vents trying to exhaust all that heat. Wasn't gonna work. By 2018, 13 years in, those "premium 20-year shingles" were shot. Granules washing down the gutters, edges curling up. South slope looked like it'd been through a war. Attic temps were hitting 160°F on summer afternoons, a full 70 degrees above outdoor temperature. The ventilation system wasn't moving air. It was trapping it. When they replaced the roof at year 15 (five years early), they added a continuous ridge vent and additional soffit ventilation. The new shingles, identical in quality to the originals, are now at year 8 with minimal wear because the attic temperature stays within 15 degrees of outdoor conditions.
Look for these ventilation red flags during your attic inspection:
- Frost accumulation on the underside of your roof deck in winter
- Visible mold or mildew growth on wood surfaces
- Attic temperature more than 20°F above outdoor temperature on mild days
- Musty odors that intensify during humid weather
- Wavy or warped sheathing boards
Ridge vents, soffit vents, and gable vents all need to work together as a system. Having one without the others creates pressure imbalances that trap air instead of moving it. When you replace your roof, this is your opportunity to redesign the ventilation system, not just replicate what's failing now.
Your Warranty Is Probably Worthless
The Difference Between Warranty Length and Actual Coverage
That "50-year warranty" sounds reassuring until you read what it covers. Manufacturers bank on you not reading past that number.
I've watched homeowners discover too late that their warranty covers material replacement at a prorated value but excludes labor entirely. Labor represents 60-70% of replacement costs.
Most shingle warranties have a non-prorated period, usually 10-15 years, where you get full coverage. After that? The coverage decreases each year. A shingle that fails in year 25 of a 50-year warranty might get you 50% of the material cost. You're still paying for removal, disposal, new installation, and the remaining material cost out of pocket.

Warranty Coverage Reality: What You Actually Get
| Warranty Year | Material Coverage | Labor Coverage | Your Out-of-Pocket Cost (Typical) |
|---|---|---|---|
| Years 1-10 | 100% replacement value | 100% (if included) | $0-500 (deductible only) |
| Years 11-15 | 100% replacement value | Excluded | $4,000-7,000 (labor + disposal) |
| Years 16-25 | 80-60% replacement value | Excluded | $6,000-10,000 (partial materials + full labor) |
| Years 26-40 | 50-30% replacement value | Excluded | $8,000-13,000 (most materials + full labor) |
| Years 41-50 | 20-10% replacement value | Excluded | $10,000-15,000 (nearly full replacement cost) |
Costs based on typical 2,000 sq ft roof replacement. Labor represents 60-70% of total project cost.
Labor coverage, when included, usually expires after just 10 years regardless of the warranty's total length. Manufacturers know that installation defects show up in the first decade. After that, you're on your own for the expensive part.
How Installation Choices Void Coverage Before You Know It
Your warranty probably requires "adequate ventilation" without defining what that means numerically. It definitely requires proper deck preparation, specific underlayment types, and manufacturer-approved accessory products (starter strips, ridge caps, etc.). Miss any of these requirements, and your coverage evaporates.
Most warranty claims get denied not because the shingle failed but because the installation didn't meet the manufacturer's standards. You won't know this until you're filing a claim years later. The roofer who cut corners to give you a lower bid just cost you thousands in coverage you thought you had.
Get everything documented during installation:
- Photos of deck preparation and underlayment installation
- Proof of proper ventilation calculations and installation
- Certification that all accessory products match manufacturer requirements
- Installer credentials if the warranty requires certified installation
Some manufacturers offer enhanced warranties only when certified contractors perform the installation. These upgraded warranties often include labor coverage and non-prorated periods that extend way longer. The certification isn't just marketing. It represents training in the specific installation requirements that keep your warranty valid.
Stop Caring What Your Neighbors Do
Three houses on your street got new roofs last month, and suddenly you're wondering if you're behind schedule. Roofing companies love this herd mentality. They'll knock on your door with "we're already in the neighborhood" pricing that creates artificial urgency.
Your roof doesn't care what your neighbors are doing.
Homes built in the same year with identical shingles age at vastly different rates. The house with south-facing roof planes gets more UV exposure and heat stress. The home surrounded by mature trees deals with moisture and debris accumulation. The property where someone power-washes the roof every few years (please don't do this) has accelerated granule loss.
Two identical ranch homes were built side-by-side in a 1998 development, both with the same 25-year architectural shingles installed on the same day by the same crew. House A faces south with minimal tree coverage and gets full sun exposure from 9 AM to 6 PM daily. House B faces north-northeast and sits beneath three mature oaks that shade the roof most of the day but drop leaves, acorns, and debris year-round. By 2020, House A needed replacement due to UV degradation and heat stress. The shingles were brittle and losing granules rapidly. House B's shingles remained flexible with good granule retention, but the north-facing slope showed early moss growth and moisture-related deterioration in the valleys where debris accumulated. House A replaced in 2020 (22 years). House B didn't need replacement until 2024 (26 years), but required more extensive substrate repairs due to the moisture issues. Same shingles, same installation date, completely different replacement timelines and cost structures.
Installation date doesn't matter as much as maintenance history.
Kept your gutters clean? Your valleys and eaves did their job. Addressed small repairs promptly? You prevented localized damage from spreading. Ignored everything for 15 years? You're paying for that now, and you might need replacement sooner than your neighbor who installed the same shingles on the same day.
Storm Chasers vs. Legitimate Damage Assessment
After every big storm, they appear. Contractors with out-of-state plates offering free inspections and promising to "work with your insurance." Some are legitimate. Many are not.
The difference matters because insurance fraud affects your premiums and your claim history, even when you're not the one committing it.
Real hail damage on asphalt shingles shows as bruising where the impact compressed the mat and displaced granules. It appears randomly distributed across the roof surface, not conveniently located where you can see it from the ground. Wind damage tears or lifts shingles, usually starting at edges and ridges where wind forces concentrate.
Red flags: Contractor finds hail damage on every single roof in your neighborhood? Doesn't matter if it faces north or south, shaded or full sun, everyone's got damage? Bullshit.
Wants you to sign before you've read it? No.
Offers to waive your deductible? That's insurance fraud in most states, and you're the one who'll deal with the consequences.
Legitimate contractors assess damage honestly, even when it means telling you that you don't need their services yet.
Replace Early or Pay More Later
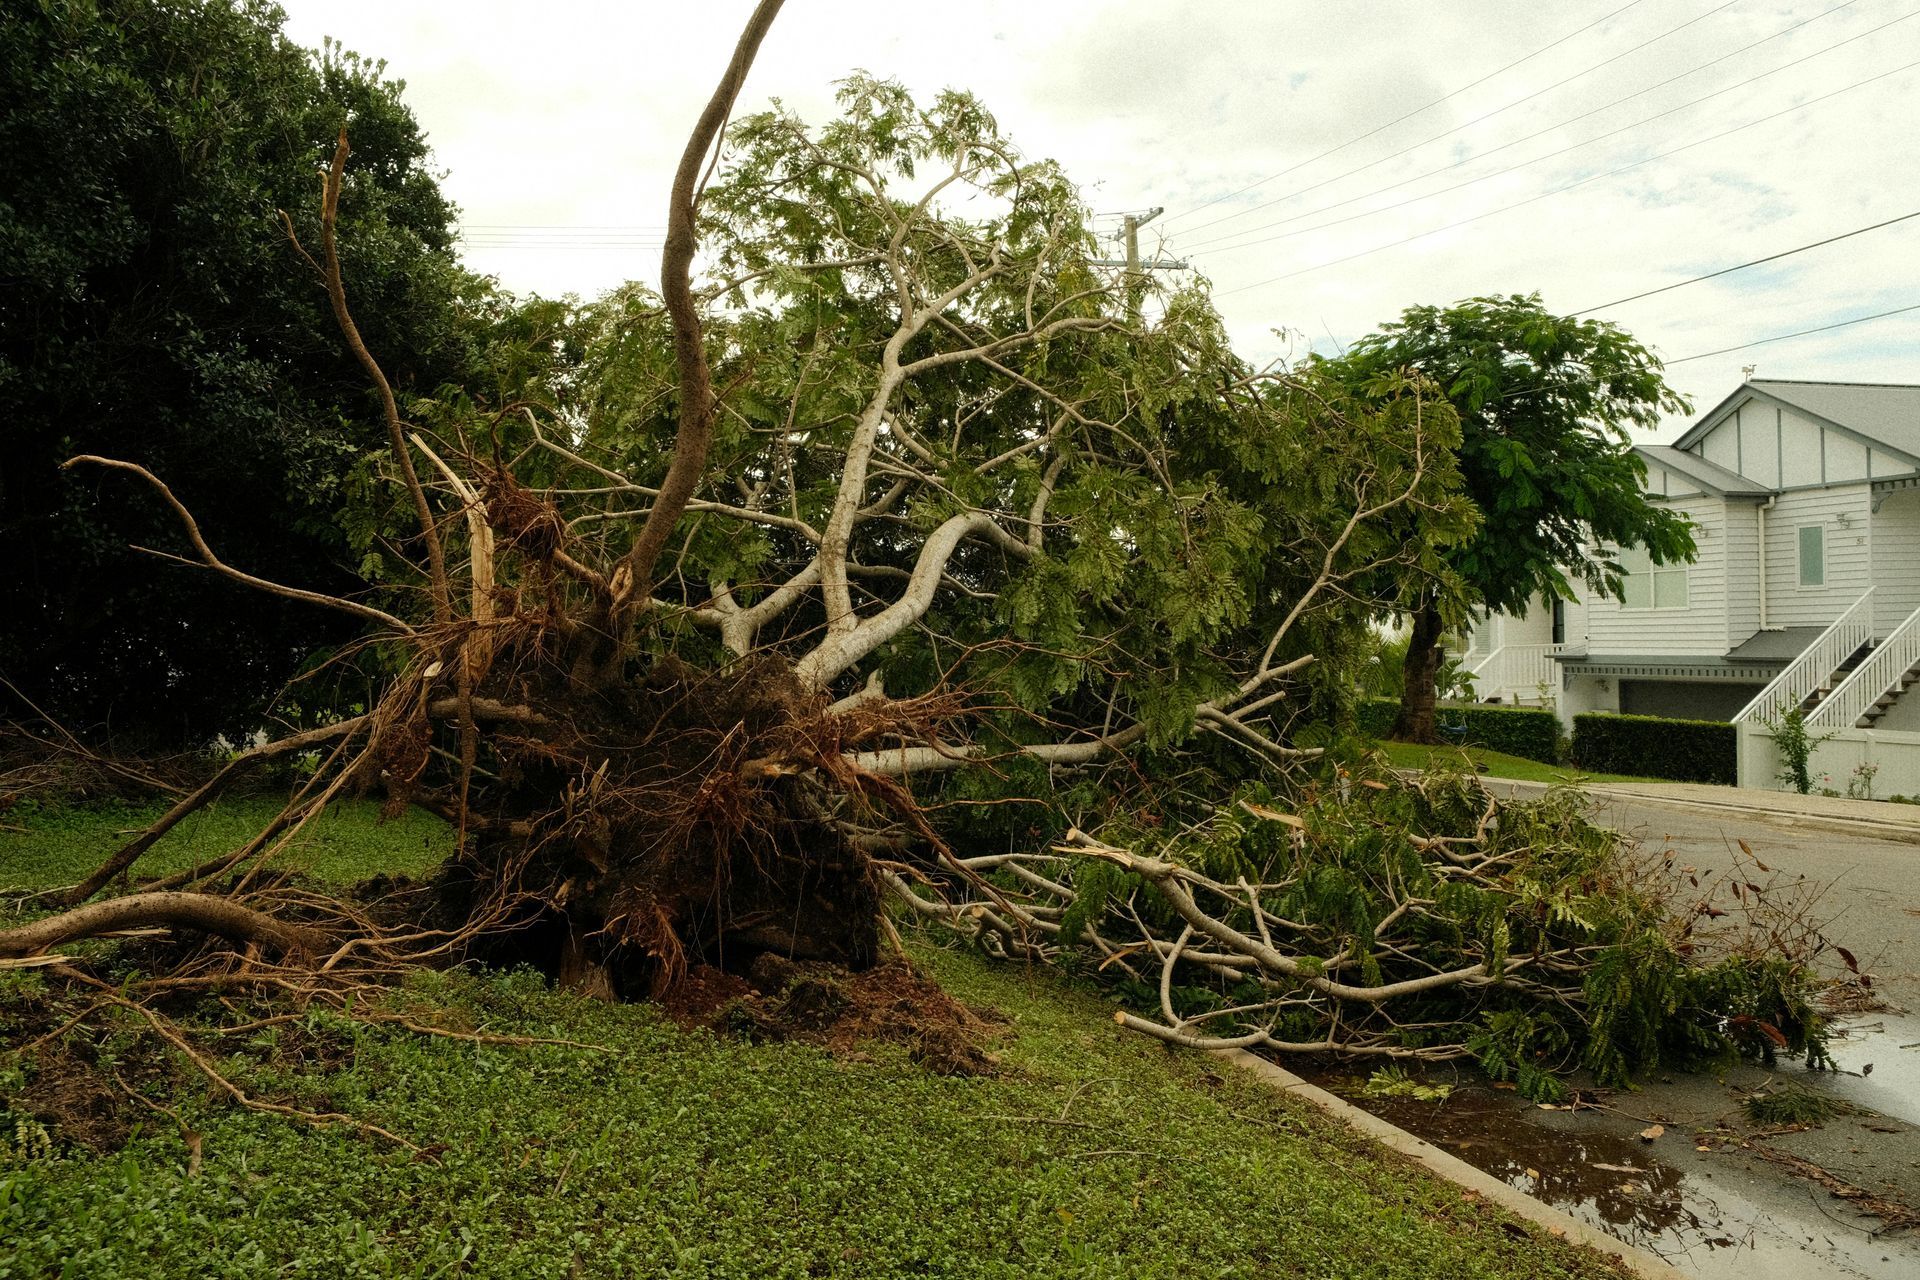
You're trying to squeeze every last year out of your current roof. I get it. Why replace something that's still functioning? But this is penny-wise, pound-foolish thinking, and here's why it'll cost you. Roofs don't fail gradually. They fail catastrophically. You go from "probably needs replacement soon" to "we have buckets in three rooms and the ceiling is staining" in one storm. Now you're calling contractors during their busiest season, accepting whoever can start immediately, and paying premium prices because you have no negotiating leverage.Freedonia Group's industry analysis shows the reroofing segment remains the driving force behind the US roofing market due to its large stock of older single-family houses, yet the anticipated decline in reroofing demand is partially attributable to unusually high weather-related reroofing activity in 2023. This creates a window where contractors have more availability and competitive pricing for homeowners who plan ahead rather than wait for emergency situations.
Replace your roof when you still have time to research contractors, compare bids, and schedule during shoulder seasons (spring or fall) when crews aren't slammed. You'll pay 15-25% less than emergency replacement pricing, and you'll work with the contractor you want rather than whoever's available. The financial math works even better when you factor in the damage that happens while you wait. That small leak you're monitoring? It's rotting your sheathing right now. Every month you delay adds to the substrate repair costs you'll eventually face. The shingle replacement cost stays roughly the same, but the total project cost climbs as secondary damage accumulates.
Seasonal Considerations Beyond Weather
Everyone knows you can't replace a roof in a snowstorm. Fewer people realize that summer heat affects installation quality just as much as winter cold does. Shingles seal through thermal activation. Too hot and they seal prematurely (creating wrinkles and poor adhesion), too cold and they don't seal at all until temperatures rise.
Spring and fall offer the sweet spot: moderate temperatures that allow proper sealing, lower contractor demand that translates to better pricing, and crew schedules that aren't rushed. You'll get more attention to detail when your project isn't sandwiched between two emergency repairs on the same day.
Material costs fluctuate seasonally too. Asphalt prices (the primary component in shingles) follow crude oil markets, which tend to spike in summer. Manufacturers adjust pricing quarterly. Timing your purchase for Q1 or Q4 often saves money on materials before you even negotiate labor costs.
Seasonal Replacement Planning: Timing Your Project
| Season | Temperature Range | Contractor Availability | Pricing | Material Pricing | Installation Quality Risk | Best For |
|---|---|---|---|---|---|---|
| Winter (Dec-Feb) | Below 40°F | High availability | Lowest prices | Lowest | Sealing delays; ice dams during work | Emergency only; warm climate regions |
| Spring (Mar-May) | 45-75°F | Moderate availability | Moderate prices | Moderate | Optimal conditions | Planned replacements; best quality window |
| Summer (Jun-Aug) | 75-95°F+ | Low availability (peak season) | Highest prices | Highest | Premature sealing; heat stress on crews | Avoid unless necessary |
| Fall (Sep-Nov) | 50-70°F | Moderate-high availability | Moderate-low prices | Moderate | Optimal conditions; weather window closing | Planned replacements; second-best window |
Manufacturers have developed improved adhesion systems over the past decade, but they don't advertise them prominently because the technology isn't visual. You can't see better adhesion in a showroom. You only see the results 10-15 years later when one roof still has its granules and another is shedding them into the gutters.
Look for shingles with dual-layer granule embedment or adhesive-enhanced granule systems. These technologies bond granules into the asphalt more securely, reducing the loss that occurs from thermal cycling, hail impact, and normal weathering. Your roofer might not mention this unless you ask, but it's worth the conversation.
Algae Resistance and Whether You Actually Need It
Those black streaks on roofs aren't dirt. They're algae (Gloeocapsa magma) that feeds on the limestone filler in asphalt shingles. It doesn't damage the shingles structurally, but it looks terrible and reduces resale value in neighborhoods where appearance matters.
Algae-resistant shingles incorporate copper-coated granules that release copper ions when it rains. These ions inhibit algae growth. The technology works, but it's not permanent. The copper coating gradually depletes, giving you 10-15 years of protection before you're back where you started.
You need this upgrade if you live in humid climates (especially the Southeast and Pacific Northwest) or if your roof has limited sun exposure due to tree coverage. Skip it if you're in arid regions or if your roof gets full sun most of the day. Algae needs moisture and shade to thrive.
The cost premium is usually minimal (around $5-10 per square), making it worthwhile for most homeowners even if you're not sure you need it. Roof cleaning to remove algae costs more than the upgrade and has to be repeated every few years.
The Hidden Costs Nobody Mentions
Permit Modifications and Inspection Failures
Your initial estimate includes a permit line item, probably $200-500 depending on your jurisdiction. What it doesn't tell you is that this covers a standard replacement only. Any structural modifications, ventilation system changes, or code compliance upgrades discovered during the project trigger additional permit amendments and re-inspection fees.
Inspectors fail roofing projects for reasons you'd never anticipate: improper flashing around that skylight you forgot to mention, deck boards spaced too far apart for the shingle weight you selected, or ventilation ratios that don't meet current code (even though they met code when originally installed). Each failure means another inspection fee and potentially another day of labor to correct the issue.

Older homes face the biggest risk because they're grandfathered under old codes until you do major work. Your replacement project might trigger requirements to upgrade attic ventilation, add ice and water shield in areas that didn't require it originally, or install drip edge where none existed before. These aren't contractor upsells. They're code compliance requirements that add real costs.
Waste Disposal Weight Overages
Your estimate probably includes disposal for one layer of shingles. Sounds reasonable until you realize that your house might have two or even three layers under that top one (common in homes built before regulations limited layering). Each additional layer multiplies your disposal weight and cost.
Wet shingles weigh way more than dry ones. If your roof has been leaking or if rain hits during tear-off, your disposal weight skyrockets. A square of dry shingles weighs around 250 pounds. That same square when saturated can hit 400+ pounds. Disposal companies charge by weight, and that difference comes out of your pocket if the estimate assumed dry removal.
Deck repairs add disposal weight too. Those rotten boards have to go somewhere, and they're heavier than shingles. Contractors estimate conservatively on deck repairs because they can't see the full extent until tear-off happens. When they find more damage than expected, both the repair costs and disposal costs increase.
Get your estimate itemized with specific assumptions about layers, moisture conditions, and anticipated deck repairs. Ask what happens if those assumptions are wrong. A good contractor will give you a per-pound overage rate or build in contingency so you're not surprised.
Substrate Repairs That Multiply During Tearoff
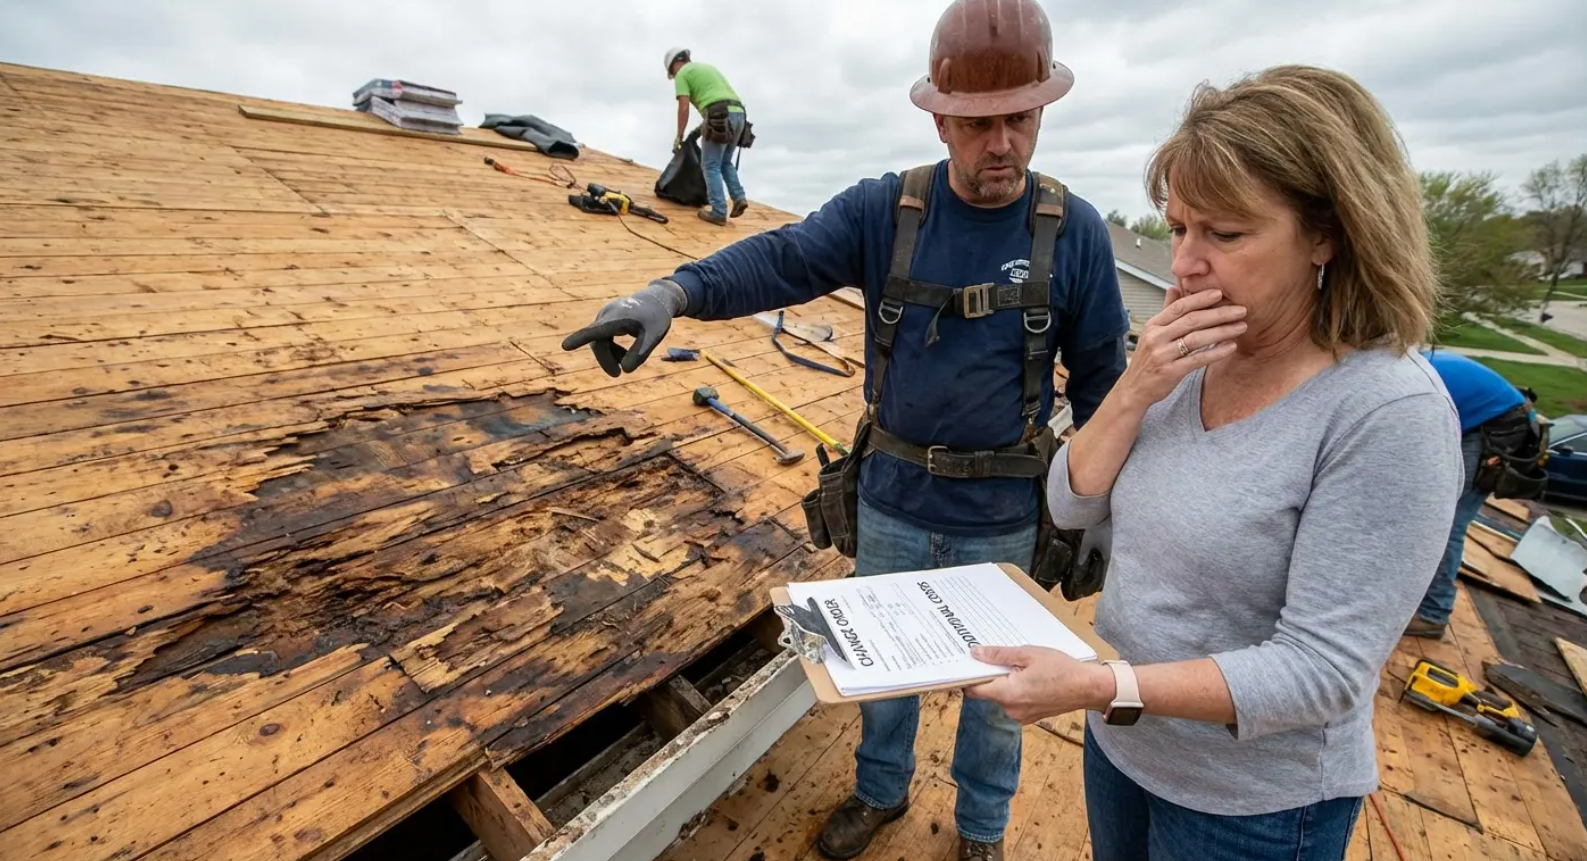
You can't see your roof deck until the shingles come off. This reality creates the most contentious cost conversations in our industry. Contractors who lowball estimates to win bids often underestimate substrate repairs, then hit you with change orders once the roof is open and you're committed.
Substrate damage clusters around predictable areas: valleys where water concentrates, eaves where ice dams form, penetrations where flashing has failed, and anywhere you've had visible interior leaks. A thorough attic inspection before you start (remember that section?) gives you advance warning about where problems likely exist.
Had a 1985 Cape Cod in New England. Got an estimate for standard asphalt shingle roof replacement at $12,500 based on the assumption of minimal substrate damage. The homeowner had noticed a small water stain in the upstairs bedroom ceiling two years prior but it hadn't grown, so they assumed it was a minor issue that had resolved itself. During tear-off, we discovered that a failed valley flashing had been channeling water into the wall cavity for years. What appeared as a small ceiling stain represented extensive damage: 12 sheets of plywood decking needed replacement, the top plates of two wall sections had rotted and required sistering, and the insulation in that wall cavity was saturated and moldy. The substrate repairs alone added $4,800 to the project, a 38% cost increase. Had the homeowner conducted a thorough attic inspection beforehand, they would have seen the moisture tracking down the rafters and could have budgeted appropriately or addressed the issue before it spread.
Deck board replacement costs vary wildly based on access and material. Replacing a few boards on a simple gable roof might run $3-5 per square foot. Replacing large sections on a complex roof with multiple levels and limited access can hit $8-12 per square foot. Plywood or OSB sheathing replacement falls somewhere in between, usually $40-60 per sheet installed.
Set aside 10-15% of your total project cost as substrate repair contingency. If you don't need it, great. If you do, you're prepared instead of scrambling for financing or making compromises that affect the quality of your new roof.
How We Do It Differently
I've spent this entire article walking you through the gaps in typical roofing consultations because I've seen too many homeowners get blindsided by costs and complications they should have known about upfront. At Joyland Roofing, we start every replacement conversation in your attic, not on your roof. That interior inspection I spent three paragraphs on? That's not a nice-to-have. That's step one.
This approach means you know about substrate issues before we write an estimate, not after we've torn off your shingles and you're committed. We itemize every component: permits with specific assumptions about code compliance requirements, disposal with layer counts and moisture contingencies, substrate repairs based on what we've seen in your attic. You might not love the total number, but you'll understand exactly what you're paying for and why.
Look, I can't predict every single thing we'll find under your shingles. Nobody can. But we can identify 80-90% of potential problems before we start, give you accurate pricing for those issues, and build reasonable contingencies for the unknowns. You deserve to make your replacement decision with complete information, not partial estimates that balloon once work begins.
Ready to get an honest assessment of your roof's condition and what replacement will actually cost? We'll start in your attic and work our way out, giving you the full picture before you commit to anything.
What Happens When Your Roof Comes Off
Weather Exposure Windows and Mitigation
Your roof protects everything you own. Removing it, even temporarily, creates real risk that most homeowners don't think about until they're watching clouds roll in with half their sheathing exposed. Understanding this vulnerability helps you prepare and know what questions to ask your contractor about weather protocols.
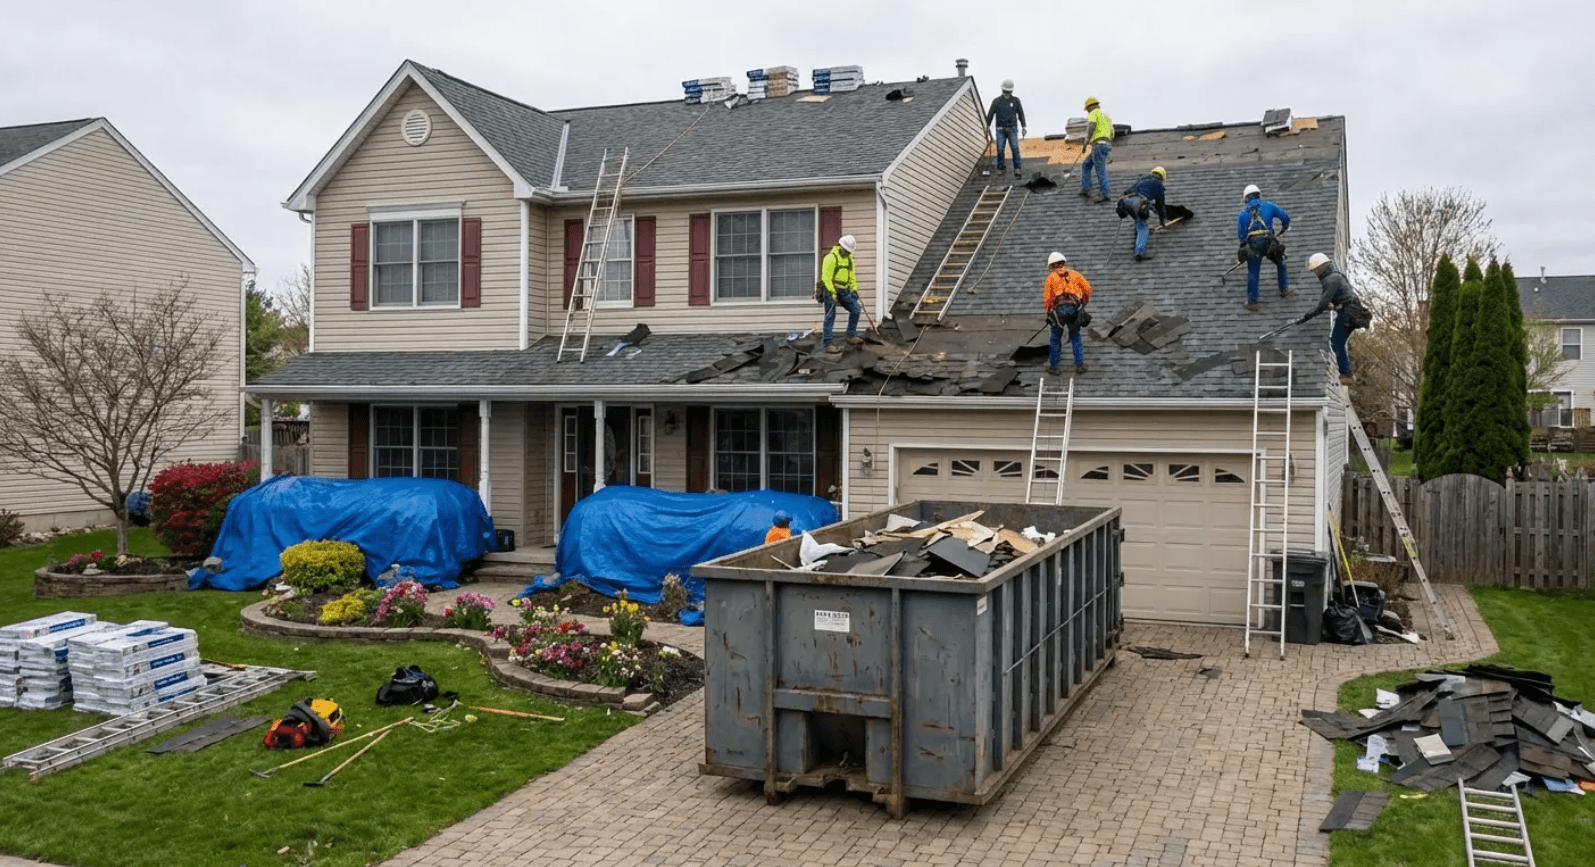
Complete tear-off and replacement usually takes 2-4 days depending on roof size and complexity. During that window, your home is exposed. Quality contractors use tarps and synthetic underlayment to protect open sections, but these are temporary measures. A severe storm during replacement can still cause interior damage even with protection in place.
Timing matters enormously here. This is why I emphasized earlier that proactive replacement during calm weather windows beats emergency replacement during storm season. You have control over exposure risk when you choose your timing. You have none when a leak forces immediate action in the middle of hurricane season.
Ask your contractor about their weather monitoring process. Do they check forecasts before starting each day? At what wind speed or rain probability do they stop work and secure the site? How quickly can they cover exposed areas if weather changes unexpectedly? If your contractor doesn't have a weather protocol, find a different contractor. I'm serious.
Interior Disruption You Should Prepare For
Roof replacement is loud. Not "annoying background noise" loud, but "you can't take a phone call" loud. Tear-off involves pry bars ripping up shingles and hammers removing nails. Installation involves nail guns firing thousands of fasteners. The noise and vibration travel through your entire structure.
Work from home that week? Plan to relocate. Have pets sensitive to noise? Arrange alternative care. Own valuable items hanging on walls? Take them down before work starts. The vibration can and will knock things off walls and shelves.
Pre-Replacement Home Preparation Checklist
Complete these tasks 2-3 days before your roof replacement begins:
Upper Floors & Attic Access:
- Remove all wall-mounted pictures, mirrors, and decorations
- Take down ceiling fans or secure blades with tape
- Cover furniture with drop cloths or plastic sheeting
- Relocate fragile items (lamps, vases, electronics) to lower floors
- Seal attic access points with plastic sheeting and painter's tape
- Remove items stored directly against attic access hatches
Exterior Preparation:
- Move vehicles to street or neighbor's driveway (minimum 15 feet from house)
- Relocate patio furniture, grills, and planters away from house perimeter
- Trim back tree branches within 10 feet of roof line
- Mark sprinkler heads and landscape lighting with flags
- Remove or secure loose items in yard (toys, decorations, hoses)
Family & Pets:
- Arrange alternative workspace if working from home
- Schedule pet boarding or arrange quiet space away from home
- Notify neighbors about project timeline and potential disruption
- Plan meals that don't require extensive kitchen time (vibration affects upper cabinets)
- Identify alternative entry/exit if driveway will be blocked
Documentation:
- Photograph existing landscaping and exterior features
- Document pre-existing interior ceiling conditions
- Clear path for contractor walkthroughs and material access
Dust infiltrates your home despite your best efforts. It works through light fixtures, ceiling fans, and any penetrations in your ceiling. Cover furniture in upper-floor rooms, seal off attic access points with plastic sheeting, and expect to do thorough cleaning after the project completes.
Your driveway and yard become a work zone. Delivery trucks will block access. Dumpsters will occupy parking space for days. Debris will inevitably end up in landscaping despite cleanup efforts. Magnetic sweepers catch most nails, but walking your property after completion to pick up stray fasteners is wise, especially if you have kids or pets.
None of this should deter you from necessary replacement, but knowing what to expect prevents frustration and helps you prepare appropriately.
The Final Walkthrough That Actually Matters
Don't hand over final payment until you've walked the property with your contractor and verified completion to your satisfaction. This isn't about being difficult. It's about making sure you got what you paid for before the crew leaves and your leverage disappears.
Check these items during your walkthrough:
- All vents, flashing, and penetrations properly sealed and secured
- Ridge caps installed straight with consistent exposure
- Valleys running clean with no shingle debris or misaligned courses
- Drip edge visible and properly installed along all eaves and rakes
- No exposed nail heads or unsealed fasteners visible anywhere
- Gutters cleaned and reattached if they were removed
- Complete yard cleanup with no visible debris or nails
- Dumpster removed and driveway/landscaping restored
Look at your roof from multiple angles and distances. Step back across the street and scan for wavy lines or inconsistent patterns that indicate poor installation. Get on a ladder (if you're comfortable) and look closely at the starter course and ridge details where shortcuts often hide.
Most issues are easy to fix if you catch them before the crew demobilizes. That same repair becomes a callback hassle requiring scheduling and return visits if you notice it after everyone's gone. Take your time with this walkthrough. You're inspecting a 20-30 year investment.
Final Thoughts
Don't replace your roof because your neighbor did. Don't do it because some contractor's "already in the area." And definitely don't wait until you're panicking over a leak.
Do it when you actually understand what's wrong with your roof, what it'll really cost, and when the timing makes sense for you. Not your neighbor. You.
Your roof replacement decision shouldn't be driven by your neighbors' choices, a contractor's convenient timing, or panic over a small leak. It should be driven by accurate information about your specific roof's condition, honest understanding of what replacement costs, and realistic assessment of when that replacement makes strategic sense for your situation.
I've covered the overlooked angle throughout this piece: that your attic tells you more about replacement timing than your shingles do, that warranties protect manufacturers more than homeowners, that "too early" beats "just in time" both financially and practically. These insights shift the conversation from reactive crisis management to proactive decision-making.
You now know to look inside before looking up, to read warranties for coverage rather than marketing numbers, to time your replacement strategically rather than waiting for failure. You understand that material selection goes deeper than color charts, that cost estimates hide predictable overages, and that the replacement process itself creates risks worth preparing for.
Take this knowledge into your contractor conversations. Ask the questions I've outlined. Demand the transparency you deserve. Your asphalt shingle roof replacement is probably the largest exterior investment you'll make in your home. Approach it with complete information, and you'll make better decisions at every step.