January 1, 2026
DIY Roof Replacement: Why Most Homeowners Are Asking the Wrong Questions Before They Start
Author
DIY roof replacement might seem like a straightforward way to save money. Measure the roof, buy materials, and follow a few tutorials.
But installing shingles is only a small part of the project. Permits, ventilation, building codes, and long-term liability often determine whether a DIY roof replacement succeeds or turns into an expensive mistake.
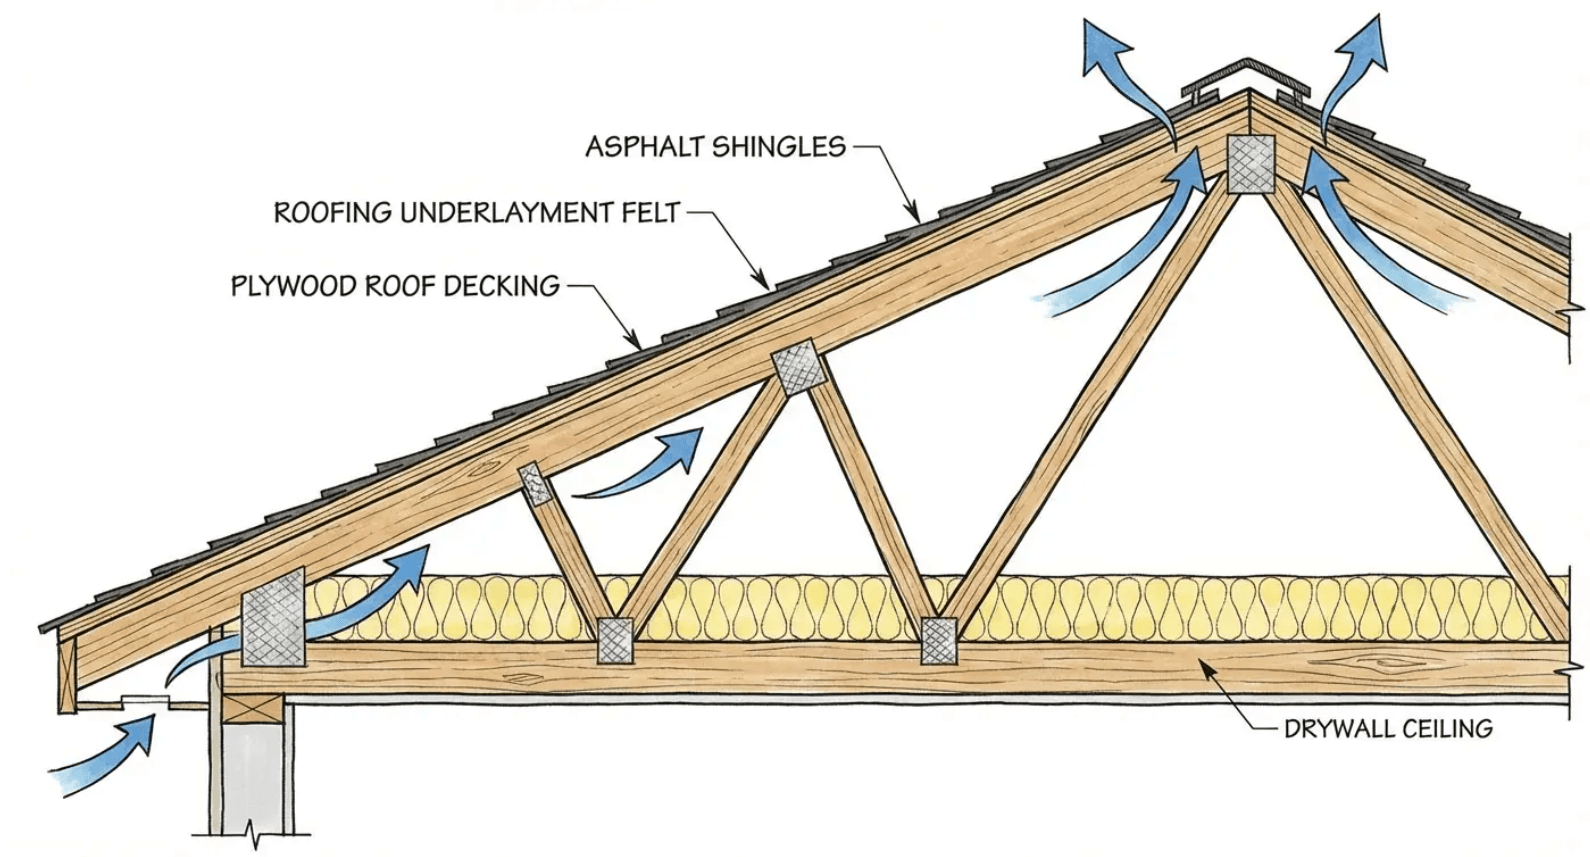
Before starting, it helps to understand how the entire roofing system works. Learn more about the key parts of a roof and shingles to see how everything connects before taking on the project.
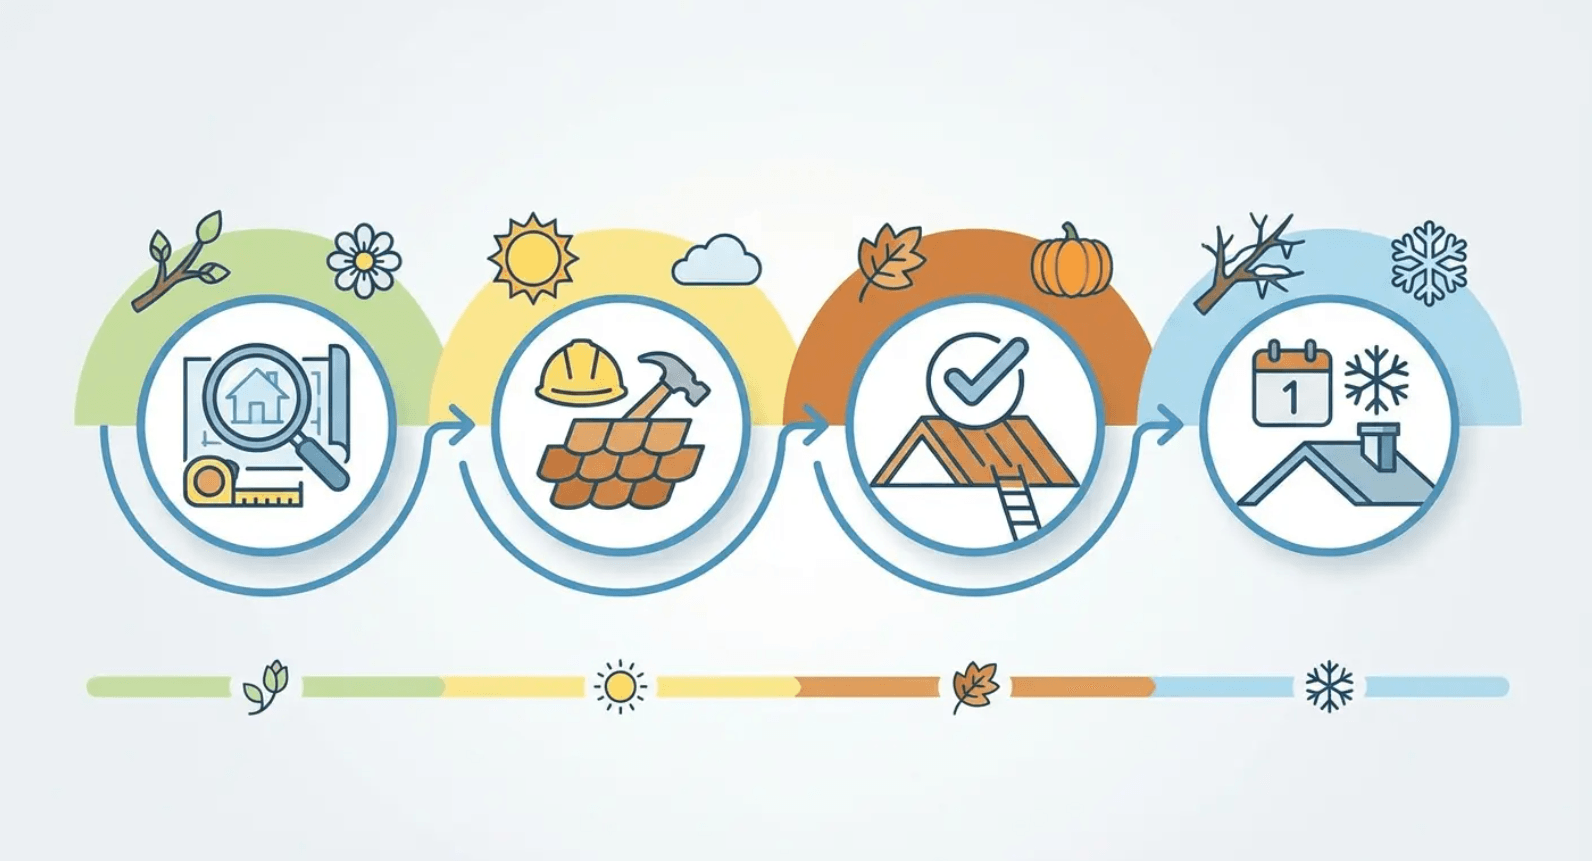
Table of Contents
- Why the "Can I Do This?" Question Misses the Point Entirely
- The Permit Paradox: What Most DIY Guides Conveniently Skip
- Your Roof's Hidden Dependencies (And Why They Matter More Than Shingle Choice)
- The Math Nobody Shows You: True Cost Breakdown Beyond Materials
- Liability Isn't Just Legal: It's Financial, Relational, and Long-Term
- Tools You'll Actually Need vs. Tools You Think You Need
- When DIY Makes Sense (And When It's Just Expensive Pride)
- The Inspection Timeline That Determines Your Success Rate
- What Happens After You Finish (Spoiler: The Work Isn't Over)
- Final Thoughts
TL;DR
Look, I'm going to save you some time. Most DIY roofing content focuses on whether you can physically do this. Wrong question. You should be evaluating permits, building systems, and what happens when things go sideways three years from now. Permits aren't optional paperwork, they're your protection against insurance denials and home sale disasters. Your roof connects to ventilation, insulation, and structural systems you probably didn't know existed. The true cost includes equipment rental, waste disposal, insurance gaps, and your time (which actually has value). Liability extends to your neighbors, your helpers, and future buyers in ways YouTube can't fix. Tool requirements are expensive and specific. And success depends less on installation day and more on inspections before and after. That's the short version.
Why the "Can I Do This?" Question Misses the Point Entirely
You've probably watched the videos. Maybe you've even climbed up to assess the damage yourself, measuring square footage and calculating material costs. The question looping in your head sounds reasonable enough: "Can I physically do this?"
You can learn to install roofing materials in an afternoon. That's not the problem.
What determines your outcome is everything that happens before and after those shingles go down. We're not talking about confidence or experience here. The issue is that residential roofing exists within this whole web of regulations, insurance requirements, and building codes that doesn't care how good your YouTube education was. You're not just replacing a surface. You're modifying a system that connects to your home's ventilation, affects your insurance coverage, requires municipal approval, and creates legal liability that extends years beyond installation day.
Most guides start with material selection or technique tutorials. That's backwards. The first question isn't about your capability. It's about your roof's context within local building codes, your insurance policy's language about contractor requirements, and whether your home's current ventilation system even supports the roofing product you're considering.
The Systems Reality Nobody Explains Upfront
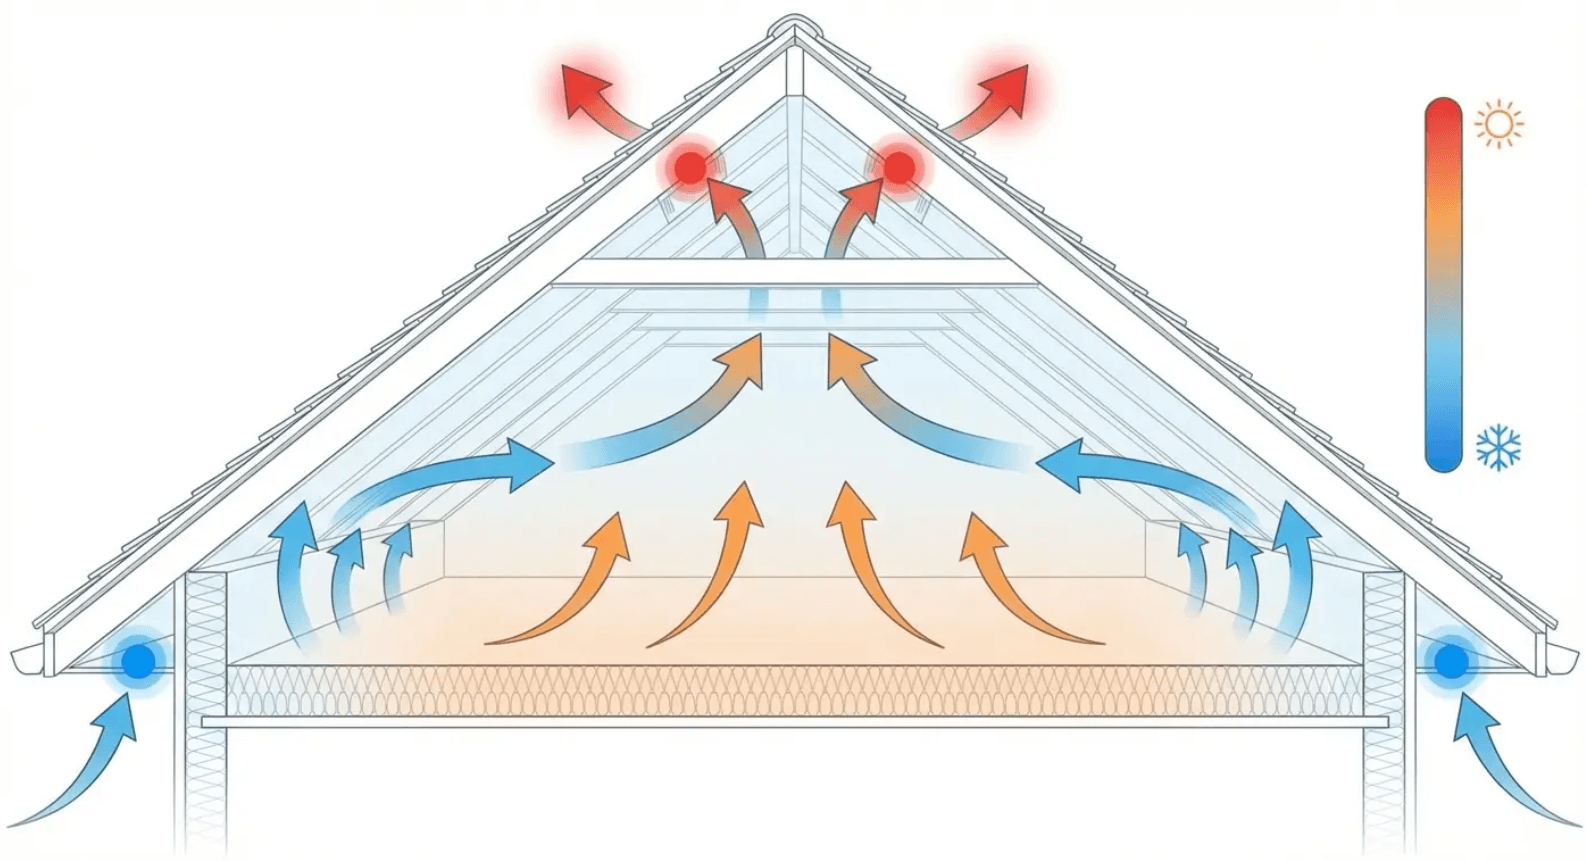
Your roof isn't a standalone component. It's the top layer of a moisture management system that includes attic ventilation, insulation placement, ice dam prevention, and structural load distribution. Change one element without understanding the others, and you've created problems that won't show up for years.
Adequate ventilation requires intake-to-exhaust ratios based on your attic's square footage. Install the wrong shingle type over insufficient ventilation, and you'll void the manufacturer's warranty while accelerating shingle degradation. The damage won't appear immediately, which is exactly why this mistake is so common. You'll notice it three years later when granules are shedding prematurely and you're trying to file a warranty claim that gets denied because your ventilation doesn't meet the product's installation requirements.
Take this guy in Minnesota who installed architectural shingles over his existing ventilation system without checking the intake-to-exhaust ratio. The attic had only gable vents. No soffit intake or ridge exhaust. Within two years, the shingles began curling at the edges due to excessive attic heat buildup. When he filed a warranty claim, the manufacturer's inspector measured the ventilation and found it provided only one-third of the required airflow. The warranty was voided, and he faced replacing a nearly-new roof out of pocket. A $15,000 mistake that proper pre-installation assessment would have caught.
Same thing applies to underlayment choices, which depend on your roof's pitch, your climate zone's temperature ranges, and whether you're in a high-wind region. These aren't preferences. They're code requirements that vary by jurisdiction and directly affect your home's insurability. When you approach DIY roof replacement without understanding these interconnected systems, you're setting yourself up for failures that won't show up until warranties have expired and you're stuck with the bill.
The roof installation process demands knowledge that extends way beyond hammering nails. You need to understand how air moves through your attic, how temperature differentials create condensation, and how your local climate affects material performance. Most DIYers don't even know these questions exist until something goes wrong.
The Permit Paradox: What Most DIY Guides Conveniently Skip
Permits. Yeah, I know. Nobody wants to talk about permits. But we're going to because this is where DIY roof jobs blow up in your face three years later.
You'll see phrases like "check your local requirements" or "permits may be necessary," which is code for "we know you need them but don't want to discourage you." Let me be clear: permits aren't optional in most jurisdictions for full roof replacement. They're legally required, and skipping them creates a cascade of problems that won't appear until the worst possible moments. We're talking about home sale complications (inspectors will notice unpermitted work), insurance claim denials (your policy likely requires permitted work for coverage), and liability issues if someone gets injured during your project.
The regulatory landscape around DIY home repairs has tightened in recent years. According to a recent report from AOL, many repairs that homeowners once tackled without hesitation now fall under "unlicensed work" categories, with roofing being one of the most scrutinized areas. Doing work that requires licensing or permits without proper authorization can lead to fines, failed insurance claims, and safety risks that weren't as strictly enforced even five years ago.
The permit process isn't designed to stop you. It's designed to ensure your work meets minimum safety standards and doesn't create hazards for future occupants. When you pull a permit, you're getting your work inspected by someone who reviews roofing projects daily and can catch mistakes before they become expensive failures.
Think about what you're actually saving by skipping permits. A few hundred dollars in fees? Maybe a week of waiting for approval? Compare that to the thousands you'll lose when problems surface later. The math doesn't work in your favor.
What Happens When You Skip the Permit
You finish your DIY roof replacement, and nothing bad happens immediately. The shingles look fine, there are no leaks, and you've saved thousands of dollars. Five years later, you're selling your home. The buyer's inspector asks for permit records. You don't have them.
Now you're in a negotiation where the buyer either walks away or demands a price reduction to cover the risk they're assuming. In some markets, you'll need to obtain a retroactive permit (which requires removing sections of roofing to verify proper installation) or hire a licensed contractor to certify the work meets code. Both options cost more than the original permit would have.
Insurance implications are worse. You file a claim after a storm damages your roof. During the investigation, your insurance company discovers the roof was installed without permits. Depending on your policy's language, they can deny the entire claim on the grounds that unpermitted work violates your coverage terms. You're now paying for storm damage repairs out of pocket, plus you still have an unpermitted roof that needs to be brought into compliance.
Let me walk you through what actually happens in different situations. You sell your house five years later. The inspector asks for permits. You don't have them. Now the buyer either walks (and you've lost the sale) or they knock $5,000 to $8,000 off the price "to cover the risk." And you take it, because what choice do you have? That's the home sale situation, and it happens constantly.
Insurance claims are even uglier. You file after a storm. They discover no permit during their investigation. Claim denied. You're out anywhere from $8,000 to $25,000 or more, depending on the damage. The permit would have cost you $300.
Neighbor complaints are less common, but if you piss off your neighbor (and trust me, roofing projects piss off neighbors), they can report you. Daily fines until you fix it. Some cities charge $250 to $1,000 per day until you come into compliance.
See the pattern? The permit costs a few hundred bucks. Every consequence costs thousands.
The timeline matters here. These consequences don't show up when you're standing back, admiring your work, feeling like a badass. They surface years later, often at the worst possible moment (during a sale, after a disaster, or when you're already dealing with other financial stress).
How to Actually Figure Out What Your City Wants
Your city or county building department's website should list permit requirements, but the information is often incomplete or outdated. You need to call and speak with someone in the permitting office. Don't email. Call. Ask directly: "What are the permit requirements for a complete roof replacement on a single-family home?" Don't ask if you need a permit (they'll assume you're trying to avoid it). Ask what the requirements are.
Request the inspection schedule. Most jurisdictions require at least two inspections: one after underlayment installation and before shingles go down, and a final inspection after completion. This timeline affects your project scheduling, especially if weather is a factor.
Before you do anything, here's what you actually need to know:
Can I pull a permit as a homeowner, or does it have to be a licensed contractor? (This matters)
What's the inspection schedule? (This affects your timing)
How much does it cost and how long does approval take?
What documentation do I need? (Some places want plans, photos, material specs)
Has anything changed in the code recently? (Cities update this stuff)
Are there penalties for unpermitted work discovered later? (Spoiler: yes)
Does work have to stop between inspection stages?
Write down who you talked to and when. You'll need it later.
If you're in an HOA, their architectural review requirements may exceed municipal code. You might need approval for color, material type, or even installation timeline. Check your HOA's covenants before you order materials. I've seen homeowners complete entire roof replacements only to discover their HOA requires a different shingle color or style. Tearing off a brand-new roof because you didn't read the fine print is an expensive lesson in due diligence.
Your Roof's Hidden Dependencies (And Why They Matter More Than Shingle Choice)
The shingles you see from the street are the least important decision you'll make. What matters is the integrated system underneath and around them: ventilation pathways, moisture barriers, thermal breaks, and structural support.
Most homes have existing ventilation systems that were designed for the original roofing material and installation method. Ridge vents, soffit vents, gable vents, and attic fans all need to work together in certain ratios. Add or change one element, and you've potentially disrupted the entire airflow pattern.
Ventilation Math That Determines Warranty Validity
Shingle manufacturers are picky about ventilation, and they should be. You need one square foot of ventilation for every 150 square feet of attic space, split evenly between intake (soffit vents) and exhaust (ridge vents or other high-point ventilation). Sounds simple, right? It's not. Because that ventilation has to be balanced between intake and exhaust, and most houses get this completely wrong.
Measure your existing ventilation before you order materials. If you're short, you'll need to add vents, which means additional cutting and installation work you probably didn't budget for. Insufficient ventilation causes shingles to overheat, dramatically reducing their lifespan. We're talking about a 30-year shingle failing in 15 years because attic temperatures regularly exceeded the material's design tolerance.
The opposite problem is less common but equally damaging: over-ventilation in cold climates can draw too much heated air from your living space, increasing energy costs and creating ice dam conditions at the roof edge. Balance is everything, and achieving that balance requires understanding your climate zone and how your home's systems interact.
Here's what you're looking at for different attic sizes. A 900 square foot attic needs 6 square feet of total ventilation: 3 square feet of soffit intake and 3 square feet of ridge or gable exhaust. The most common problem? Missing soffit intake entirely. For a 1,200 square foot attic, you need 8 square feet total (4 intake, 4 exhaust), and the usual issue is insufficient ridge vent. A 1,500 square foot attic requires 10 square feet total (5 intake, 5 exhaust), and blocked soffit vents are common. At 1,800 square feet, you need 12 square feet total (6 intake, 6 exhaust), and I see a lot of houses with only gable vents and no actual airflow. For a 2,400 square foot attic, you're looking at 16 square feet total (8 intake, 8 exhaust), and usually there's a combination of issues.
Moisture Barriers and Climate-Specific Requirements
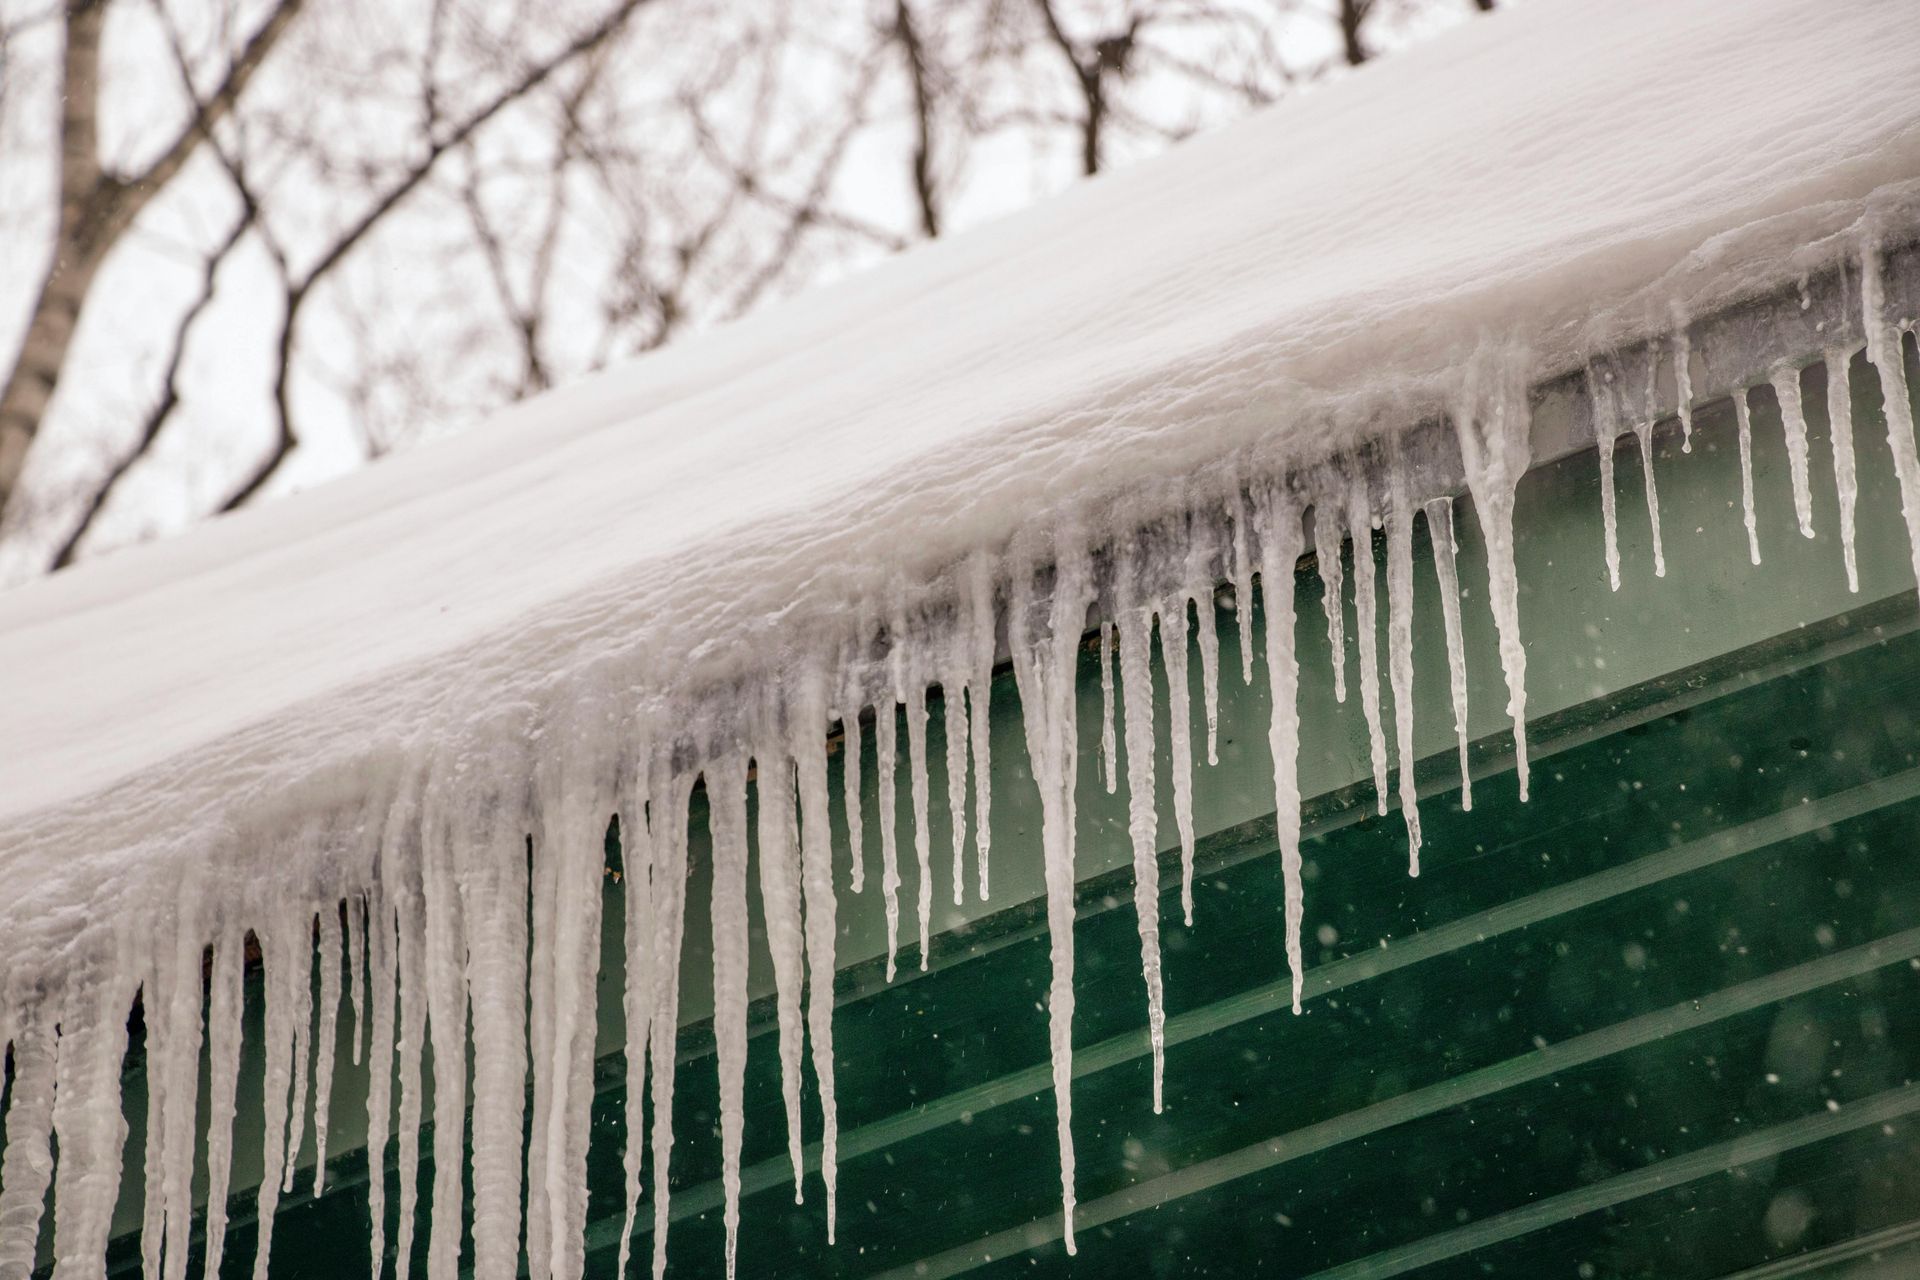
Your climate zone determines your underlayment requirements, and this isn't negotiable. Cold climate jurisdictions require ice and water shield coverage extending at least three feet inside the exterior wall line. This protects against ice dams, which form when heat escaping through your roof melts snow that then refreezes at the colder roof edge.
Standard felt underlayment doesn't provide adequate protection in these conditions. You need self-adhering modified bitumen membrane in ice dam-prone areas. Check your local code amendments (not just the base building code) for what's actually required.
High-wind coastal areas have different requirements. You might need enhanced attachment schedules for shingles (more nails per shingle) and certain underlayment products rated for high wind exposure. These requirements exist because standard installation methods fail in your climate conditions.
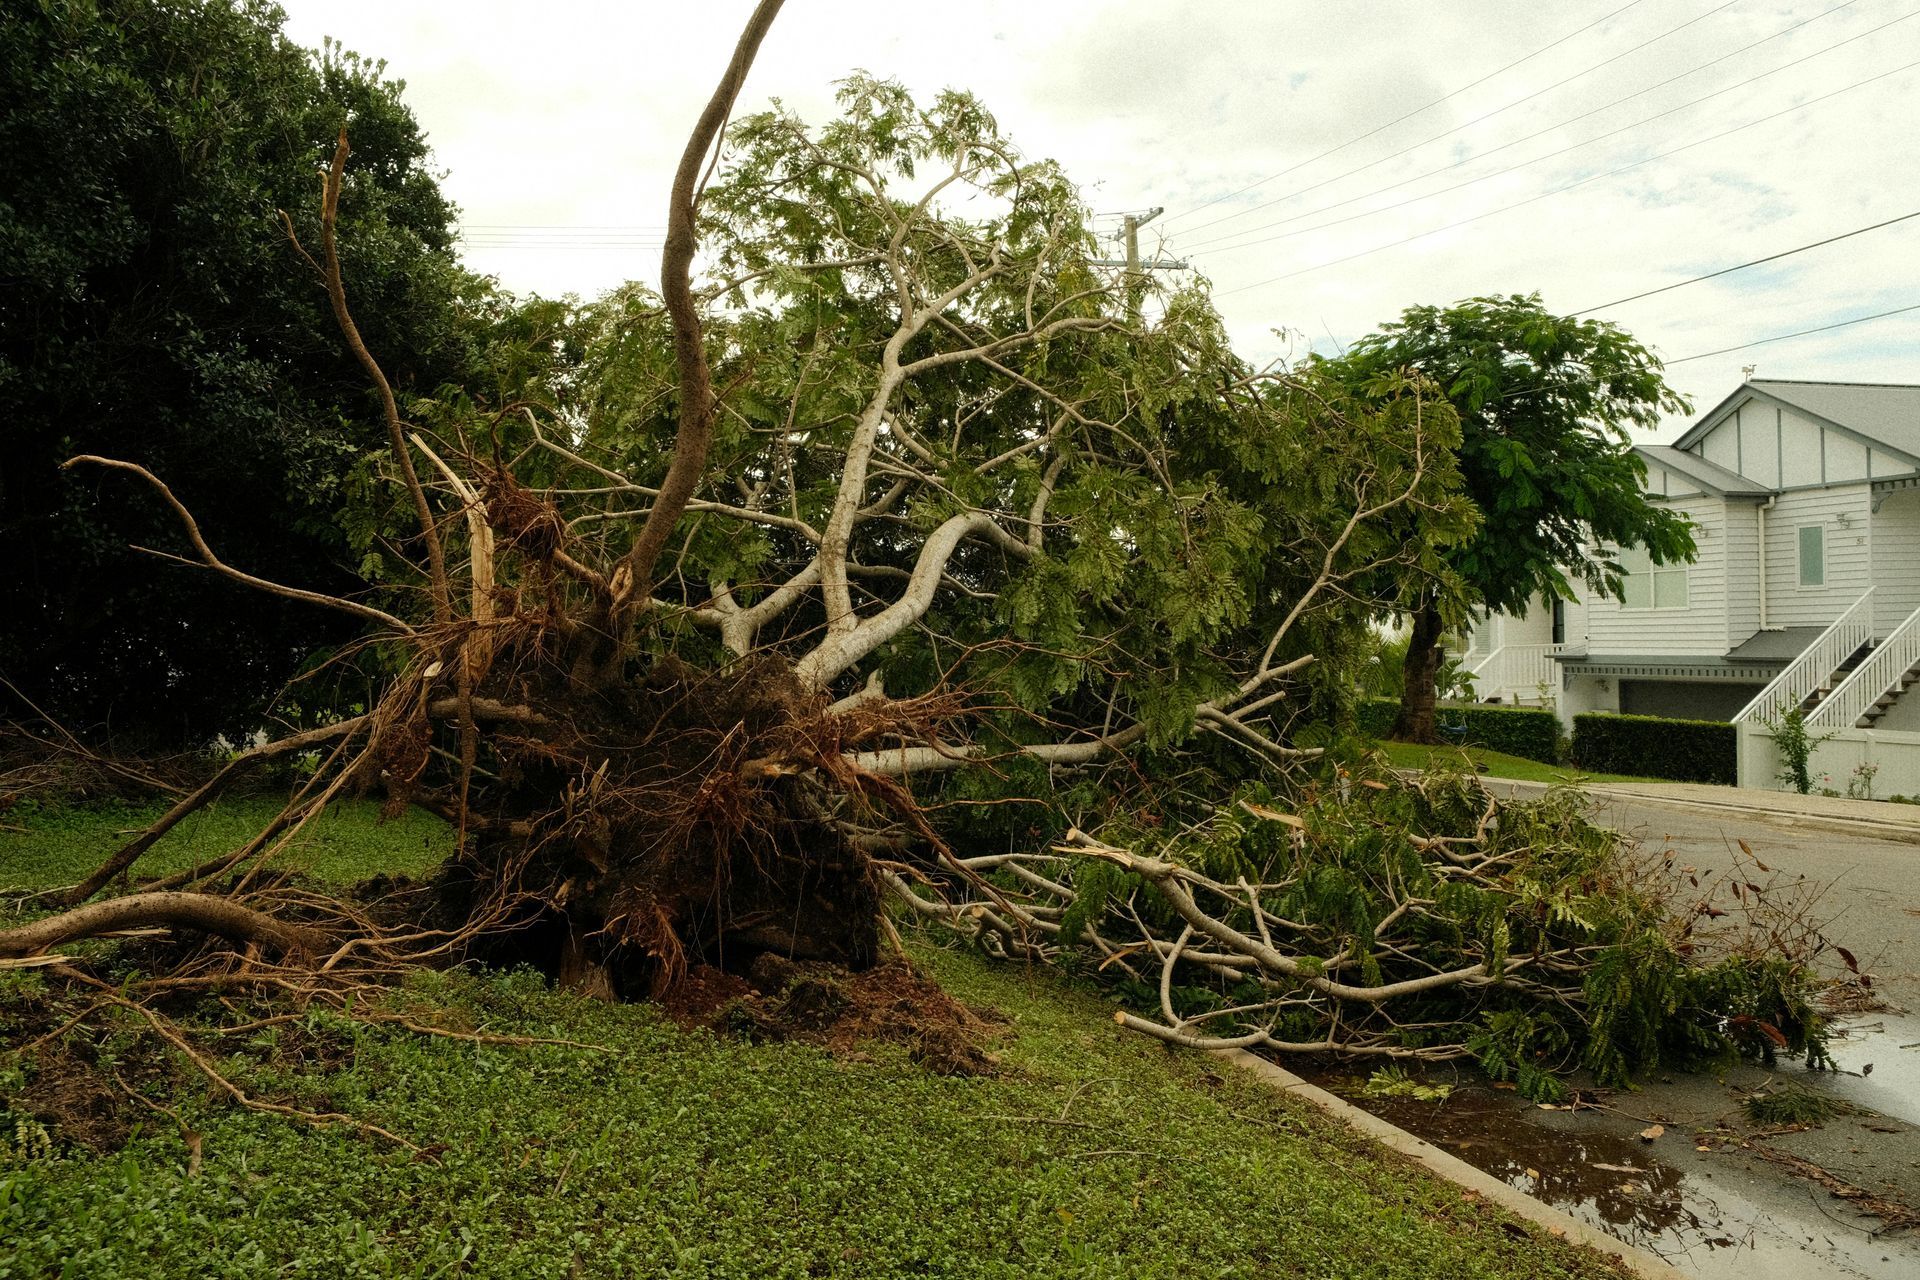
My wife's cousin Jake (we just call him my buddy now, whatever) did his roof in 2019. South Carolina, right on the coast. He used the cheap felt underlayment because the synthetic stuff was like $400 more. Hurricane came through in 2020. Not even a big one, Category 2. Roof came off in sections. Insurance said nope, not up to coastal code . Jake paid $18,000 out of pocket. We don't talk about it at family dinners anymore.
Climate requirements aren't suggestions. They're the minimum standards developed from decades of observing how roofs fail in your environment. Ignoring them because you found a cheaper material or a faster installation method is gambling with your home's protection and your financial security.
The Math Nobody Shows You: True Cost Breakdown Beyond Materials
You've calculated material costs and compared them to contractor quotes. The difference looks significant, maybe $8,000 to $12,000 depending on your roof size. That gap is real, but it's not your actual savings because you're not accounting for the complete cost picture.
Equipment and Rental Costs Most DIYers Forget
A pneumatic roofing nailer rental costs $40 to $75 per day. You'll need it for at least three to five days for an average-sized roof, assuming good weather and no complications. The compressor to power it adds another $50 to $80 per day. You can't use a standard framing nailer because the coil capacity and nail length are wrong for roofing applications.
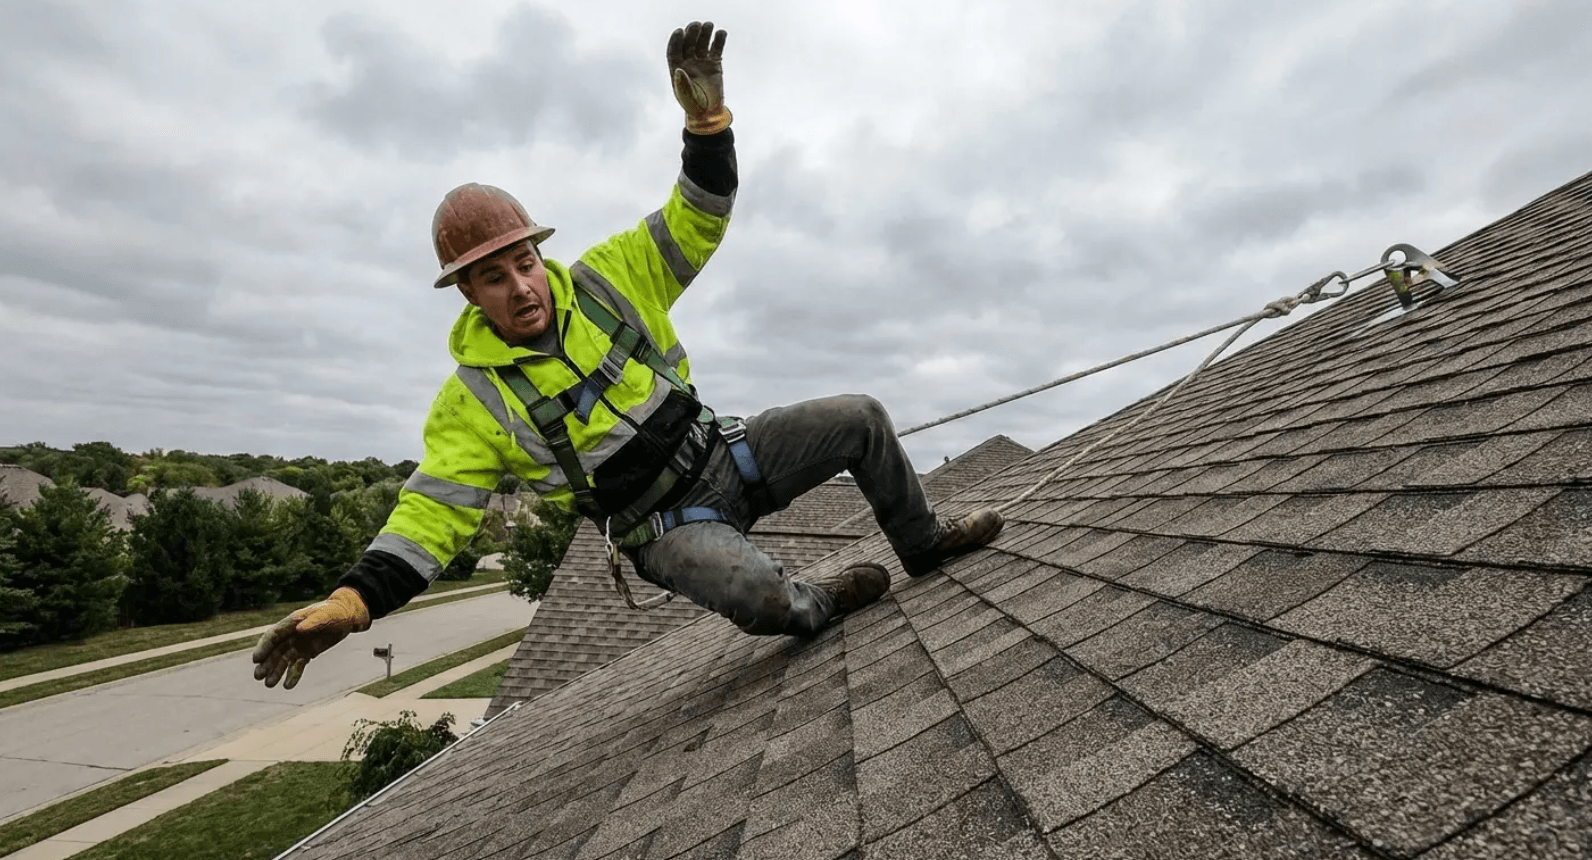
Roof brackets or scaffolding rental runs $200 to $500 depending on your roof's height and pitch. You might think you can skip this and just be careful, but working on a sloped surface all day without proper staging is how people fall. OSHA requires fall protection for any work above six feet, and while those regulations don't legally apply to homeowners, the physics of falling certainly does.
A dumpster or waste container for old roofing material costs $300 to $600 for the rental period. You're looking at 30 to 50 pounds of waste per 100 square feet of roof. That's multiple tons of material that needs to go somewhere, and your regular trash service won't take it.
The Insurance Gap Nobody Mentions
Your homeowner's insurance covers accidents that happen to guests on your property, but it probably doesn't cover injuries to people helping with your DIY roofing project. The distinction matters because DIY roofing is inherently dangerous, and if your friend or family member falls and gets injured, you could be personally liable for their medical costs.
Professional contractors carry workers' compensation insurance and general liability coverage. If their employee gets injured, workers' comp covers it. If they damage your property or a neighbor's property during installation, their liability policy covers it. You have none of these protections during DIY work.
Check your policy's language about DIY projects and volunteer labor. Some policies explicitly exclude coverage for injuries related to construction activities performed by non-professionals. You might need a separate liability rider for the project duration, which adds cost you probably didn't anticipate.
Opportunity Cost and Timeline Reality
A professional crew replaces an average roof in one to three days. Your DIY timeline will be two to four weeks of weekends, assuming good weather and no major complications. That's 80 to 120 hours of labor.
Calculate your hourly value. If you make $50,000 annually, your time is worth roughly $25 per hour. At 100 hours, that's $2,500 in opportunity cost (time you could have spent on income-generating work or activities you enjoy). Add that to your material and equipment costs, and your "savings" shrinks considerably.
Weather delays compound the timeline problem. If you're halfway through tear-off when rain is forecast, you need to tarp the exposed sections and wait for dry conditions. Every delay adds rental costs for equipment and increases the risk of water damage to your home's interior.
Here's how to actually calculate what this will cost you:
Materials:
Start with shingles, underlayment, ice and water shield, drip edge and flashing, nails and fasteners, ridge cap, and ventilation components. Add those up for your materials subtotal.
Equipment Rental:
Roofing nailer for however many days you need, air compressor for the same period, scaffolding or brackets, safety harness and equipment, dumpster and waste removal. That's your equipment subtotal.
Permits and Fees:
Building permit, inspection fees, HOA review fee if applicable. Permits subtotal.
Opportunity Cost:
Your estimated hours times your actual hourly value. Be honest here.
Insurance and Risk:
Additional liability coverage if you can get it, plus a contingency for mistakes (budget 10-15% of your total). Risk subtotal.
Add it all up. That's your TOTAL DIY COST. Now compare it to your professional quote. What's your actual savings? Or is it actually a loss?
Liability Isn't Just Legal: It's Financial, Relational, and Long-Term
Liability sounds abstract until it becomes your problem. I'm not just talking about lawsuits (though those are possible). The liability you assume with DIY roofing extends into your finances, your relationships, and your home's future marketability in ways that persist long after the shingles are down.
When Your Roof Becomes Your Neighbor's Problem
Shingles that aren't properly installed can blow off in moderate winds. When they do, they don't just disappear. They land on your neighbor's car, damage their siding, or break their windows. You're liable for that damage because it resulted from your improper installation.
Your homeowner's insurance might cover sudden accidents, but damage caused by faulty workmanship often falls into a gray area. If the insurance adjuster determines the blow-off happened because you didn't follow manufacturer installation specs, they can deny your claim. You're paying for your neighbor's repairs out of pocket, plus dealing with the relationship damage that comes from your project causing them expense and inconvenience.
Drainage problems create ongoing liability. If your DIY roof replacement changes water flow patterns and now your runoff floods your neighbor's foundation, you've created a recurring problem that could lead to legal action. Professional roofers understand drainage requirements and slope calculations that prevent these issues. Most DIYers don't even know to consider them.
The Friend You Asked for Help Who Got Hurt
You asked your brother-in-law to help because he's handy and you didn't want to do this alone. He fell from the roof and broke his arm. Now you're facing his medical bills, potential lost wages if he can't work, and family dynamics that will never be quite the same.
This happens more often than you'd think. Roofing is the construction activity with the highest injury rate, and most of those injuries happen to inexperienced workers (which includes your well-meaning helpers). Your relationship with that person changes permanently when your project puts them in the hospital.
The financial exposure is real. If their health insurance doesn't cover the full cost of treatment, they might look to you for the difference. If they can't work for weeks or months, they might expect you to cover lost income. You don't have workers' compensation insurance, so these costs come directly from your pocket. The money you thought you were saving by DIY gets consumed by medical bills and lost wages, plus you've damaged a relationship that matters to you.
Tools You'll Actually Need vs. Tools You Think You Need
Tool lists in DIY roofing guides tend to minimize requirements or suggest substitutions that don't work in practice. You can't successfully replace a roof with the contents of a typical homeowner's garage, and attempting to do so creates installation problems that compromise the roof's performance.
The Non-Negotiable Equipment List
A pneumatic coil roofing nailer is required, not optional. Hand-nailing shingles is technically possible but impractical for an entire roof. You'll spend three times as long, and your nail depth consistency will be poor (which affects shingle performance and warranty coverage). The nailer needs to be a roofing nailer, not a framing nailer, because the magazine angle and nail collation are different.
A quality roofing shovel or tear-off tool costs $40 to $80. The cheap versions bend or break during removal of the first few courses. You're working with a tool that's under constant prying stress, and inadequate quality means you'll be making additional trips to the hardware store mid-project.
Chalk lines, speed squares, and measuring tapes are obvious, but you also need a quality utility knife with plenty of replacement blades. You'll go through 20 to 30 blades on an average roof because cutting through shingle material dulls them quickly. Trying to work with dull blades slows you down and creates imprecise cuts that affect installation quality.
Safety equipment isn't optional despite what you might see in DIY videos. A proper fall arrest system (harness, rope, and anchor points) costs $200 to $400 to purchase or $50 to $100 to rent. Roof brackets or scaffolding we mentioned earlier. Knee pads, work gloves, and safety glasses are minor costs but necessary for working all day on an abrasive surface.
Side note: I once watched a YouTube video where a guy was roofing in flip-flops. Flip-flops. On a 7/12 pitch. I think about that video sometimes when I can't sleep.
Why Your Regular Tools Won't Cut It
You think you can use your regular hammer? You can't. I mean, you physically can, but after 200 shingles your arm will be screaming and half your nails will be crooked. Ask me how I know. Roofing hammers have specific features: a textured face to prevent slipping on nail heads, a hatchet edge for cutting shingles, and a gauge for consistent nail depth. Using a standard claw hammer means inconsistent nail depth, which is one of the primary causes of premature shingle failure.
A regular circular saw can cut shingles, but it's slower and less precise than a hook blade utility knife. More importantly, circular saws on a roof create safety risks that aren't worth the minor time savings. You're working on a sloped surface with limited stable positioning, and power tools in that environment increase accident risk significantly.
Your home air compressor probably doesn't have sufficient CFM (cubic feet per minute) output to run a roofing nailer continuously. Roofing nailers require 2.5 to 3.5 CFM at 90 PSI. Most homeowner compressors are rated for 2.0 CFM or less. You'll spend more time waiting for pressure to rebuild than nailing, turning a one-day installation into three days.
When DIY Makes Sense (And When It's Just Expensive Pride)
Can you DIY your roof? Sure. Should you? Probably not. I know that's not what you want to hear, but I'd rather you be pissed at me now than broke later.
DIY roof replacement isn't universally a bad idea, but it's the right choice for a much smaller percentage of homeowners than the volume of DIY content would suggest. Whether it makes sense for you depends on factors that have nothing to do with your general handiness or willingness to work hard.
The Scenarios Where DIY Actually Works
Simple gable roofs with minimal penetrations (no skylights, few pipe boots, straightforward ridge lines) on single-story homes are viable DIY candidates. The complexity is manageable, the safety risks are reduced compared to multi-story homes, and the likelihood of making costly mistakes is lower.
You have genuine construction experience, not just general home repair skills. I'm talking about previous work that involved building systems, code compliance, and projects that required permits and inspections. If your experience is limited to interior projects or basic repairs, you don't have the knowledge base to anticipate the problems that arise during roofing work.
Your local jurisdiction allows homeowner-installed roofs with reasonable permit and inspection requirements. Some areas make DIY roofing effectively impossible by requiring licensed contractor involvement at various stages. Research this before you commit to DIY.
You have reliable help from people with relevant experience. Roofing isn't a solo project for safety and practical reasons. If you're recruiting inexperienced friends, you're just multiplying the risk without adding meaningful capability.
The regulatory environment has shifted in recent years. A 2025 report from AOL highlights that many home repairs once considered straightforward DIY projects now require licensed professionals in most jurisdictions. While full roof replacements have traditionally required permits, enforcement has intensified, and the consequences for unpermitted work have become more severe, particularly regarding insurance claims and home sales. This trend means that even if your roof is technically simple enough for DIY installation, the regulatory setup may make professional installation the only practical option.
The Red Flags That Mean You Should Hire Out
Complex roof geometries with multiple valleys, dormers, or intersecting planes are beyond most DIYers' capability. The flashing details at these intersections are where most leaks originate, and getting them right requires experience you don't gain from a single project. You might install the shingles correctly and still have a roof that leaks because the valley flashing is wrong.
Steep pitch roofs (anything above 6/12 pitch) create safety challenges that aren't worth the risk for inexperienced workers. The steeper the pitch, the more difficult it is to maintain secure footing and the more likely falls become. Professional roofers have experience working on steep slopes and equipment designed for those conditions.
You're on a tight timeline. If you need the roof completed quickly (maybe you're trying to close on a sale or prevent further water damage), DIY timelines are too unpredictable. Weather delays, learning curves, and unexpected complications mean you can't reliably predict completion dates.
Your roof has existing damage beyond the surface layer. If there's rotten decking, damaged trusses, or structural issues, you're not just replacing roofing material anymore. You're into repairs that require carpentry skills and structural knowledge most homeowners don't have. Discovering these problems mid-project when your roof is torn off is a nightmare scenario.
The Inspection Timeline That Determines Your Success Rate
Installation is the visible part of roofing work, but success depends on inspections that happen before you order materials and continue for months after the last shingle goes down. In my experience, DIY projects fail not because of installation errors but because of problems that weren't caught during pre-work assessment or post-installation monitoring.
The Pre-Installation Assessment You Can't Skip
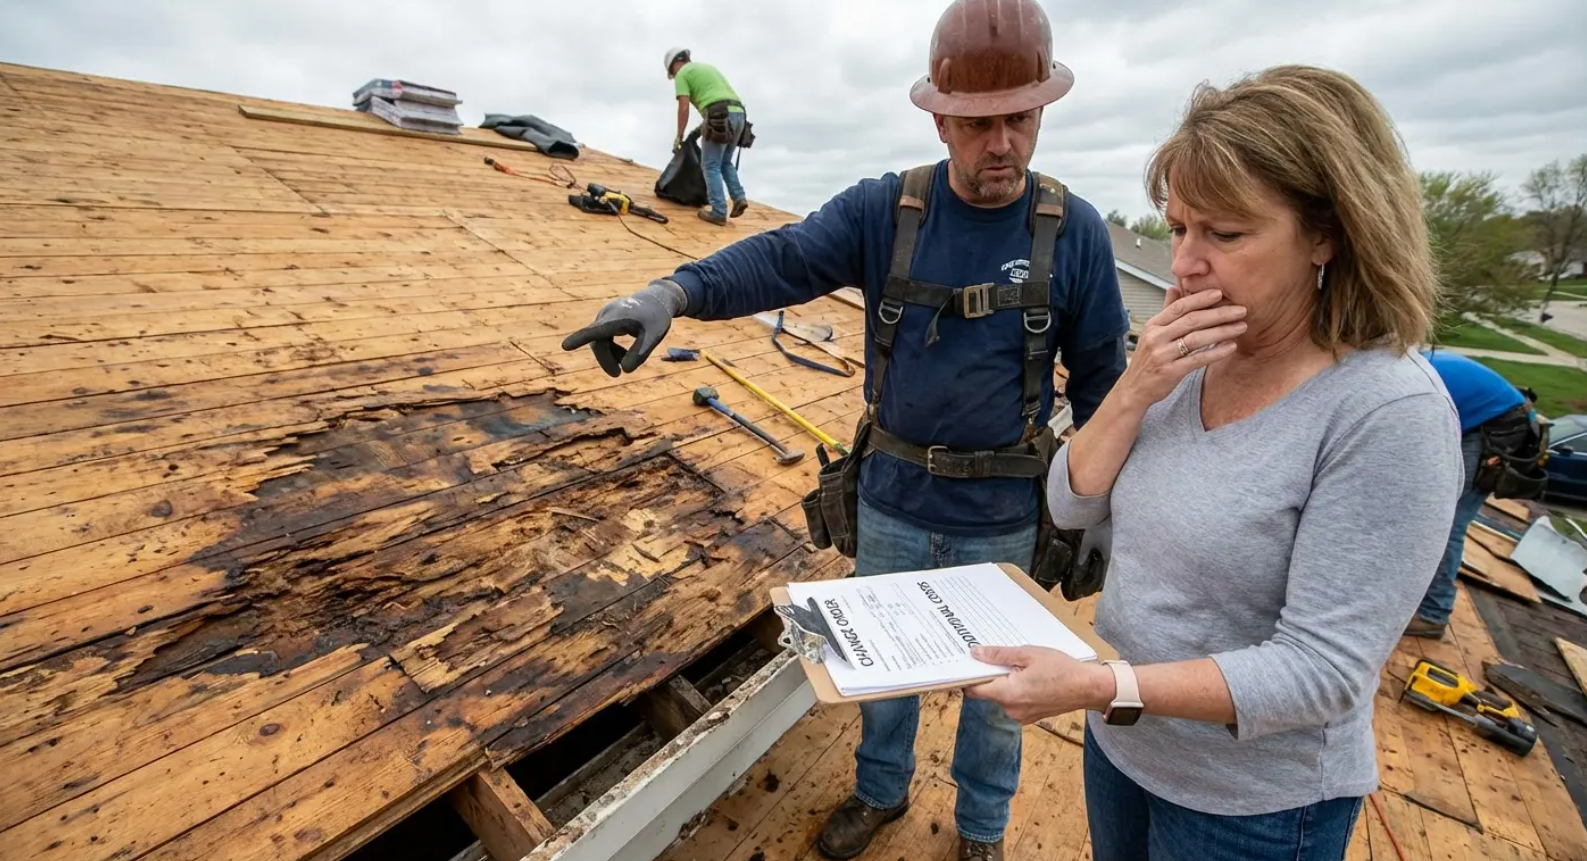
Get in your attic before you order materials. You're looking for signs of water damage on the underside of the roof decking, which appear as staining, mold, or soft spots. If you find any, you have rot that needs to be addressed before new roofing goes down. This changes your project scope and budget significantly.
Check for adequate decking attachment. Older homes might have skip sheathing (boards with gaps between them) rather than solid decking. You can't install modern shingles over skip sheathing. You'll need to add plywood or OSB sheathing over the existing boards, which is additional material cost and labor you probably didn't anticipate.
Evaluate your existing ventilation system. Count your soffit vents and measure your ridge vent or other high-point ventilation. Calculate whether you have the required ventilation ratio (usually 1:150 or 1:300 depending on your code). If you're short, you need to add vents before roofing installation.
Structural issues demand attention: sagging ridge lines, broken trusses, or areas where the roof plane isn't uniform. These problems need to be fixed before roofing work begins, and they require carpentry skills beyond basic roof installation.
Mid-Project Checkpoints That Prevent Failures
After tear-off, before you install any new materials, inspect every square foot of exposed decking. You're looking for soft spots, damaged areas, or sections that need replacement. Walk the entire roof carefully (with proper safety equipment) and mark any problem areas. Replace damaged decking before underlayment goes down.
After underlayment installation, verify that all seams are properly overlapped and sealed. Underlayment is your secondary water barrier, and gaps or improperly sealed seams create leak pathways. Check that ice and water shield extends to the required distance inside the exterior wall line and that all penetrations (pipe boots, vents) are properly flashed.
During shingle installation, periodically step back and check your lines. Shingles that aren't straight become increasingly obvious as you progress up the roof. Catching alignment problems early means you can correct them before you're too far along. Use chalk lines frequently to maintain straight courses.
Verify nail placement and depth throughout installation. Nails should penetrate through the shingle and into the decking by at least three-quarters of an inch. Overdriven nails (driven too deep) tear the shingle and create potential leak points. Underdriven nails don't provide adequate hold and can lead to blow-offs.
Post-Installation Monitoring Most DIYers Ignore
Your first heavy rain is the real test of your installation quality. Get in your attic during or immediately after the rain and look for any signs of water intrusion. Check around all penetrations, in valleys, and along the ridge line. Any moisture means you have a problem that needs immediate attention.
After your first winter (if you're in a cold climate), check for ice dam formation and verify that your ventilation system is functioning properly. Ice dams indicate either insufficient insulation in your attic or inadequate ventilation. Both problems accelerate shingle degradation and create leak risks.
At six months post-installation, inspect your roof from the ground with binoculars. Look for any shingles that appear lifted, damaged, or missing. Check that all flashing is still properly sealed and that no sealant has failed. Early detection of problems allows for repairs before they become major failures.
Annually, repeat this inspection. Roofing problems develop over time, and catching them early prevents minor issues from becoming expensive repairs. This ongoing monitoring is part of the true cost of DIY work. It's your responsibility forever, not just until installation is complete.
What Happens After You Finish (Spoiler: The Work Isn't Over)
You've installed the last shingle, cleaned up the job site, and returned your rental equipment. The project feels complete, but you're actually beginning the long-term management phase that will continue for the life of the roof.
Warranty Registration and Documentation Requirements
Shingle manufacturers don't automatically honor warranties just because you bought their product. You need to register your installation within a certain timeframe (usually 60 days) and provide proof of proper installation. This is where DIY roof replacement projects hit a documentation wall that most people don't anticipate.
Warranty registration usually requires photos of the completed installation, proof of adequate ventilation, and verification that installation followed manufacturer specs. Some manufacturers require certification from a licensed contractor for their premium warranties. If you're DIY, you might only qualify for the limited material warranty, not the full system warranty that covers installation defects.
Keep every receipt, every photo, and every piece of documentation related to your roof installation. You'll need this information if you ever file a warranty claim, when you sell your home, or if your insurance company requests installation details after a claim. Create a physical and digital file that includes material invoices, permit documents, inspection reports, and installation photos.
The Maintenance Schedule Nobody Follows (But Should)
Gutters need cleaning at least twice annually, more often if you have overhanging trees. Clogged gutters cause water to back up under shingles at the roof edge, creating leaks and accelerating deterioration. This isn't optional maintenance. It's required for your roof to reach its expected lifespan.
Debris removal from roof valleys and behind chimneys should happen seasonally. Accumulated leaves and organic material trap moisture against your shingles and create conditions for algae and moss growth. Both reduce shingle lifespan and can void warranty coverage if the manufacturer determines that lack of maintenance caused premature failure.
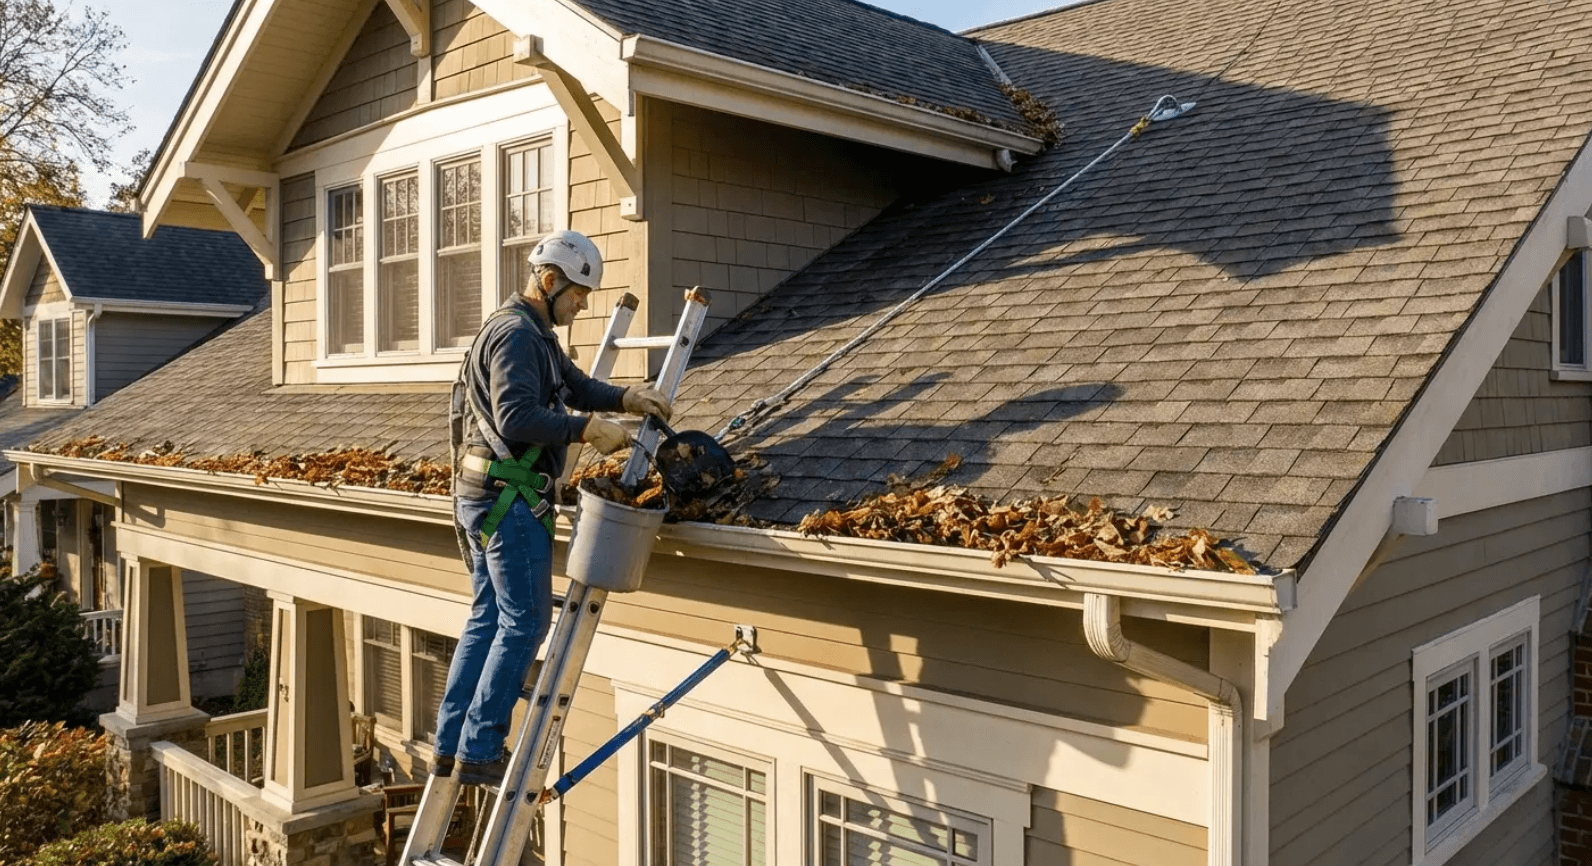
Flashing inspection should occur annually. The sealant around pipe boots, chimneys, and other penetrations degrades over time and needs periodic replacement. Catching failed sealant early means a $20 tube of roofing cement fixes the problem. Ignoring it means water intrusion that damages your decking and interior.
Tree trimming isn't roofing maintenance, but it directly affects roof lifespan. Branches that overhang your roof drop debris, provide pathways for animals to access your roof, and can cause physical damage during storms. Keep trees trimmed back at least six feet from your roof line.
This happened to a reader in Oregon who completed what appeared to be a flawless installation on their single-story ranch home. They registered the warranty and felt confident in their work. Three years later, they noticed interior water staining near a bathroom vent. Investigation revealed that the pipe boot sealant had failed, allowing water to seep in during heavy rains. Because they hadn't performed annual flashing inspections, the leak had existed for months, causing $3,200 in interior ceiling and insulation damage. The pipe boot itself would have cost $15 to reseal during a routine inspection. This is why post-installation neglect can erase any DIY savings.
The Home Sale Complications You're Creating Today
When you sell your home, the buyer's inspector will ask about your roof's age, who installed it, and whether the work was permitted. Your answers to these questions directly affect the sale price and whether the deal closes at all.
"I installed it myself" raises immediate red flags for buyers. They don't know your skill level, they can't verify the installation quality, and they're assuming risk that a professionally installed roof wouldn't carry. Expect them to request a price reduction to account for this uncertainty, or they might require a professional inspection and certification before closing.
If you can't provide permit documentation, the problem compounds. Buyers might walk away entirely, or they'll demand significant price concessions. In some markets, unpermitted work requires disclosure and can kill deals even if the installation quality is fine.
The roof's remaining warranty (if any) doesn't transfer easily with DIY installations. Professional installations often include workmanship warranties that transfer to new owners. DIY installations have no such protection, which reduces the home's value in buyers' eyes.
You've invested weeks of labor and thousands of dollars into this project. The quality of your work might be excellent. But without proper documentation, permits, and professional certification, you've created a sales obstacle that will cost you money when you eventually move. That's a long-term consequence most DIY content never mentions.
Final Thoughts
The question isn't whether you can physically install a roof. You probably can, given enough time and decent weather. The real questions are whether your roof, your local regulatory environment, your insurance requirements, and your long-term plans make DIY the sensible choice when you account for all costs and risks.
Most DIY roofing content sells you on capability while ignoring context. I've tried to flip that. Your context determines whether DIY makes sense, and that context includes building systems you can't see, regulations that vary by jurisdiction, liability that extends years beyond installation, and documentation requirements that affect your home's future marketability.
Calculate the true costs: equipment rental, waste disposal, insurance gaps, opportunity cost of your time, and the premium you'll pay at resale for DIY work that can't be verified. Add the risks: injury to yourself or helpers, damage to neighboring property, permit complications, and warranty limitations. Compare that total against professional installation quotes, and the gap narrows considerably.
If you move forward with DIY roof replacement, do it with full awareness of what you're assuming. Get the permits. Document everything. Follow manufacturer specs exactly. Inspect your work at every stage. Maintain proper safety equipment throughout. Register your warranty. Keep immaculate records. Accept that you're taking on responsibilities that extend for decades, not just until the last shingle goes down.
Here's What I'd Actually Do If I Were You:
Call three roofers. Get quotes. While you're waiting, pull up your city's permit requirements and actually read them. Check your insurance policy for language about DIY work. Then ask yourself: Is the money I'm saving worth the risk I'm taking?
For 90% of you, the answer is no. For the other 10% (the ones with simple roofs and real experience), maybe. But you'll know which group you're in.
Learning how to roof a house goes way beyond watching tutorials. It requires understanding the complete system you're working within and making decisions based on your situation, not generic DIY enthusiasm. The roofs that matter aren't the ones that look good from the street on installation day. They're the ones that perform properly for 20 years, pass inspection when you sell, and don't create liability nightmares when something goes wrong. That outcome requires more than installation skill. It requires understanding what you're actually getting into.
You've got the information now. The choice is yours, but at least it's an informed one.