
Most homeowners invest in an extension patio roof design expecting year-round comfort, only to realize the space works for a single season—and fails the rest of the time. Too hot in summer, too cold in winter, too bright when you want shade, and somehow still leaking when it rains. The problem isn’t just materials or installation—it’s how your extension patio roof ideas are executed as a system that fails to adapt to changing conditions..
This guide breaks down what actually makes a patio extension functional across seasons—going far beyond the quick fixes most contractors suggest. From roof pitch and sun angles to thermal performance and adaptability, you’ll see why a standard approach leads to spaces you barely use—and how to avoid it.
If you’re planning a new build or upgrading your current setup, understanding the
science behind roof performance is the first step toward getting it right.
Table of Contents
- TL;DR
- Why Most Extension Patio Roofs Fail the Moment Weather Shifts
- How Roof Pitch Dictates Comfort More Than Material Choice
- The Overlooked Role of Thermal Bridging in Patio Extensions
- Modular Roof Systems You Can Reconfigure Without Starting Over
- Why Your Roof Should Respond to Sun Angles, Not Just Block Them
- Integrating Rainwater Management Into Your Roof Design
- How to Future-Proof Your Extension Against Climate Variability
- When Solid Roofs Make Less Sense Than Hybrid Structures
- The Hidden Cost of Ignoring Roof-to-Wall Transitions
- Final Thoughts
TL;DR
Most patio roofs are designed for one season and become useless the rest of the year. This isn't about picking better materials. It's about pitch, thermal bridging (yes, that's a thing), sun angles, and the roof-to-wall connection where everything goes wrong. If you're planning a patio roof or fixing one that doesn't work, this covers what actually matters versus what contractors typically focus on.
Why Most Extension Patio Roofs Fail the Moment Weather Shifts
So you built a patio extension. Let me guess. You actually use it comfortably maybe four months a year? The rest of the time it's either an oven, an icebox, too bright to sit under without sunglasses, or there's water pooling somewhere you didn't expect.
The standard extension roof treats weather like something to block out completely. That's why you end up with a covered patio that feels like a cave in winter when you'd actually welcome some solar heat or a greenhouse in summer despite installing the roof specifically to create shade.
New Paragraph
How Roof Pitch Dictates Comfort More Than Material Choice
Pitch matters more for your daily comfort than whether you chose aluminum, polycarbonate, or shingles. Way more.
Here's why. Roof pitch determines how your roof interacts with the sun's path across the sky. A steeper pitch anything over 4:12 excels at shedding water and snow, but it creates a sharper angle to morning and evening sun. During those golden hours when you'd actually want to use your patio, you're getting direct sunlight streaming in at low angles, right into your eyes and onto your furniture.
Shallow pitches 2:12 to 3:12 keep the space feeling open and let you control sun exposure more effectively with where you place the roof edge. The tradeoff? Water drainage needs more attention, and you'll need to think carefully about gutter sizing and placement.
Most people miss this part. The sun's angle changes dramatically between seasons. In summer, the sun is nearly overhead at midday, so even a shallow roof provides substantial shade. Come winter, that same sun sits much lower in the sky, and your roof pitch determines whether you get any passive solar warming or if you've just created a permanent shadow over your patio.
You can't fix a poorly chosen pitch with better materials. A flat polycarbonate roof will still trap heat regardless of its UV-blocking properties if the pitch doesn't allow hot air to escape. A steeply pitched metal roof will still create uncomfortable glare if it's angled wrong relative to where you're actually sitting.
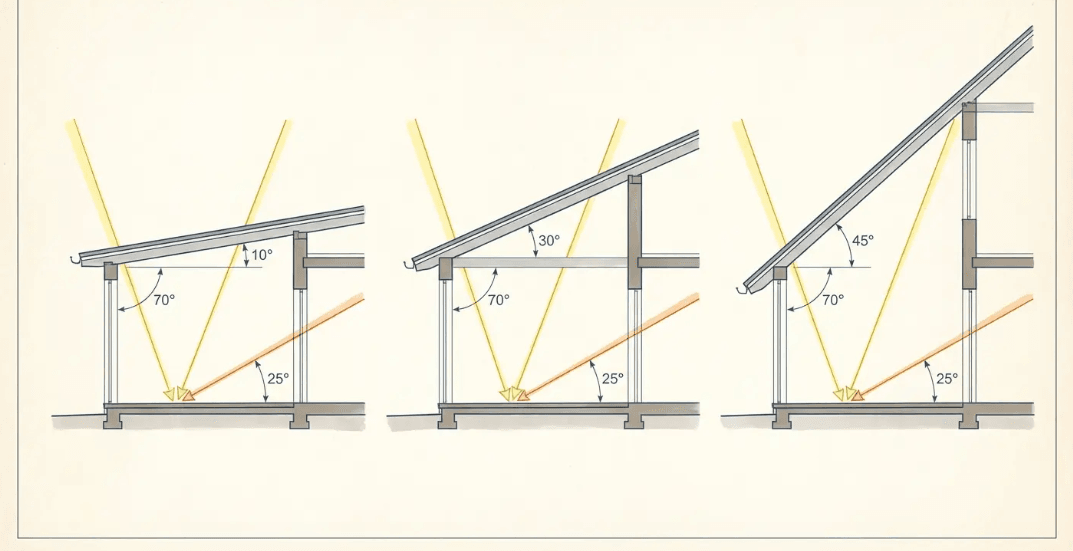
Think about pitch in relation to your home's latitude and the direction your patio faces. South-facing patios benefit from slightly steeper pitches (3:12 to 4:12) that block high summer sun but allow lower winter sun to reach the space. East or west-facing extensions often work better with shallower pitches (2:12 to 3:12) that don't amplify the already-intense morning or evening sun angles.
The pitch you choose should also account for your roof's height at the house attachment point. A steep pitch starting from a low attachment point creates a cramped, tunnel-like feeling. That same pitch starting from a higher point feels expansive and architectural.
The Overlooked Role of Thermal Bridging in Patio Extensions
Your patio extension roof might be perfectly designed for sun and rain, but if you're still uncomfortable underneath it, thermal bridging at connection points could be sabotaging the entire system.
Thermal bridging. Terrible name for a simple problem. Metal conducts heat, and when metal connects your hot roof to your house, it makes everything uncomfortable.
You'll notice this most on the hottest and coldest days, exactly when you'd most want your patio to provide comfortable refuge. The metal posts supporting your roof become too hot to touch in summer. The roof edge closest to your house feels noticeably warmer or colder than the rest of the covered area.
Most contractors ignore this completely—and it’s one of the biggest reasons extension patio roof ideas underperform. They'll attach your roof ledger board directly to your house with metal fasteners, creating dozens of small thermal bridges. They'll use continuous metal beams without thermal breaks. They'll skip the insulation at critical junction points because "it's just a patio roof."
Go outside right now and touch your metal posts. Seriously. If they're way hotter or colder than the air, you've got thermal bridging problems.
Quick thermal bridging check for existing patio roofs:
Touch metal support posts on hot or cold days. Are they significantly warmer or colder than the air temperature? Check the ledger board connection point for visible condensation or temperature differences compared to the surrounding wall. Look at metal beam connections to see if fasteners and brackets are in direct contact with both structural elements. Feel the patio surface directly under metal posts for noticeable temperature differences. In winter, look for ice formation patterns along metal connection points. Check for heat shimmer or excessive warmth radiating from metal components during peak summer heat.
Here's how to interrupt those thermal pathways. Specify thermal break tape or gaskets anywhere metal components attach to your house structure. Choose composite or wood support posts instead of hollow metal ones. If you prefer the look of metal, insist on foam-filled columns. At the roof ledger board, use a thermal break material between the board and your house wall.
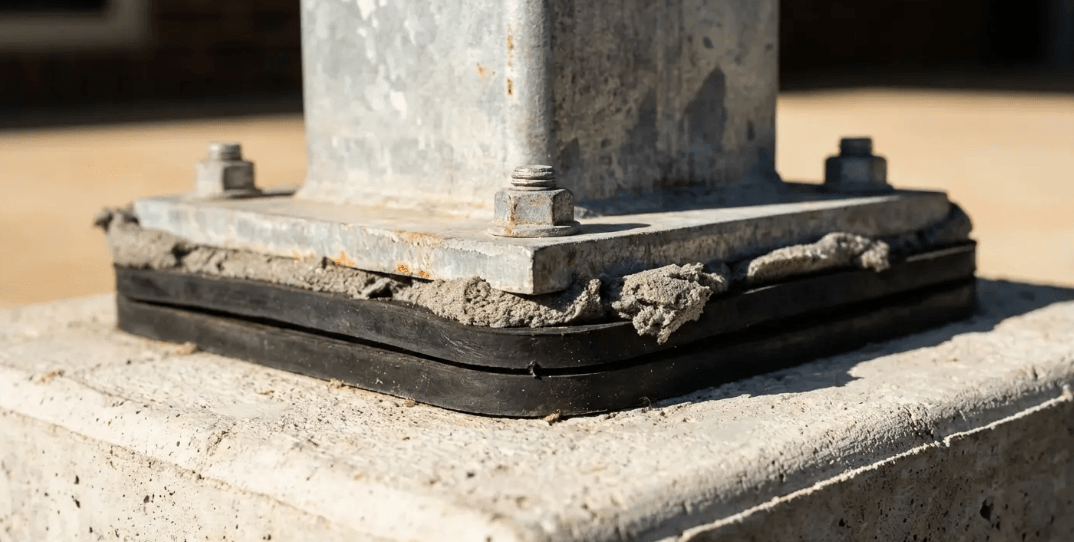
For existing roof extensions where you're experiencing temperature discomfort, you can retrofit thermal breaks at key points. Wrap metal posts with insulating sleeves (which can be finished to match your design aesthetic). Add rigid foam insulation between the roof ledger and the house wall, then refinish the connection. Install thermal break tape along metal beam connections.
Modular Roof Systems You Can Reconfigure Without Starting Over
Permanent decisions about your outdoor space stop making sense when your needs change every few years. Or every few months, depending on how you use your patio.
Modular roof systems use track-mounted panels, removable sections, or adjustable louvers that you can reconfigure without tools, contractors, or demolition. You're not locked into a single configuration that seemed perfect in the planning phase but feels limiting once you're living with it.
Design trends in 2025 show homeowners increasingly prioritizing flexibility in outdoor spaces. Architectural Digest reports that designers are moving away from static outdoor structures and embracing "spaces that blend comfort, performance, and natural materials with an aesthetic that seamlessly blends with the home's interior design," with adjustable and modular elements becoming standard expectations rather than luxury upgrades. (Source: Architectural Digest)
You might start with solid panels across the entire roof for maximum weather protection, then swap in translucent panels over your dining area when you realize you want more natural light there. Come fall, you could remove panels entirely along one section to create an open-air zone for fire pit gatherings.
Track-mounted systems take this further by letting you slide panels open or closed along rails. You get the weather protection of a solid roof when you need it and the openness of an uncovered patio when conditions are perfect. These systems work particularly well for deep patios where you want different zones with different coverage levels.
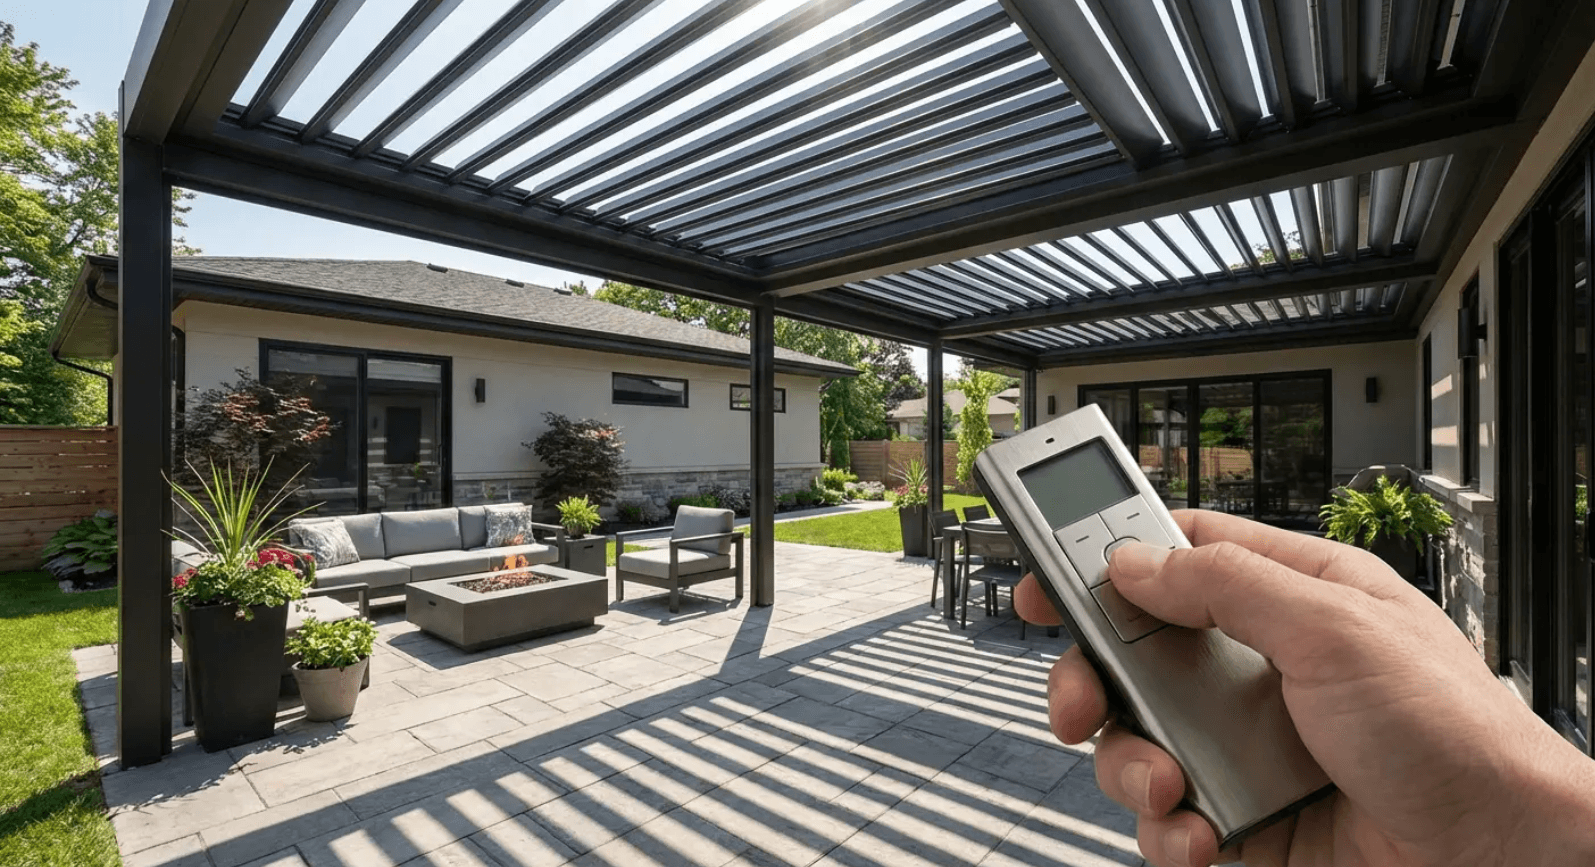
Adjustable louver roofs represent the high end of modular thinking. Motorized slats rotate to control sun exposure, ventilation, and weather protection. You can fine-tune the angle throughout the day, closing them completely during rain or opening them to specific angles that block direct sun while maintaining airflow and views.
The cost difference between modular and fixed systems isn't as dramatic as you might expect. Yes, modular systems have higher upfront material costs, but you're eliminating the future cost of modifications, additions, or complete replacements when your needs change. You're also avoiding the disruption and mess of construction work on an occupied patio.
Now, modular systems aren't perfect. They cost more upfront, they have more moving parts that can break, and if you live somewhere with extreme winds, all those adjustable pieces become liability. But for most people in most climates, the flexibility is worth it.
Installation requires more precision than traditional roof framing. The tracks, mounting points, and panel systems need exact alignment for smooth operation. This isn't a DIY weekend project unless you have significant construction experience and the right tools.
Weather performance depends on the system's engineering. Quality modular systems with proper seals and locking mechanisms perform as well as fixed roofs in wind and rain. Cheaper systems with loose-fitting panels or inadequate seals will leak, rattle, and potentially fail in severe weather.
Why Your Roof Should Respond to Sun Angles, Not Just Block Them
Blocking the sun completely is the easiest solution, but it's rarely the smartest one. Your roof extension should filter and direct sunlight based on when and where it's problematic.
Sun angles follow predictable patterns. At noon in summer, the sun is nearly overhead (the exact angle depends on your latitude). During that same hour in winter, it's much lower in the sky. Morning and evening sun always comes in at low, sharp angles regardless of season.
A roof designed around these patterns uses its edge position and overhang depth to block sun when it's most intense while allowing it through when it's beneficial. This is valuable for south-facing patios where winter sun can provide meaningful warmth on cool days, but summer sun would make the space unbearable.
Calculate your overhang depth using your latitude and the sun's altitude angle at summer solstice. For most US locations, an overhang depth equal to 25-30% of the distance from the roof attachment point to the patio edge will block overhead summer sun while allowing lower winter sun to reach the space. You'll need to adjust this ratio based on your specific latitude and patio orientation.
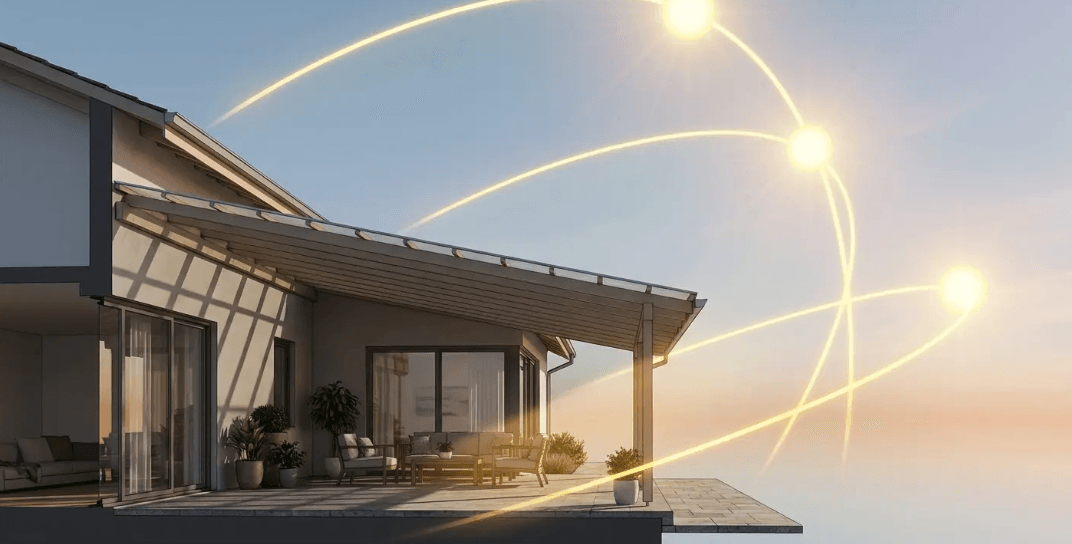
East and west exposures need different thinking because the problematic sun comes in horizontally during morning and evening hours. Overhangs don't help much here. Instead, consider vertical elements like strategically placed posts with climbing plants, adjustable side screens, or extending the roof beyond the patio edge to create deeper shade zones.
You can incorporate sun-tracking elements without going full motorized louver system. Simple manually adjustable panels or shade sails on the patio's east and west sides let you block low-angle sun when needed and open up the space when that sun isn't an issue.
The goal is creating extended roofing that works with solar geometry rather than fighting it. You're using free heat gain in winter, blocking excessive heat in summer, and maintaining visual connection to the sky and surroundings instead of living under an opaque lid.
This approach reduces your reliance on mechanical cooling or heating to make the patio comfortable. You're using architectural design to solve climate control problems, which costs nothing to operate and requires minimal maintenance.
Integrating Rainwater Management Into Your Roof Design
Your patio roof collects hundreds of gallons of water during significant rain events, and that water has to go somewhere. Most installations treat this as an afterthought, resulting in erosion, foundation issues, or flooding in areas you didn't anticipate.
A 12x20 foot patio roof collects about 150 gallons of water from just one inch of rainfall. During a typical storm dropping two to three inches, you're dealing with 300-450 gallons flowing off your roof in a concentrated period. That volume will cause problems if you haven't planned for it.
Standard approach: attach gutters after the roof is built, run downspouts to the nearest convenient location, and hope the water disperses without causing issues. This reactive method leads to pooling near your patio foundation, soil erosion that undermines your posts, and water flowing toward your house instead of away from it.
Better approach: design your water management system alongside your roof structure. Figure out where water should ultimately end up (rain garden, existing drainage system, storage for irrigation, or dispersal area), then work backward to design gutters, downspouts, and routing that efficiently moves water to that destination.
Gutter sizing matters more than most people realize. A standard 5-inch K-style gutter handles about 1,200 square feet of roof area in moderate rainfall, but only 600 square feet in heavy rainfall conditions. If your area experiences intense storms, size up to 6-inch gutters and use larger 3x4 inch downspouts instead of standard 2x3 inch ones.
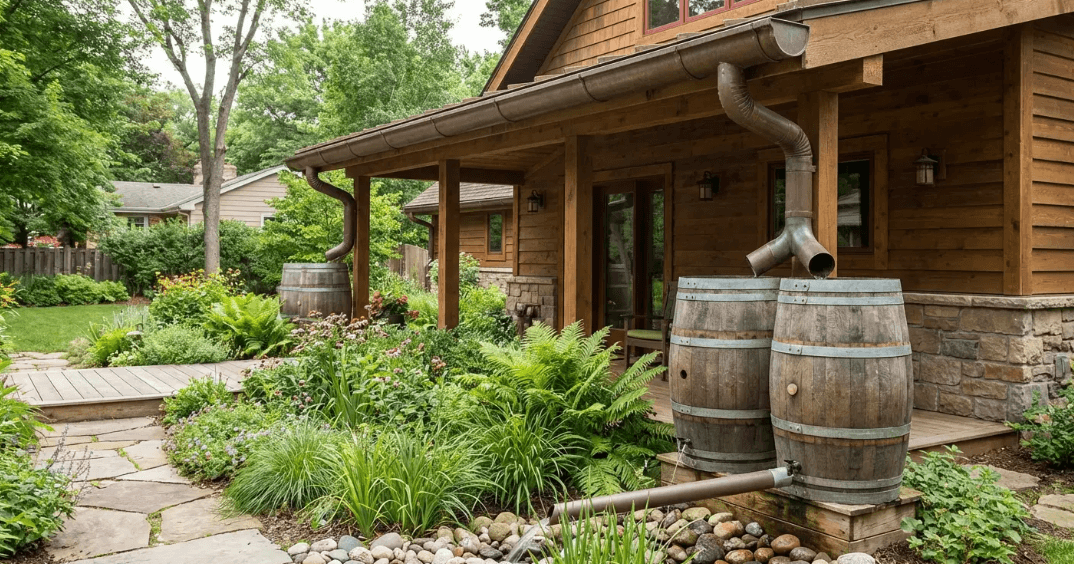
Consider integrating rainwater storage if you have irrigation needs or want to reduce stormwater runoff. A simple rain barrel system captures 50-100 gallons for garden use. More sophisticated systems with multiple tanks can store several hundred gallons, providing free water for landscaping while reducing the burden on municipal stormwater systems.
Downspout placement should account for your yard's natural drainage patterns and existing landscaping. Don't dump water onto areas that already struggle with drainage or near foundation walls. Extend downspouts at least 6-10 feet from your patio structure and house foundation, using underground drainage pipes if necessary to reach appropriate dispersal areas.
If you're dealing with an existing covered patio extension that has drainage problems, retrofitting proper water management is more disruptive but entirely doable. You'll need to add or resize gutters, reroute downspouts, and potentially install underground drainage lines to move water away from problem areas.
The connection between your patio roof gutters and your home's existing gutter system needs careful planning. Don't simply tie into the nearest downspout without considering whether that system can handle the additional volume. You might need to run a separate drainage line to avoid overwhelming your house's existing capacity.
How to Future-Proof Your Extension Against Climate Variability
Weather patterns your parents could predict with reasonable accuracy have become significantly less reliable. Your patio roof needs to handle extremes it wouldn't have encountered two decades ago.
Temperature swings have widened in most regions. Materials that performed adequately when temperature ranges stayed within a predictable band now experience accelerated expansion and contraction cycles that lead to premature failure. Fasteners loosen. Sealants crack. Panels warp.
Choose materials rated for temperature ranges beyond what your area has historically experienced. If your region typically sees winter lows around 10°F and summer highs around 95°F, select materials rated for -10°F to 115°F. That buffer accounts for the increasing frequency of extreme weather events.
Wind loads have increased in many areas, even those not traditionally considered high-wind zones. Your roof structure should meet or exceed current building codes for wind resistance, but consider going one zone higher than your area's minimum requirement. The cost difference is minimal during initial construction but could prevent catastrophic failure during an unprecedented wind event.
Precipitation intensity matters more than annual rainfall totals. You're seeing more rain falling in shorter periods, overwhelming drainage systems designed for gentler, longer-duration storms. Size your gutters and downspouts for the most intense rainfall your region has experienced in the past five years, not the historical average.
UV exposure has intensified in many regions due to atmospheric changes. Polycarbonate panels, fabric elements, and exterior finishes degrade faster than their rated lifespan suggested. Choose materials with UV inhibitors built into the substrate rather than applied as coatings, which wear off over time.
Structural connections deserve extra attention in a climate-variable future. Use hurricane ties or structural brackets at all critical connection points, even if you're not in a hurricane zone. These reinforcements cost little but provide significant protection against wind uplift and lateral forces.
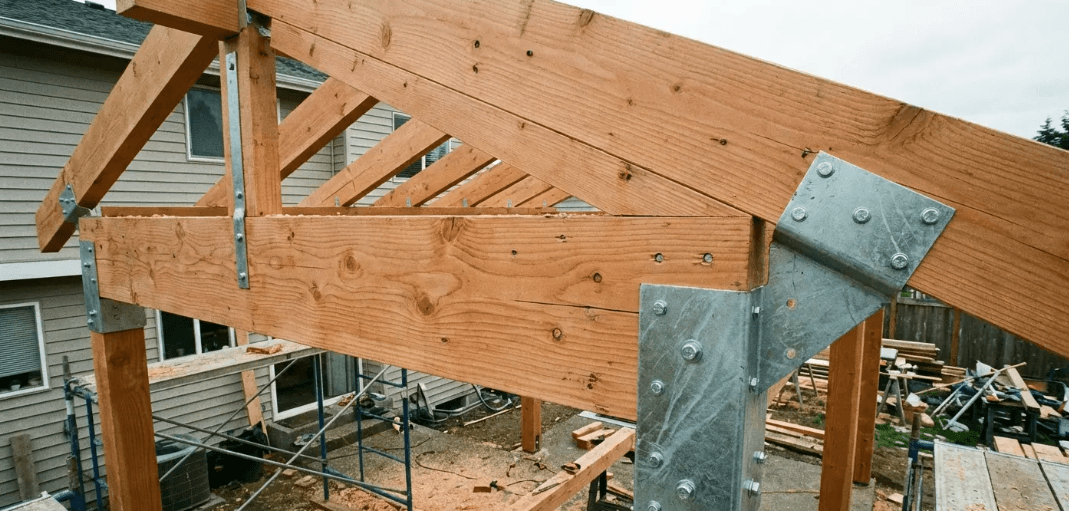
Snow loads have become unpredictable in regions that rarely saw significant accumulation. If your area has experienced any notable snow events in the past decade, design your roof structure to handle at least that load, regardless of whether local code requires it. Retrofit existing roofs with additional support posts or beams if you're concerned about their snow-bearing capacity.
Flexibility in your roof design provides climate resilience that fixed systems can't match. Removable panels let you reduce wind resistance during severe weather warnings. Adjustable elements allow you to optimize for whatever conditions you're experiencing rather than being locked into a configuration that worked for last decade's climate but struggles with this decade's reality.
When Solid Roofs Make Less Sense Than Hybrid Structures
Solid roofs seem like the obvious choice because they provide complete weather protection, but complete protection often means complete disconnection from the outdoor environment you're trying to enjoy.
The outdoor living design renaissance of 2025 emphasizes creating distinct zones within single spaces. Architectural Digest reports that landscape designers are increasingly recommending that homeowners "create separate areas for relaxing and entertaining outdoors" using different coverage types to define each zone, with hybrid structures becoming the preferred solution for patios deeper than 16 feet. (Source: Architectural Digest)
Hybrid structures use different roofing types in strategic zones based on how you use each area. Your dining zone might benefit from solid coverage for weather protection during meals. Your lounging area might work better with retractable or translucent coverage that maintains sky views and natural light.
Ventilation is where solid roofs consistently fail. Hot air accumulates under solid coverage with nowhere to escape, turning your patio into a heat trap on warm days. Even with fans, you're fighting physics. Hybrid designs incorporate vented sections or open areas that allow hot air to rise and escape naturally.
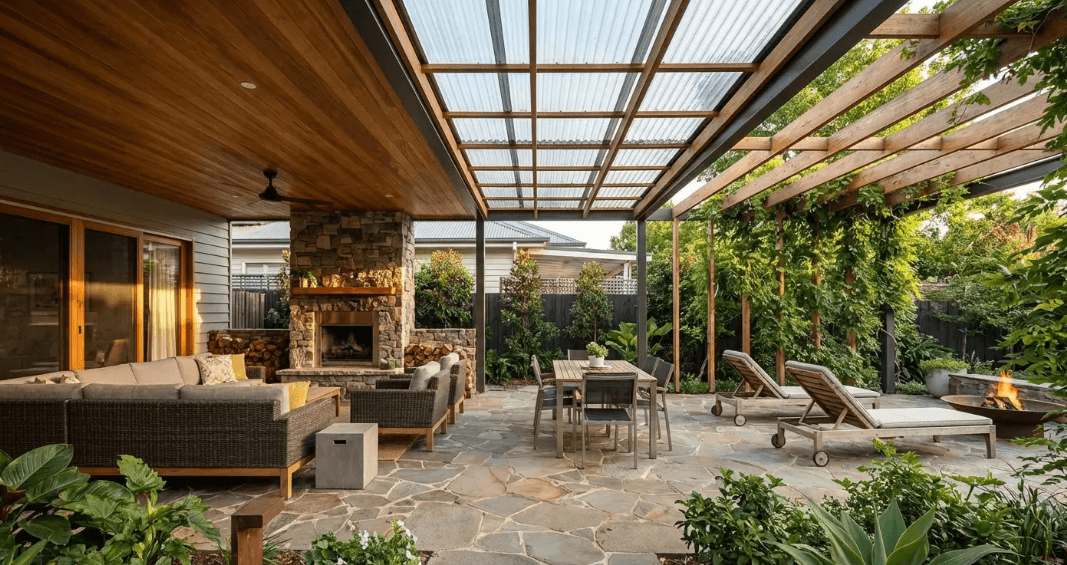
This configuration works well: solid roofing over the section closest to your house (typically where you have dining or cooking areas that need consistent weather protection), transitioning to louvered or slatted coverage in the middle zone (providing adjustable protection and ventilation), and ending with pergola-style open beams at the outer edge (maintaining connection to sky and surroundings while providing structural definition).
Light quality differs dramatically between solid and translucent sections. Solid roofs create defined shade that feels comfortable but can be gloomy, especially on overcast days. Translucent panels provide weather protection while maintaining brightness, though they can create glare issues if not properly positioned. Combining both gives you bright, naturally lit areas where you want them and deeper shade where it's beneficial.
Think about your patio's depth when deciding on hybrid versus solid coverage. Shallow patios (8-12 feet deep) often work better with consistent coverage because there isn't enough space to create distinct zones. Deeper patios (16+ feet) have room for multiple zones with different coverage types, making hybrid structures more practical and valuable.
The transition between different roof types requires careful detailing to prevent leaks and maintain structural integrity. Use proper flashing at all transition points. Make sure water from solid sections doesn't drain onto areas with less coverage below them. Plan your support structure to accommodate the different load requirements of each roof type.
Hybrid structures cost more than uniform solid roofs due to increased complexity and material variety, but they deliver significantly better functionality across different weather conditions and uses. You're paying for versatility that a single-solution roof simply can't provide.
The Hidden Cost of Ignoring Roof-to-Wall Transitions
Pest access at roof-to-wall transitions is remarkably common. Gaps between the ledger and wall, spaces where flashing doesn't fit tightly, and openings where the roof rafters meet the ledger all provide entry points for insects, rodents, and birds. Screen or seal these gaps during installation rather than trying to address pest problems after they've established themselves.
Energy loss through poorly sealed roof-to-wall connections affects your home's interior comfort and utility costs. Air leakage at the connection allows conditioned air to escape and outdoor air to infiltrate. This is a problem if your patio roof attaches to a wall with living space behind it rather than an exterior wall of unconditioned space.
Inspect your roof-to-wall connection annually. Look for caulk that's cracked, shrunk, or pulling away from surfaces. Check for water stains on the wall below the connection. Examine the ledger board for signs of rot or deterioration. Address any issues immediately because water damage accelerates rapidly once it starts.
For existing patio roofs with questionable connections, you might need to partially disassemble the roof-to-wall junction to install proper flashing and sealing. This is disruptive and expensive, but it's far less costly than repairing extensive water damage to your home's wall structure.

John Esh | CEO & Master Installer
- 25+ Years Experience: From ground crew to Master Certified Installer.
- Local Roots: Serving Lancaster, Harrisburg, and SEPA since 1991.
- Credentials: GAF Master Certified (ME27586); Licensed in PA (PA124258) & MD (#137952).
- The "Why":
Obsessed with "radical transparency" to remove the fear factor from home improvements.
James Wesser | Content Producer
- Background: Former local news digital producer and journalist.
- The Mission: Turning complex roofing jargon into clear, "fluff-free" answers for homeowners.
- Local Tie: When not filming on-site, he’s likely roaming Hersheypark or building digital worlds.