March 31, 2026
Vaulted Roof Design Drawings: The Hidden Math That Keeps Your Ceiling From Collapsing
Author
Most homeowners reviewing vaulted roof design drawings focus on what the finished space will look like — the soaring ceiling house proportions, the dramatic sweep, the sense of openness. But vaulted roof design drawings that actually protect your investment go beyond aesthetics and show the complete structural picture. Whether you're working with roof trusses for vaulted ceilings or traditional stick-built rafters, your vaulted roof design drawings need to address forces that simply don't exist in conventional attic-space roofs. This guide breaks down exactly what those drawings must include — and what's commonly missing.
Table of Contents
- Your Drawings Are Ignoring Physics
- The Structural Load Problem Nobody Talks About
- Ceiling Joists Are Actually Tension Ties
- Reading the Lines That Architects Don't Always Draw
- Ridge Beam vs. Ridge Board (Not Semantics)
- Code Violations Hiding in Your Drawings
- Material Specs That Actually Matter
- Connection Details: Where Roofs Fail
- Why Temporary Bracing Should Be On Your Drawings
- Does Your Drawing Actually Account for Thrust?
- Working with Joyland Roofing on Design Review
TL;DR
- Vaulted roofs push walls outward. Your drawings need to show how you're stopping that.
- Ridge beam vs. ridge board isn't semantics. It's the difference between needing rafter ties or not.
- Most vaulted roof design drawings are gorgeous and structurally incomplete. The connections are where everything fails, and they're usually shown with generic symbols that mean nothing.
- Before you submit those drawings, ask one question: "Where is the thrust resolved?" If you can't point to a specific detail, you're not done.
Your Drawings Are Ignoring Physics
I've looked at maybe 400 vaulted roof design drawings in my career. Every single one is gorgeous. Beautiful cross-sections, soaring ceilings, the whole dramatic effect you're going for.
Know what's not on them? Any indication of what's actually holding that ceiling up.
You're probably looking at your vaulted roof design drawings right now wondering if they're adequate. The truth is, most design drawings prioritize the visual outcome over the mechanical requirements. That's not always the designer's fault, but sometimes it is. The real issue is that vaulted roofs create forces that don't exist in conventional attic-space roofs. If your vaulted roof design drawings don't explicitly address those forces, you're building on assumptions.
When architect Ming Thompson describes vaulted ceilings, she notes that "historically, vaulted ceilings referred to any arched ceiling below a roof and above walls, like a dome or a barrel vault," but today the term encompasses any ceiling that takes advantage of the space between the roof and what would be a flat ceiling (source: Architectural Digest). What this really means is the structural complexity has evolved way beyond what most people realize.
Standard roof trusses are engineered units. The manufacturer calculates everything, and your drawing just shows placement. Vaulted roofs built with rafters? You're engineering a custom structure every single time. Your vaulted roof design drawings need to communicate that engineering, not just the aesthetic intent.
When drawings skip the physics, contractors make field decisions based on what "looks right" or what they've done before. Sometimes that works. Often it doesn't. I've seen ridge beams undersized by half, rafter ties placed too high to function properly, and connection hardware that couldn't possibly transfer the loads involved.
The Forces Your Drawing Must Address
Gravity loads are obvious. Snow, roofing materials, the weight of the framing itself. These all push straight down. Your vaulted roof design drawings probably show rafter sizes calculated for these vertical loads.
That's also insufficient.
Vaulted roofs generate horizontal thrust. Picture two rafters meeting at a peak with no attic floor joists tying them together at the bottom. Those rafters want to spread apart at the base, pushing your exterior walls outward. This isn't hypothetical. It's happening right now in every vaulted roof, constantly.
Your vaulted roof design drawings need to show how you're stopping that thrust. Not a note saying "engineer to verify." Actual specified elements. Collar ties at specific heights, ridge beams sized to eliminate thrust, steel tension rods, structural ridge beams that carry the load differently. Something concrete.
'Engineer to verify' means you haven't figured it out yet. Don't submit vaulted roof design drawings you haven't figured out yet.
What "Complete" Actually Means
Complete vaulted roof design drawings show the load path. You should be able to trace how weight and forces move from the ridge down through the rafters, into the walls, and ultimately to the foundation.
If you can't follow that path on the drawing, the drawing isn't done.
I ask clients to do this exercise: point to where the thrust is resolved. If the answer is "I don't know" or "isn't that just how roofs work," we've got work to do. Your contractor should be able to answer this question instantly by looking at your vaulted roof design drawings. If they can't, you're both guessing.
The drawing should also indicate inspection points. Vaulted roofs have critical connections that need verification during construction, not after drywall covers everything. Where are the hurricane ties? What's the nailing schedule for the ridge connection? How are rafters attached to the wall plates?
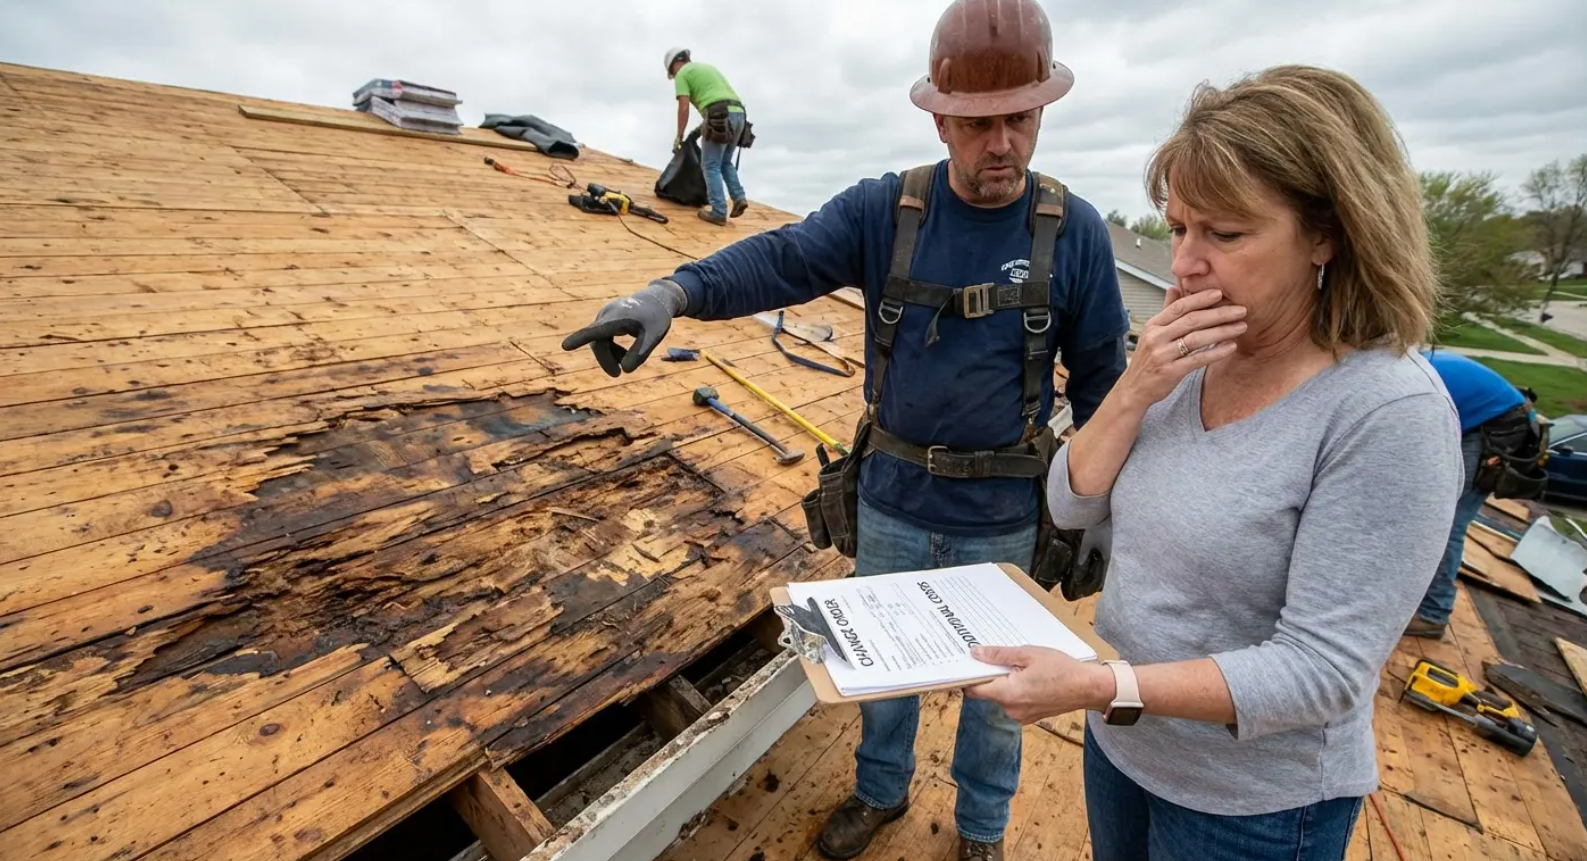
Miss these and you're screwed. They're the difference between a roof that performs safely for decades and one that slowly pushes your walls apart until something gives.
The Structural Load Problem Nobody Talks About
Load calculations exist on your vaulted roof design drawings. You've probably seen them: dead load, live load, snow load, wind load. Numbers with PSF (pounds per square foot) notations that look official and thorough.
Problem is, those calculations usually assume the load distributes evenly and travels straight down through the framing.
Vaulted roofs don't work that way. The load path is angular, which means components experience both compression and tension forces simultaneously. Your rafter isn't just holding up weight. It's also being pulled apart at the connections and pushed together along its length.
Most load calculations on vaulted roof design drawings don't separate these force types. You'll see a rafter specified as 2x10 #2 SPF at 24" on center, calculated for a total load of 50 PSF. That might be perfectly adequate for vertical loads. It tells you nothing about whether that rafter can handle the bending moment created by the combination of vertical load and horizontal thrust.
The Span Table Trap
Span tables are useful. They're also dangerous when misapplied.
I see vaulted roof design drawings that reference span tables for rafter sizing without noting the assumptions those tables make. Most residential span tables assume the rafter is part of a roof-ceiling assembly with ceiling joists acting as rafter ties. Remove those ceiling joists (which you do in a vaulted design) and the span table no longer applies.
Your drawings should reference the correct table. If you're using a ridge beam to eliminate thrust, you need span tables for rafters in a beam-supported application. If you're using collar ties or rafter ties, you need tables that account for those specific configurations. The difference can be two or three rafter sizes.
Point Loads vs. Distributed Loads
Most vaulted roof design drawings handle this poorly: point loads. You're probably planning to hang a chandelier from that beautiful vaulted ceiling house space. Maybe a ceiling fan. Perhaps some decorative beams that aren't structural but still have weight.
Each of those creates a point load. A concentrated force at a specific location rather than weight distributed across the entire surface. Your rafter might be sized perfectly for distributed snow load but completely inadequate for a 150-pound chandelier hung at mid-span.
This might mean additional blocking, stronger hangers, or even supplemental beams that aren't visible in the finished space. For more on what those hidden components look like in practice, our guide on what a real roof inspection covers is worth a read.
Wind loads on vaulted roofs require careful evaluation, particularly for curved vault configurations. According to Eurocode 1 standards for wind action evaluation, external pressure coefficients on vaulted roofs vary significantly based on the height-to-depth ratio of the structure. For a building with a height-to-depth ratio (h/d) of 0.33, linear interpolation between standard values yields a pressure coefficient of +0.25 for zone A (the windward curved surface), -0.96 for zone B (the peak and leeward slope), and -0.40 for zone C (the sides). This demonstrates that vaulted roofs experience dramatically different wind pressures across their surfaces compared to conventional pitched roofs (source: Civil Engineering Design). Your vaulted roof design drawings need to account for these varying pressure zones, especially in high-wind regions.
Ceiling Joists Are Actually Tension Ties
In a conventional roof, ceiling joists do two jobs. They support the ceiling below, obviously. More importantly from a structural perspective, they tie the bottoms of opposite rafters together, preventing outward thrust.
Remove them to create your vaulted ceiling, and you've eliminated half of the structural system.
This is where vaulted roof design drawings often use vague terminology that causes confusion. You'll see references to "collar ties," "rafter ties," "ceiling joists," and "tension ties" used interchangeably. They're not the same thing, and the distinctions matter enormously. When we talk about roof trusses for vaulted ceilings, understanding these differences becomes critical to the entire structural approach. Whether you're specifying a vault truss system or stick-built rafters, every rafter ceiling assembly needs to address this clearly in the drawings.
Rafter Ties vs. Collar Ties
Rafter ties connect opposing rafters in the lower third of the rafter span. That location isn't arbitrary. It's where they're most effective at resisting thrust. Move them higher, and they become progressively less effective. By the time you're halfway up the rafter, they're doing almost nothing to prevent wall spread.
Collar ties connect rafters in the upper third of the span. They prevent the ridge from separating and help resist wind uplift, but they do not effectively resist outward thrust at the walls.
This is crucial: you cannot substitute collar ties for rafter ties and expect the structure to perform the same way.
Your vaulted roof design drawings need to specify which you're using and where. I've seen drawings that show "ties" at mid-height without clarifying their purpose or acknowledging that they're too high to function as rafter ties. The contractor installs them as drawn, the building inspector (hopefully) catches the problem, and now you're redesigning mid-construction.
Last year, I reviewed a project where the homeowner's architect specified "structural ties" at 8 feet above the wall plate on a roof with 24-foot rafters (12-foot horizontal span from wall to ridge). The lower third of that span ends at 4 feet above the plate. By placing ties at 8 feet (exactly mid-height), the design created what looked like adequate bracing but provided virtually no resistance to outward thrust.
The building inspector caught this during plan review, requiring a complete redesign that added three weeks to the project timeline and $8,000 in engineering fees. Had the vaulted roof design drawings clearly specified "rafter ties at maximum 4'-0" above plate per IRC R802.3" instead of the vague "structural ties," the problem would never have occurred.
The Every-Rafter Rule
Code requirement that surprises people: if you're using rafter ties instead of a structural ridge beam, every rafter pair needs a tie.
Not every other one. Not just at the ends. Every single pair.
Some vaulted roof design drawings show ties at 4-foot or 8-foot intervals, probably because that looks cleaner on the page or because the designer assumed the roof sheathing would distribute forces between tied pairs. It doesn't work that way. Each rafter pair generates its own thrust, and each pair needs its own resistance.
This creates aesthetic challenges in vaulted designs. Rafter ties crossing your beautiful open ceiling every 16 or 24 inches (whatever your rafter spacing is) might not be the look you wanted. That's fine. You have options. But your vaulted roof design drawings need to address this reality, not ignore it.
When You Can Raise the Ties
Building codes allow rafter ties to be raised above the lower third of the span if you increase the size of the rafters and ties to compensate for the reduced mechanical advantage. The calculations for this are specific and should appear on your vaulted roof design drawings.
I rarely see this done correctly. The drawing will show raised ties with a note saying "rafters sized accordingly," but no calculation or reference to the engineering that justifies the design. That's not sufficient. Your contractor can't verify the design is adequate, and the building inspector has no basis for approval.
If you're raising rafter ties, your drawings should show the calculation method, the increased member sizes, and the connection requirements. This usually means an engineer's stamp, which is appropriate given the complexity involved.
Reading the Lines That Architects Don't Always Draw
Design drawings use conventions and symbols that communicate information efficiently. A single line represents a beam. A double line might indicate a wall. Small circles show fasteners or connections.
These conventions work well for standard construction where everyone understands the assumptions behind the symbols.
Vaulted roofs break those assumptions. The single line representing your ridge in your vaulted roof design drawings might be a 2x6 ridge board (non-structural) or a 6x12 ridge beam (structural). Those are completely different elements with completely different implications for the rest of the roof system, but they might look identical on the drawing.
The Detail Callout Problem
Good vaulted roof design drawings include detail callouts: enlarged views of specific connections or assemblies where the standard scale doesn't show enough information.
Vaulted roof drawings should have details for every critical connection. At minimum, you need:
- Ridge connection (how rafters attach to ridge board or beam)
- Wall plate connection (how rafters attach to top of wall)
- Rafter tie connection (if used)
- Collar tie connection (if used)
- Valley and hip connections (if applicable)
I review drawings where these details are missing or referenced as "typical" without showing what typical means. Your contractor shouldn't have to guess what you intended. The connection is either fully specified on the drawing or it's not.
Section Cuts That Actually Inform
Section views are common in vaulted roof design drawings. They show a slice through the building, revealing the interior structure.
For vaulted roofs, you need section cuts that show the full load path, not just the visual profile.
A useful section cut for a vaulted roof shows:
- Foundation and how loads transfer to it
- Wall construction and height
- Rafter size, spacing, and slope
- Ridge detail (beam or board)
- Any ties, collars, or tension members
- Roof sheathing and finished roofing
- Insulation and ventilation strategy (this affects framing)
Many vaulted roof design drawings show a beautiful interior perspective but cut the section at the wall line, omitting the foundation connection. Others show the roof framing but not the wall construction, making it impossible to verify that the wall can handle the thrust loads.
Complete sections show the whole system.
Ridge Beam vs. Ridge Board (Not Semantics)
This might be the single most important distinction in vaulted roof design drawings, and it's often poorly communicated. A ridge beam is a structural member that supports the rafters. A ridge board is a non-structural piece that simply provides a nailing surface where rafters meet.
Using a ridge beam changes everything. The beam carries half the roof load, eliminating the outward thrust at the walls. This means you don't need rafter ties, which is often the whole point in a vaulted design. The beam must be properly sized for the load and properly supported at its ends.
Using a ridge board means the rafters are doing all the structural work, and you absolutely need rafter ties or another method of resisting thrust. The ridge board just keeps the rafters aligned.
Understanding vault truss systems or traditional rafter framing helps clarify why this distinction matters so much. Whether you're considering a vaulted truss configuration, cathedral trusses, or stick-built rafters, your vaulted roof design drawings must clearly indicate which structural strategy you're employing. If you're unsure which direction suits your project, our overview of roof replacement and repair options covers the structural trade-offs in plain language.
How Drawings Confuse This
I see vaulted roof design drawings that show a 2x10 at the ridge labeled "ridge beam." A 2x10 is almost never adequate as a true structural ridge beam in a residential vaulted roof. It might work as a ridge board, but calling it a beam suggests it's doing structural work it can't do.
Other drawings show a large timber (6x12, 8x12) at the ridge but don't specify how it's supported at the ends. A ridge beam needs to bear on posts, walls, or beams that transfer the load to the foundation. If your vaulted roof design drawings show a massive ridge beam but no support details, the design is incomplete.
Your drawing should explicitly state: "structural ridge beam, eliminates need for rafter ties" or "ridge board, non-structural, rafter ties required." Remove all ambiguity.
The Support Detail
If you're using a structural ridge beam, the end support detail is critical. The beam is carrying thousands of pounds of roof load, and that load needs a clear path to the foundation.
Make sure your vaulted roof design drawings show:
- What supports the beam ends (post, wall, header)
- Size and material of the support
- How the support connects to the beam
- How the support transfers load to foundation
- Any lateral bracing required
Some drawings show the ridge beam just ending at the wall line without clarifying what happens there. Does it bear on the wall top plate? Is there a post inside the wall? Does a header carry the load? These aren't details to figure out during construction.
Last month, a homeowner in Colorado hired a designer who specified a 6x14 Douglas Fir ridge beam for a 28-foot vaulted great room. The drawings showed the beam spanning wall-to-wall but included no support details at the gable ends. During construction, the framing crew assumed the beam would bear directly on the top plates of the 2x6 exterior walls.
The problem? A 6x14 beam loaded with half the roof weight of a 1,200-square-foot roof section generates approximately 4,800 pounds of bearing load at each end. The 2x6 top plate, even in a double configuration, provides only 16.5 square inches of bearing area, creating a bearing stress of 291 PSI — well above the 625 PSI perpendicular-to-grain compression limit for the species, but concentrated on an inadequate connection.
The structural engineer, called in after framing had started, required the installation of engineered posts inside each gable wall, bearing on dedicated footings poured through the existing slab. Cost of the fix: $12,000. Had the vaulted roof design drawings specified "6x14 ridge beam bearing on 6x6 posts with Simpson CB66 post bases anchored to dedicated 24"x24"x12" concrete footings," the posts would have been included in the original foundation work.
When You Need Both
Some complex vaulted roof designs use both approaches in different areas. Maybe you have a structural ridge beam over the main living space (allowing full vaulting) but use ridge boards with rafter ties in secondary areas where some ceiling height can be sacrificed.
This is fine, but your vaulted roof design drawings need to clearly differentiate the two systems. Different line weights, different labels, different details. A contractor should be able to look at any section of the roof and immediately know which approach applies there.
Code Violations Hiding in Your Drawings
Building codes exist for good reasons, and vaulted roof designs violate code requirements more often than you'd think. The problem is that violations aren't always obvious from looking at the drawings, especially if you don't know what to look for.
Code compliance isn't just about passing inspection. It's about ensuring your roof performs safely over its lifetime. A design that technically violates code might stand for years without obvious problems, then fail catastrophically under a heavy snow load or high wind event.
Whether you're working with a vaulted truss system, cathedral trusses, or traditional rafter construction, code requirements apply equally and must be addressed in your vaulted roof design drawings. A vaulted truss must meet the same structural performance standards as stick-built rafters, even though the engineering approach differs. Common code questions come up constantly — our roofing FAQ covers many of them.
The Rafter Tie Height Requirement
I mentioned this earlier, but it's worth emphasizing: codes require rafter ties in the lower third of the rafter span. Measure the span from the outside of the wall plate to the ridge, divide by three, and that's your maximum tie height above the plate.
Many vaulted roof design drawings show ties at mid-height or even higher, creating a dramatic vaulted space. Unless the design includes engineered compensation (larger members, different connection details), this violates code.
Your drawings should show the rafter span measurement and the calculated maximum tie height. This gives the contractor and inspector clear reference points for verification.
Ventilation Requirements
Vaulted roofs create ventilation challenges. Codes require specific ventilation ratios (typically 1:150 or 1:300 net free ventilation area to ceiling area), and achieving this in a vaulted design is more complex than in a standard attic.
You have several options: cathedral ceiling with vent space above insulation, unvented conditioned assembly with specific insulation requirements, or hybrid approaches. Each has different code requirements, and your vaulted roof design drawings need to specify which approach you're using.
I see drawings that show insulation filling the entire rafter bay without indicating how ventilation occurs or whether the assembly is designed as unvented. That's a code violation waiting to happen, plus a potential moisture disaster. Our post on appropriate roof venting explains exactly why getting this right matters.
Your drawing should include insulation and ventilation details, not just framing.
Lateral Load Resistance
Wind and seismic loads create lateral forces on your roof. Codes require specific resistance to these forces, and vaulted roofs sometimes lack the diaphragm strength that conventional roofs get from ceiling joists and attic framing.
Your vaulted roof design drawings should show how lateral loads are resisted. This might be through properly designed shear walls, structural ridge beams that tie into lateral load-resisting systems, or other engineered solutions.
A drawing that only addresses gravity loads is incomplete from a code perspective.
Material Specs That Actually Matter
The species and grade of lumber you specify changes everything about your design. A 2x10 rafter in Douglas Fir-Larch #1 can span significantly farther than the same dimension in Spruce-Pine-Fir #2.
Your vaulted roof design drawings need to specify both dimension and grade, not just one.
I review drawings that list lumber sizes but not grades, or that specify "typical framing lumber" without defining what that means. Your contractor will use whatever's cheapest and available, which might not match the assumptions in your span calculations. This applies whether you're using traditional rafters, roof trusses for vaulted ceilings, or a truss ceiling system — the material specs must match the engineering in every case.
The Moisture Content Issue
Lumber moisture content affects both strength and dimensional stability. Green lumber (moisture content above 19%) is weaker than dry lumber and will shrink significantly as it dries. This shrinkage can cause problems in vaulted roofs where ridge beams, rafters, and posts need to maintain precise relationships.
Specify kiln-dried lumber for critical structural members, especially ridge beams and posts. The notation "KD-19" or "MC15" tells your supplier and contractor exactly what's required.
Without this specification, you might get green lumber that shrinks an inch or more after installation.
Engineered Lumber Options
Many vaulted roof designs benefit from engineered lumber products: LVL (laminated veneer lumber) for ridge beams, I-joists for rafters, or glulam for exposed beams. These products offer consistent quality, predictable performance, and often better spans than dimensional lumber.
If your vaulted roof design drawings specify engineered lumber, they need to include the manufacturer's product designation, not just a generic description. "LVL beam" isn't sufficient. You need something like "1.75" x 14" LVL, 2.0E." The contractor needs to order the exact product that matches your engineering.
Connection Hardware Specifications
Simpson Strong-Tie and similar manufacturers make dozens of different hangers, straps, and connectors. Your vaulted roof design drawings need to specify exactly which ones are required for critical connections.
Proper specification reads: "Simpson H2.5A hurricane tie at each rafter-to-plate connection" or "Simpson LUS26 joist hanger for 2x6 rafter ties." This removes guesswork and ensures the connection can transfer the forces your design assumes it will.
Connection Details: Where Roofs Fail
Connections are where roofs fail. The rafters might be perfectly sized, the ridge beam adequately strong, but if the connections can't transfer the forces between members, the system doesn't work.
Your vaulted roof design drawings need to detail every critical connection.
The Rafter-to-Ridge Connection
How do your rafters attach to the ridge? Toenailing? Face-mounted hangers? Birdsmouth cuts that bear on top of the beam?
Each method has different load transfer characteristics and different installation requirements.
Professional vaulted roof design drawings show this connection in detail. You'll see the rafter angle, the cut details, the fastener type and spacing, and any hardware required. Amateur drawings show two lines meeting at the ridge with no indication of how they're joined.
The Rafter-to-Wall Plate Connection
This connection resists both vertical loads (rafters trying to slide down the slope) and uplift loads (wind trying to lift the roof off). It typically requires both a birdsmouth cut for bearing and mechanical fasteners (hurricane ties, straps) for uplift resistance.
Your vaulted roof design drawings should show the birdsmouth cut depth (typically limited to 1/3 of the rafter depth), the bearing length required, and the specific hardware for uplift resistance.
I see drawings that show rafters touching wall plates with no cut details or hardware specifications. That's not enough information to build correctly. When connection failures show up after the fact, they often result in roof repairs that could have been avoided entirely with complete drawings.
Rafter Tie Connections
If you're using rafter ties, they need to connect to rafters with sufficient strength to resist the tension forces trying to pull them apart. This usually means bolted connections or specific nailing patterns, not just toenails.
Your vaulted roof design drawings should specify the connection method. For heavy loads, you might need bolts with washers at specific spacing. For lighter applications, structural screws might work.
The drawing needs to say which, along with size and spacing.
Ridge Beam Bearing Connections
Where your ridge beam bears on its supports, you need adequate bearing area and proper load transfer. A 6x12 beam carrying 10,000 pounds needs more than just sitting on top of a 4x4 post. You need bearing plates, proper post sizing, and connections that prevent lateral movement.
These details should appear on your vaulted roof design drawings, not get figured out during framing. Show the bearing plate size and material, the fasteners connecting beam to post, and any lateral bracing required.
Why Temporary Bracing Should Be On Your Drawings
Most vaulted roof design drawings completely omit this: temporary bracing requirements during construction. Vaulted roofs are unstable until they're complete. Rafters can twist, ridges can sag, and walls can bow outward before sheathing and permanent bracing are installed.
You might think temporary bracing is the contractor's problem, not something that belongs on design drawings.
I disagree. Critical temporary bracing requirements should be noted on your vaulted roof design drawings because they affect construction sequencing and safety.
Ridge Beam Bracing During Installation
A long ridge beam is flexible before the rafters are attached. It can sag, twist, or move laterally during installation.
Your vaulted roof design drawings should note that temporary bracing is required and suggest intervals (every 8 feet is common).
This isn't micromanaging the contractor. It's acknowledging that your design creates specific stability challenges that need to be addressed. A note reading "ridge beam requires temporary bracing at 8' o.c. until rafters are installed" shows you've thought through the construction process.
Rafter Bracing Before Sheathing
Individual rafters can twist or move out of plane before sheathing is installed. Temporary bracing perpendicular to the rafters keeps them aligned and prevents the domino effect where one twisted rafter pushes others out of position.
Your vaulted roof design drawings might include a note: "install temporary 1x4 bracing perpendicular to rafters at mid-span until sheathing is complete." This is especially important for long rafter spans or steep slopes where twisting forces are significant.
Wall Bracing Against Thrust
Before rafter ties are installed (or if you're using a ridge beam that hasn't been set yet), your walls are experiencing unresisted outward thrust from partially installed rafters. Temporary bracing prevents wall movement during this vulnerable period.
A note on your vaulted roof design drawings might read: "brace exterior walls against outward movement until roof framing is complete." This reminds everyone involved that the structure isn't stable in its intermediate states.
The importance of understanding temporary stability during vaulted roof construction was highlighted in a recent renovation project documented by a DIY homeowner. When vaulting the ceiling in their common area, the structural engineer's drawings specified a 4x12 structural ridge beam supported by three 4x4 posts. The homeowner noted that during the construction phase, "these purlins, their supports, and all the ceiling joists would need to be removed in order to vault the ceiling, and all the loads that they carried would have to be transferred from the roof down to the ground in some other way" (source: Frugal Happy, DIY vaulted ceiling renovation blog).
The project required careful sequencing and temporary support to prevent structural failure during the transition from the old ceiling joist system to the new vaulted configuration, underscoring why vaulted roof design drawings should address construction-phase stability, not just final conditions.
Does Your Drawing Actually Account for Thrust?
I keep coming back to thrust because it's the fundamental challenge in vaulted roof design, and it's where most vaulted roof design drawings fall short. You need a way to verify that your drawings address this force, not just assume it's handled somehow.
The Thrust Calculation
Thrust magnitude depends on roof slope, rafter span, and total load. Steeper roofs generate less thrust. Shallower roofs generate more. Longer spans generate more thrust than shorter spans.
Your vaulted roof design drawings should include the calculated thrust value or reference the calculation.
This might appear as a note: "horizontal thrust at wall plate: 1,200 lbs per rafter pair" or reference an attached calculation sheet. The specific number matters because it determines what's required to resist it.
Resistance Method Clearly Stated
Your vaulted roof design drawings should explicitly state how thrust is resisted. Options include:
- Rafter ties at [specific height], sized to resist [thrust value]
- Structural ridge beam eliminates thrust at walls
- Steel tension rods at [spacing and size]
- Structural collar ties with engineered connections
- Continuous tie across multiple rafter pairs
The method should be clear enough that anyone reading the drawing understands the structural strategy. Vague references to "typical construction" don't cut it for vaulted roofs.
The Wall Design Connection
Resisting thrust at the top of the wall is only half the problem. The wall itself needs to transfer that horizontal force down to the foundation without bowing or failing.
Your vaulted roof design drawings should show how walls are designed to handle these forces.
This might mean shear wall construction, additional wall studs, or specific foundation connections. If your drawing shows the roof framing but not how the walls handle the loads, you're missing a critical piece of the system.
A homeowner in Oregon hired an architect to design a vaulted great room addition with 16-foot cathedral ceilings. The drawings showed 2x12 rafters at 24" on center with a non-structural ridge board and specified "rafter ties as required by code." What the vaulted roof design drawings didn't show was the calculated thrust value or the size of those ties.
During construction, the framing contractor installed 2x6 rafter ties in the lower third of the span, assuming they'd be adequate since they matched the existing ceiling joists in the rest of the house.
The building inspector rejected the framing, explaining that the 2x6 ties were undersized for the 1,850-pound thrust load generated by each rafter pair (calculated based on the 16-foot span, 6:12 slope, and 50 PSF total load). The project required installation of 2x10 rafter ties with bolted connections — work that had to be done after the drywall contractor had already framed the ceiling.
Had the vaulted roof design drawings included "horizontal thrust = 1,850 lbs per rafter pair; provide 2x10 DF-L #2 rafter ties with (2) 1/2" bolts at each rafter connection," the correct ties would have been installed initially, saving $4,200 in rework costs.
This is a subtitle for your new post