DIY How to Replace a Pipe Boot on an Asphalt Shingle Roof
John Esh
January 1, 2026

Lorem ipsum dolor sit amet

Lorem ipsum dolor sit amet, consectetur adipiscing elit. Sed do eiusmod tempor incididunt ut labore et dolore magna aliqua. 

One of the most common roofing features that can be the source of your roof leaking is the pipe boot. This rubber material is placed around the PVC pipe that vents your plumbing and can also be referred to as vent pipe flashing. The rubber boot is secured around the pipe to make it waterproof and prevent leaking.


However, over time, the rubber is broken down by weather elements and age and can be compromised.


Follow along in this video where Joyland Roofing Operations Manager, Kevin O’Connell, shows you how to replace your old rubber pipe boot with a new nevaleak pipe boot.


We’ve got a pipe boot here that is definitely at the end of its life. It might be a little hard to see, but I can stick my finger right now into the roof deck and even down into their attic. This rubber has completely deteriorated, and that happens overtime with sun on these rubber pipe boots.


What we are going to do is go ahead and replace this whole boot. We are going to lift all these shingles up and pull that boot out.

Step 1: Pull Up the Surrounding Shingle Tabs

What we are going to do is pull these shingles up, that way we can get at this boot and replace it. You want to be careful not to tear any of the shingles while we’re replacing it. It’s also a good idea to have some extra shingles in case we do tear one, that way we can replace it.


Loosen the Nails then Remove Shingles


We are going to go through and pull these nails out. I’ve removed the shingles around the pipe boot.

Step 2: Remove the Old Pipe Boot

Now, we are going to remove the old pipe boot by loosening the nails and taking it off. Be careful not to damage any of the shingles and disturb them the least amount as possible.


There ya go: Old pipe boot versus new one.


Clean up a little bit around the pipe where the old pipe boot was prior to putting the new pipe boot in place.

Step 3: Install New Pipe Boot

Correctly Size New Pipe Boot to Fit Pipe Diameter


Depending on the size of the pipe will depend on where you cut the ring off on the new pipe boot – this is a 3-in-1. This pipe is small enough so I don’t have to cut anything.

You’ll stick it on the pipe boot then set it down into place. Spin it around to make it a little easier to get underneath the shingles.


Reinstall Surrounding Shingles


We have the new pipe boot in! We can now secure it then piece in our next shingles.

This new boot is a little bigger, so I need to trim the top shingle back a little bit. This is so the shingles can lay flat once everything is secure.


Secure New Pipe Boot in Place


We will put a couple nails on the edge of the newly installed pipe boot to hold it.


Seal Around New Pipe Boot


What I like to do is lift these shingles and right along the top edge of the new pipe boot and along the outside edges is to put a bead of caulk in there. This is just in case any water or blowing rain tries to get up in there, especially with older shingles, the caulk will stop it. I try to do it over the nails put in the new pipe boot.

Step 4: Reinstall Remainder of Shingles

Pipe boot is secured and we have it caulked. Now, we can start putting the shingles back in. If the pipe boot is bigger than the old one, you’ll again need to trim the shingles that surround the new pipe boot. Once cut, the shingles are in there and they fit well. Now, we will go ahead and secure them with nails.


Be Cautious of Nail Placement around Pipe Boot


When we reinstall the shingles, you’ll want to make sure you don’t place the nail too close to the edge of the new pipe boot – especially where we placed the caulk. It’s fitting well, so we are going ahead to secure the last tab of shingles.


Reseal Shingle Tabs


The shingles are in and secured! The only thing that is left – you saw in the beginning when I was loosening up the tabs of shingles. What I was doing is I was breaking the tar seal that’s in there. Shingles have a tar strip on them that adheres each of these tabs to the one above it. Now I broke that. Because of the age of the shingles, they are not going to reseal.


Do Not Over Use the Caulk


What I’ll do is I’m going to add my own sealant to the shingles that way I’ll force it to seal with the caulk. You don’t need to go overboard with the caulk, you just need to make a mechanical seal. If we don’t do this, you get a decent amount of wind and these shingles will blow right up.


No Caulk at the Bottom of the Pipe Boot


Be careful not to place the caulk under the shingle at the bottom of the pipe boot because that’s where the water will drain out. If you put caulk in there, you’re going to make a dam, and that will cause issues.

And that is how you replace a pipe boot!

Do you have questions? Would you like a professional to inspect or recaulk your chimney in southcentral or southeastern PA? Contact Joyland Roofing at 717-340-9565.

A large, uprooted tree lies across a grassy lawn next to a residential street following a storm.
By James Wesser March 26, 2026
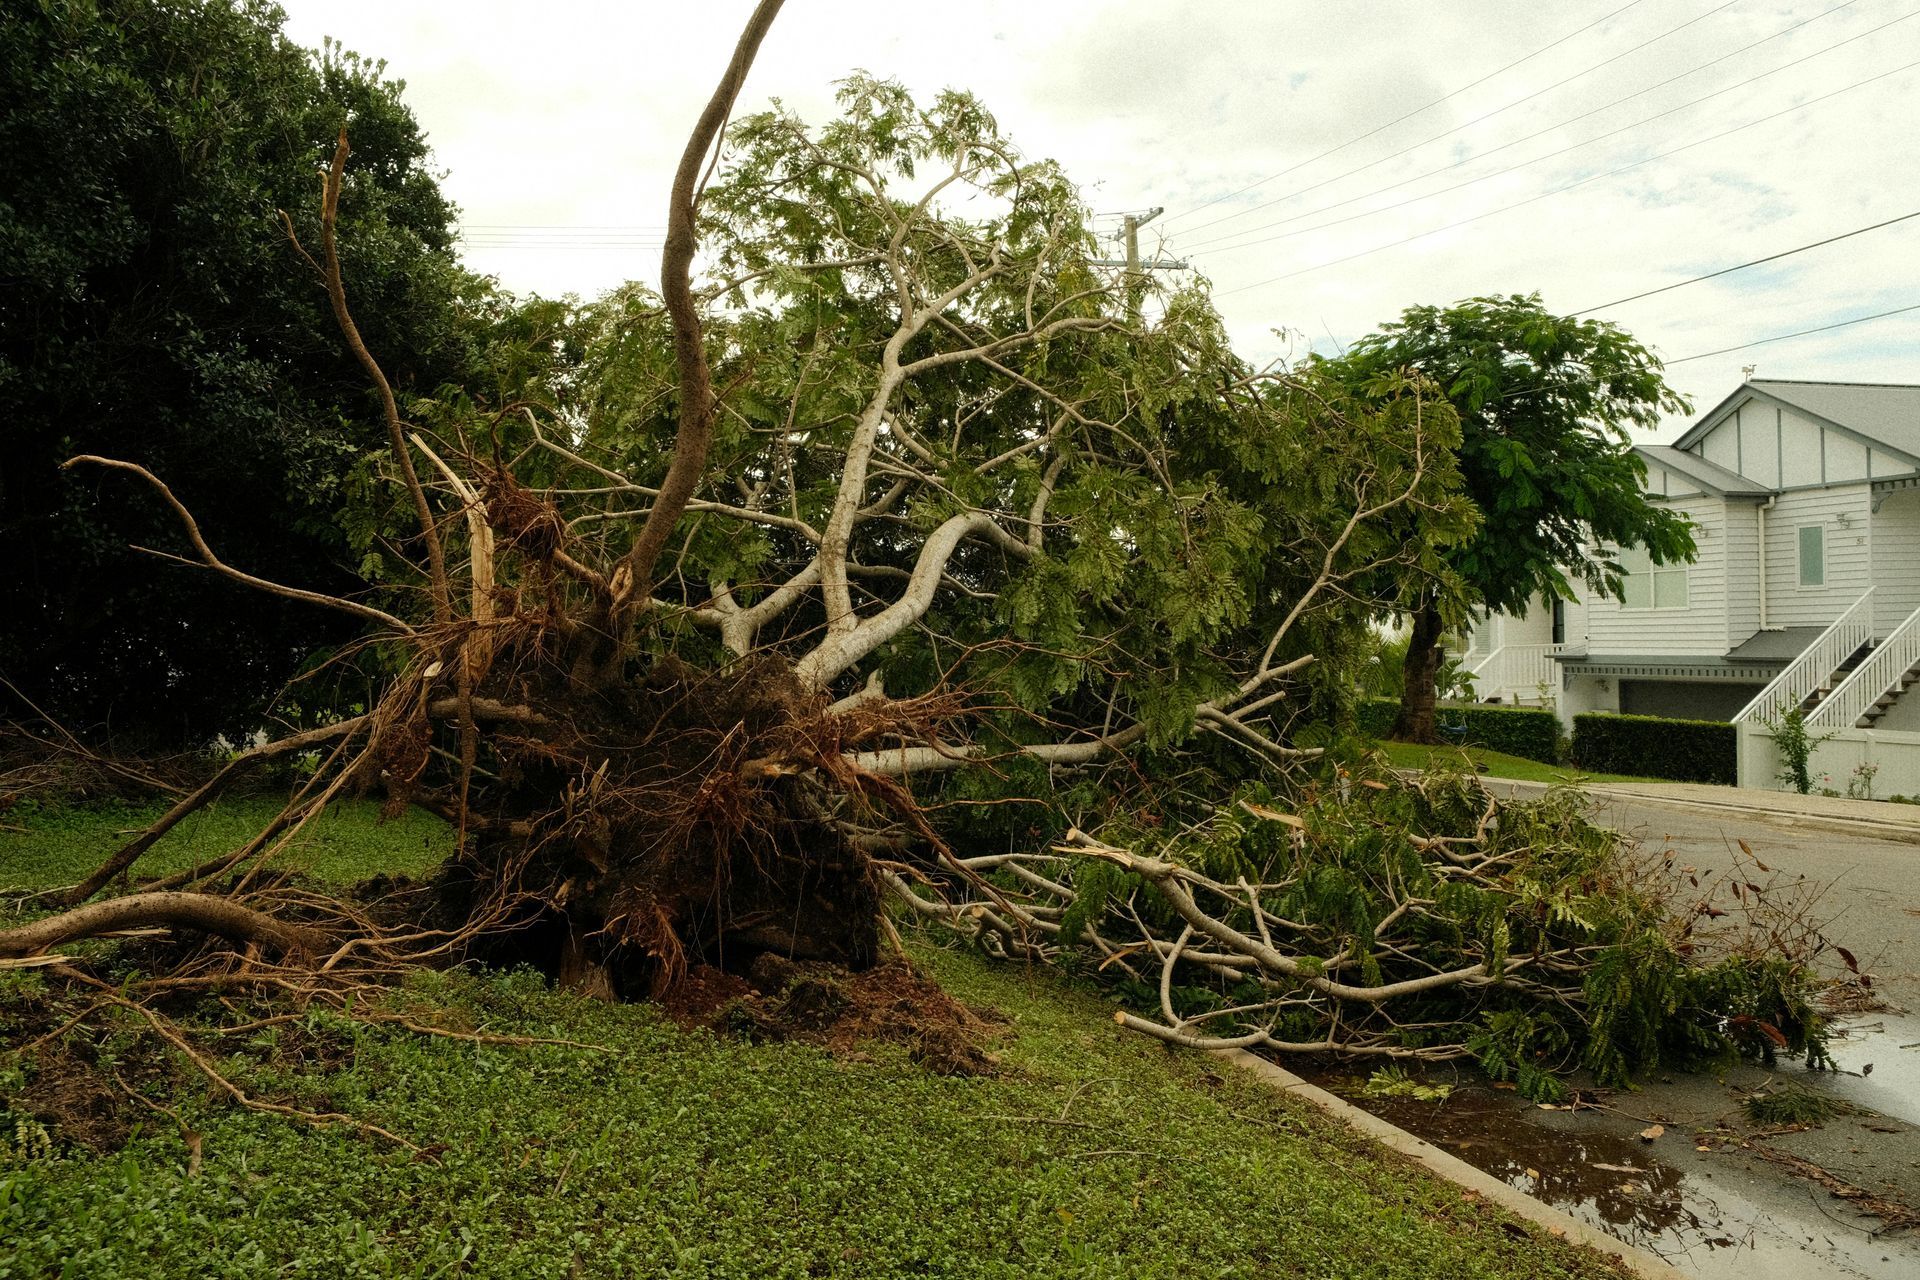
Storm hit your roof in Lancaster, PA? Here’s exactly what to do next to spot damage and avoid costly repairs.
Snow-covered roof with a row of long icicles hanging off the edge of a green building.
By John Esh February 11, 2026
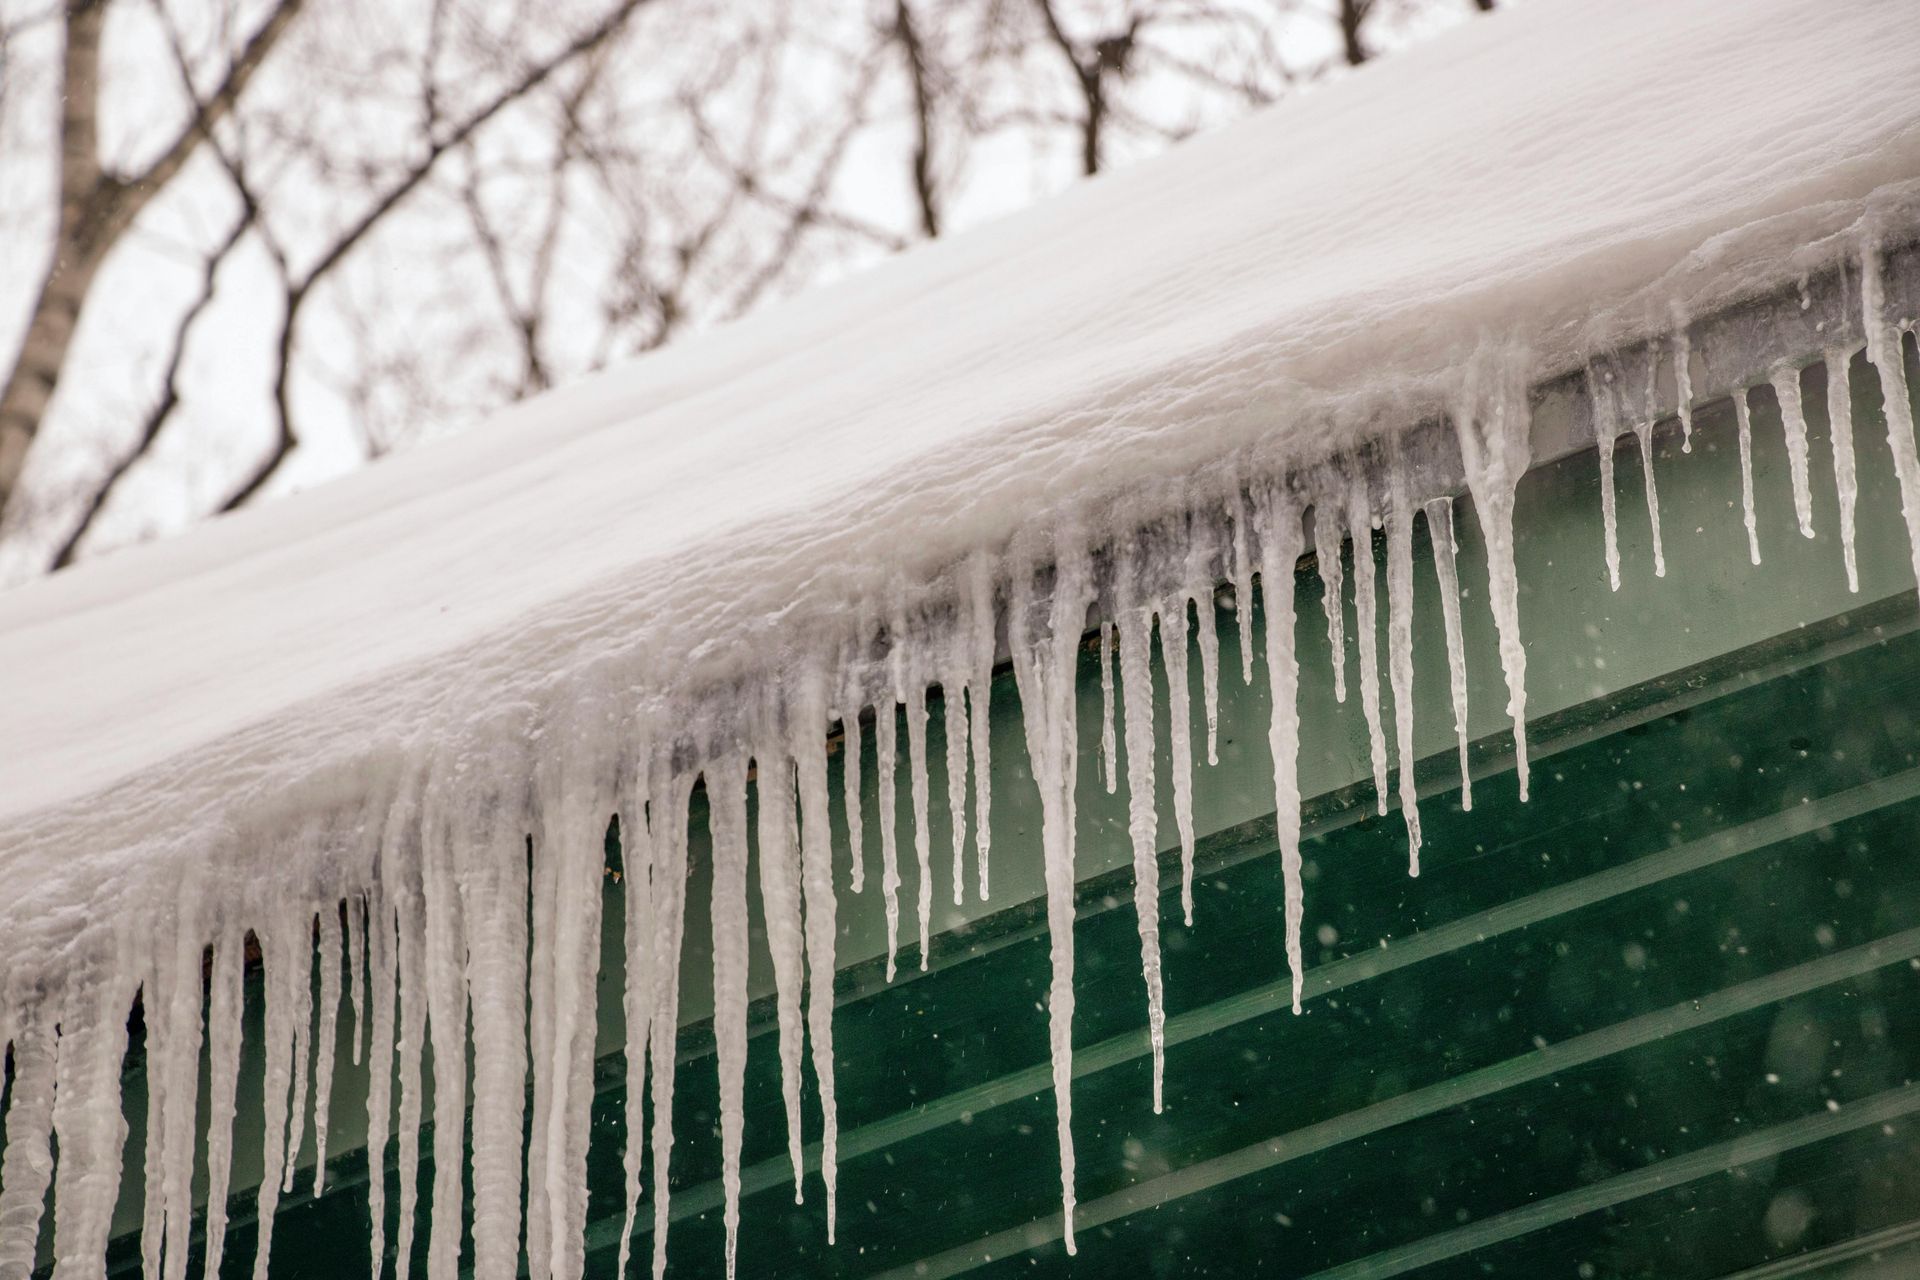
If you’re experiencing Ice Damming on your roof in central PA including Lancaster and surrounding areas, then read on because I’ll explain what you need to do. This guide is designed for the homeowner in Pennsylvania who needs immediate answers to mitigate ice dams on their roof and take steps to make sure it doesn’t happen again. I’ll go over some quick actions you can take right now to slow down or reverse this problem, then explain why it’s happening and how ice dams can be prevented in the future. Click below to jump to a section within the guide . What Causes an Ice Dam On My Roof? Should I Remove the Ice Dam or Wait for Warm Weather? How Can I Get Rid of the Ice Dam? Is Ice Damage Covered by Insurance? Risks Associated With Ice Dams How to Prevent Ice Dams in the Future Joyland Roofing Specializes in Ice Dam Removal
Person on a shingled roof, text:
By John Esh January 4, 2026
Search Blog

John Esh | CEO & Master Installer

  • 25+ Years Experience: From ground crew to Master Certified Installer.
  • Local Roots: Serving Lancaster, Harrisburg, and SEPA since 1991.
  • Credentials: GAF Master Certified (ME27586); Licensed in PA (PA124258) & MD (#137952).
  • The "Why": Obsessed with "radical transparency" to remove the fear factor from home improvements.

James Wesser | Content Producer

  • Background: Former local news digital producer and journalist.
  • The Mission: Turning complex roofing jargon into clear, "fluff-free" answers for homeowners.
  • Local Tie: When not filming on-site, he’s likely roaming Hersheypark or building digital worlds.

Meet The Experts